MultiPortal v1.1.1 Is Now Live
If you’re serious about scaling your reseller infrastructure, this release is for you.
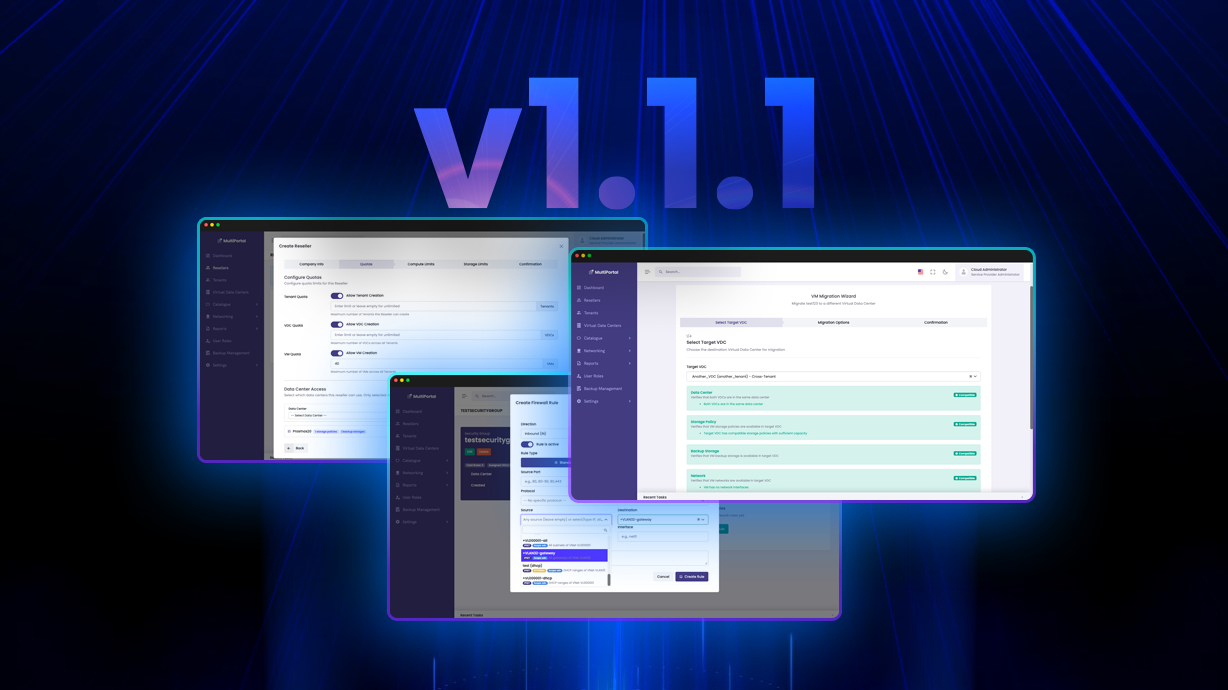
MultiPortal v1.1.1 is now live, bringing sharper governance, greater VM flexibility and stronger operational confidence to service providers ready to scale properly. This isn’t just another update. It’s a meaningful step forward in how you manage resellers, tenants and virtual environments as your infrastructure expands.
Following our recent Release Candidate, we want to thank everyone who tested, shared feedback and helped us refine this version. Your input played a key role in making v1.1.1 stronger and production ready.
What’s New in v1.1.1
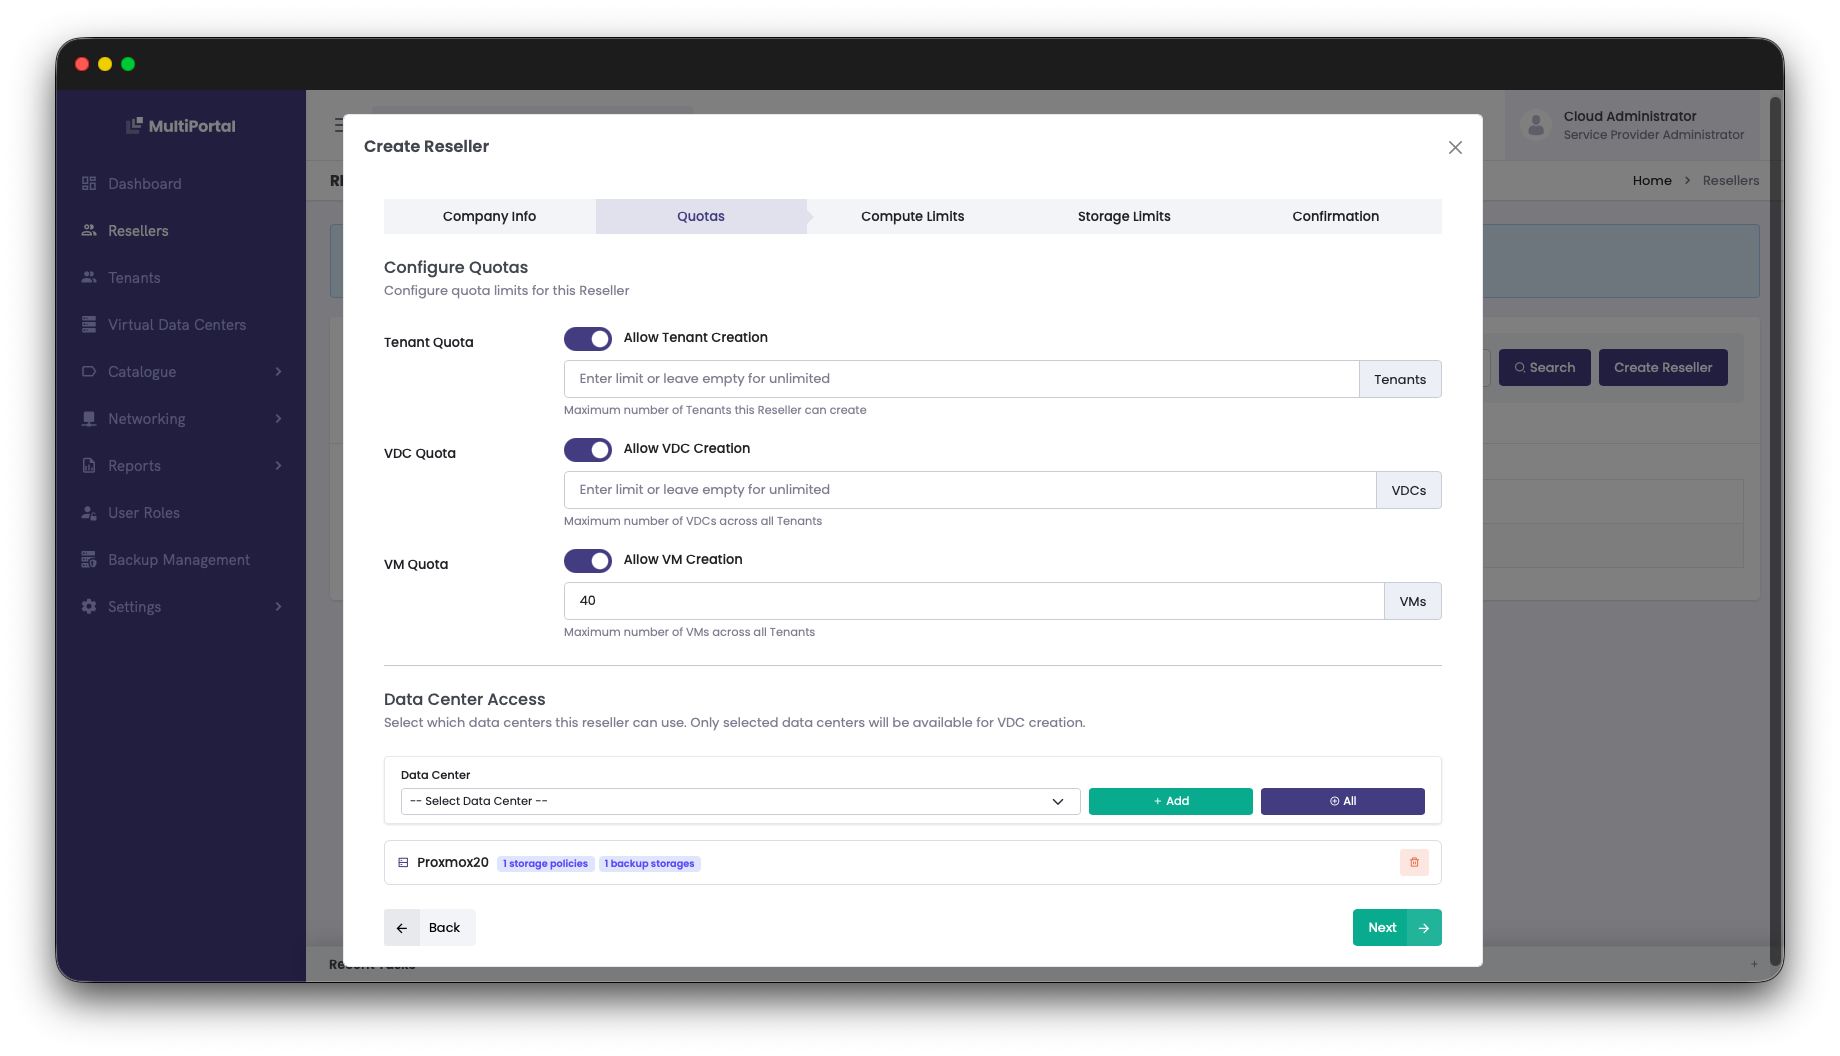
Reseller Quotas
Take control of capacity. Set defined limits for resellers to manage resource usage properly, protect infrastructure and prevent overconsumption before it becomes a problem.
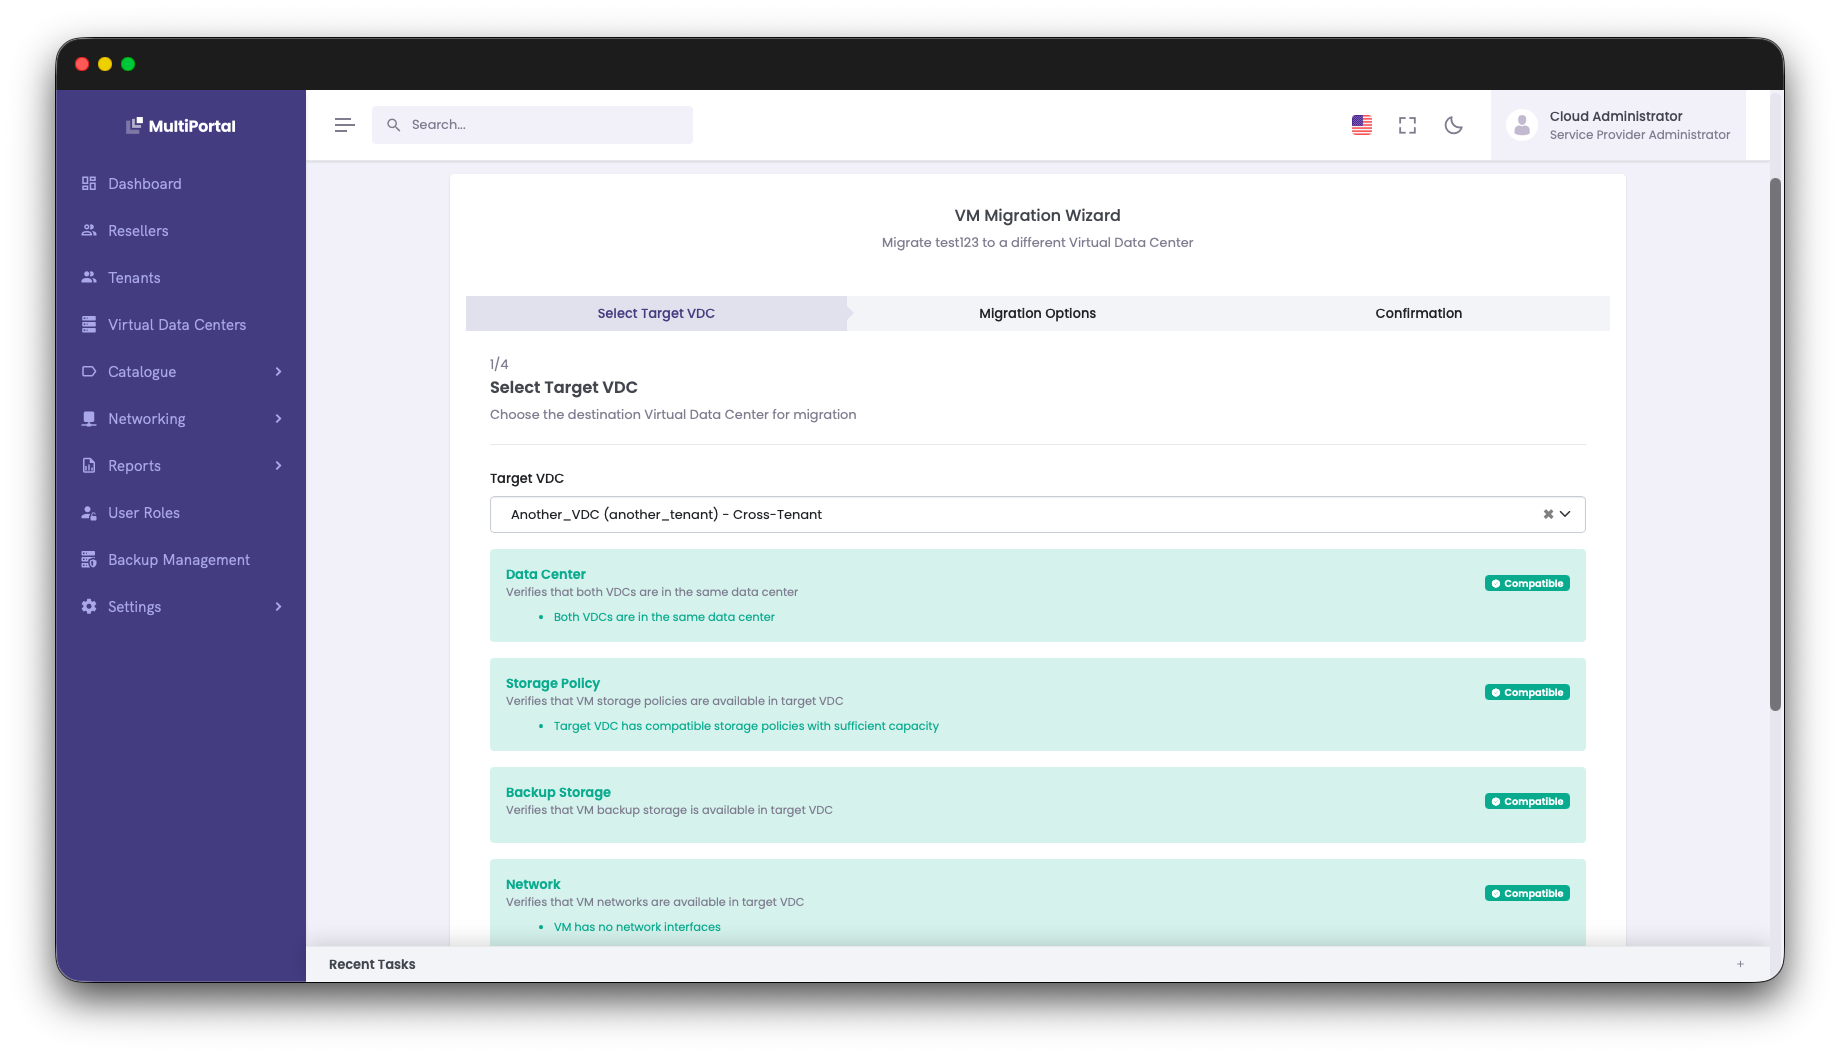
VM Migration Between VDCs and Storage Policies
Move virtual machines across Virtual Data Centres and storage policies with ease. No disruption. No complexity. Just greater flexibility when managing customer environments.
Reseller Tenant Impersonation
Enable resellers to securely access tenant environments for faster troubleshooting and support. Reduce back and forth. Resolve issues quicker. Deliver a better customer experience.
Alongside these major features, v1.1.1 includes important improvements to stability, VM handling, storage validation, backups and dashboard accuracy to keep production environments running smoothly.
If you’ve been evaluating MultiPortal, this release makes the decision easier. You get stronger reseller governance, smoother VM mobility and better operational oversight, all within one platform.
You can read the full release notes here.
As always, we recommend backing up your MultiPortal environment and database before upgrading.
We’re excited about what this unlocks for our partners and customers. If you’re planning your deployment, reviewing your reseller strategy, or looking to scale with confidence, book a demo and we’ll walk you through how v1.1.1 can support your growth plans.
We’re excited to share something new for the MultiPortal community: our first-ever Release Candidate is now available.
MultiPortal 1.1.1-rc.1 marks an important milestone in how we deliver updates going forward. Over the past few months, we’ve heard consistent feedback from Service Providers, Resellers, and community members who want earlier access to upcoming features, along with more opportunities to test changes before they land in production.
This release is the start of that journey.
Moving to staged releases
As outlined in our earlier post What’s Coming in MultiPortal 1.1.1, we’re introducing a staged release process:
Alpha → Closed Beta → Release Candidate → Production
The goal is simple: identify issues earlier, improve quality, and give the community a chance to shape each release before it becomes generally available.
With that in mind, MultiPortal 1.1.1-rc.1 is now ready for wider evaluation and feedback.
Built for testing and feedback
This Release Candidate introduces a new embedded feedback tool directly within the MultiPortal UI, making it easier than ever to share thoughts as you explore new workflows.
If you’re testing this build, we’d especially love feedback around new features, migration workflows, and reseller management improvements.
What’s included in 1.1.1-rc.1
While the full release notes cover everything in detail, a few highlights in this RC include:
- A new Reseller Quota feature, giving Service Providers more flexibility in managing reseller limits
- The ability to migrate VMs between VDCs, as well as migrate storage between policies
- New reseller support tools, including tenant impersonation
- A wide range of improvements across networking, usage calculations, validation, and platform consistency
- Multiple bug fixes across cloning, templates, backups, HA sync, and tenant admin workflows
- API enhancements, including added support for reseller quota management
Important notes before installing
Release Candidates are intended for evaluation only, so please keep the following in mind:
- RC builds are not suitable for production environments
- Existing environments cannot be upgraded to an RC (new installs only)
- No licence key is required
- Official support is not provided for RC builds
- The RC will expire around one month after the final 1.1.1 release
How to get started
If you’d like to try the Release Candidate on Ubuntu 24.04 or Debian 12, you can install it with the quick-start commands below:
sudo curl -o ./rcsetup.sh https://downloads.multiportal.io/rcsetup.sh
sudo chmod +x ./rcsetup.sh
sudo ./rcsetup.sh –fqdn “myfqdn.domain.local” -H
For additional installation options, visit our full guide here:
https://wiki.multiportal.io/en/release-candidates/install-an-rc
Help shape the final 1.1.1 release
This Release Candidate is a chance for the community to help influence the final MultiPortal 1.1.1 release before it reaches production.
If you’re comfortable testing pre-release software, we’d love for you to install the RC, explore what’s new, and share feedback through the embedded tool.
Thanks for being part of the MultiPortal journey. More to come soon.
The team has been hard at work, and we are excited to share a quick preview of some changes coming in our next release (version 1.1.1).
We have focused heavily on providing resellers more autonomy, improving the day-to-day user experience, and tightening up performance – here is a look at some of the highlights you can expect!
New Quota Tools for Resellers
One of the biggest additions in this release is a complete overhaul of how Resellers can manage their tenants & associated resources. We are introducing new “Reseller Quota” functionality that allows Service Providers to set specific limits on Tenants, Virtual Data Centres (VDCs), and Virtual Machines (VMs).
With this update, Resellers will be able to independently create their own Tenants and VDCs within the limits you define, without needing to wait for a Service Provider admin to do it for them. We have also added support for “Unlimited” quotas, which enables a Pay-As-You-Go (PAYG) model for those who need flexibility. It’s a massive step towards making Resellers more self-sufficient.
Seamless VM Migration
For Service Providers, we are introducing a migration tool that allows you to move Virtual Machines between VDCs. The wizard handles the remapping storage policies and network configurations during the move which should make balancing resources and managing customer environments much smoother. This will also allow Service Providers to pre-stage workloads before moving them into production tenant environments.
Enhanced Stability and Performance
We have made some important changes to stability and speed:
– Cloning Improvements: We have implemented some additional safeguards when cloning a VM or building a VM from a template. The system will now prevent interactions (like trying to start the VM) until all post-clone tasks are fully complete.
– Optimised Reporting: We have massively improved the usage calculation engine. You can expect report generation to be much faster and more efficient.
Better Visibility and Usability
We have also packed in some “quality of life” improvements to make your daily administration tasks easier:
– Windows 2025 Support: Ability to select “Windows 2025” when building new VMs, keeping everything in line with Proxmox.
– IP Addresses on VMs: If the QEMU guest agent is running, VM IP addresses will now be displayed directly on the VM inside of MultiPortal. This will further be extended into our upcoming IPAM functionality.
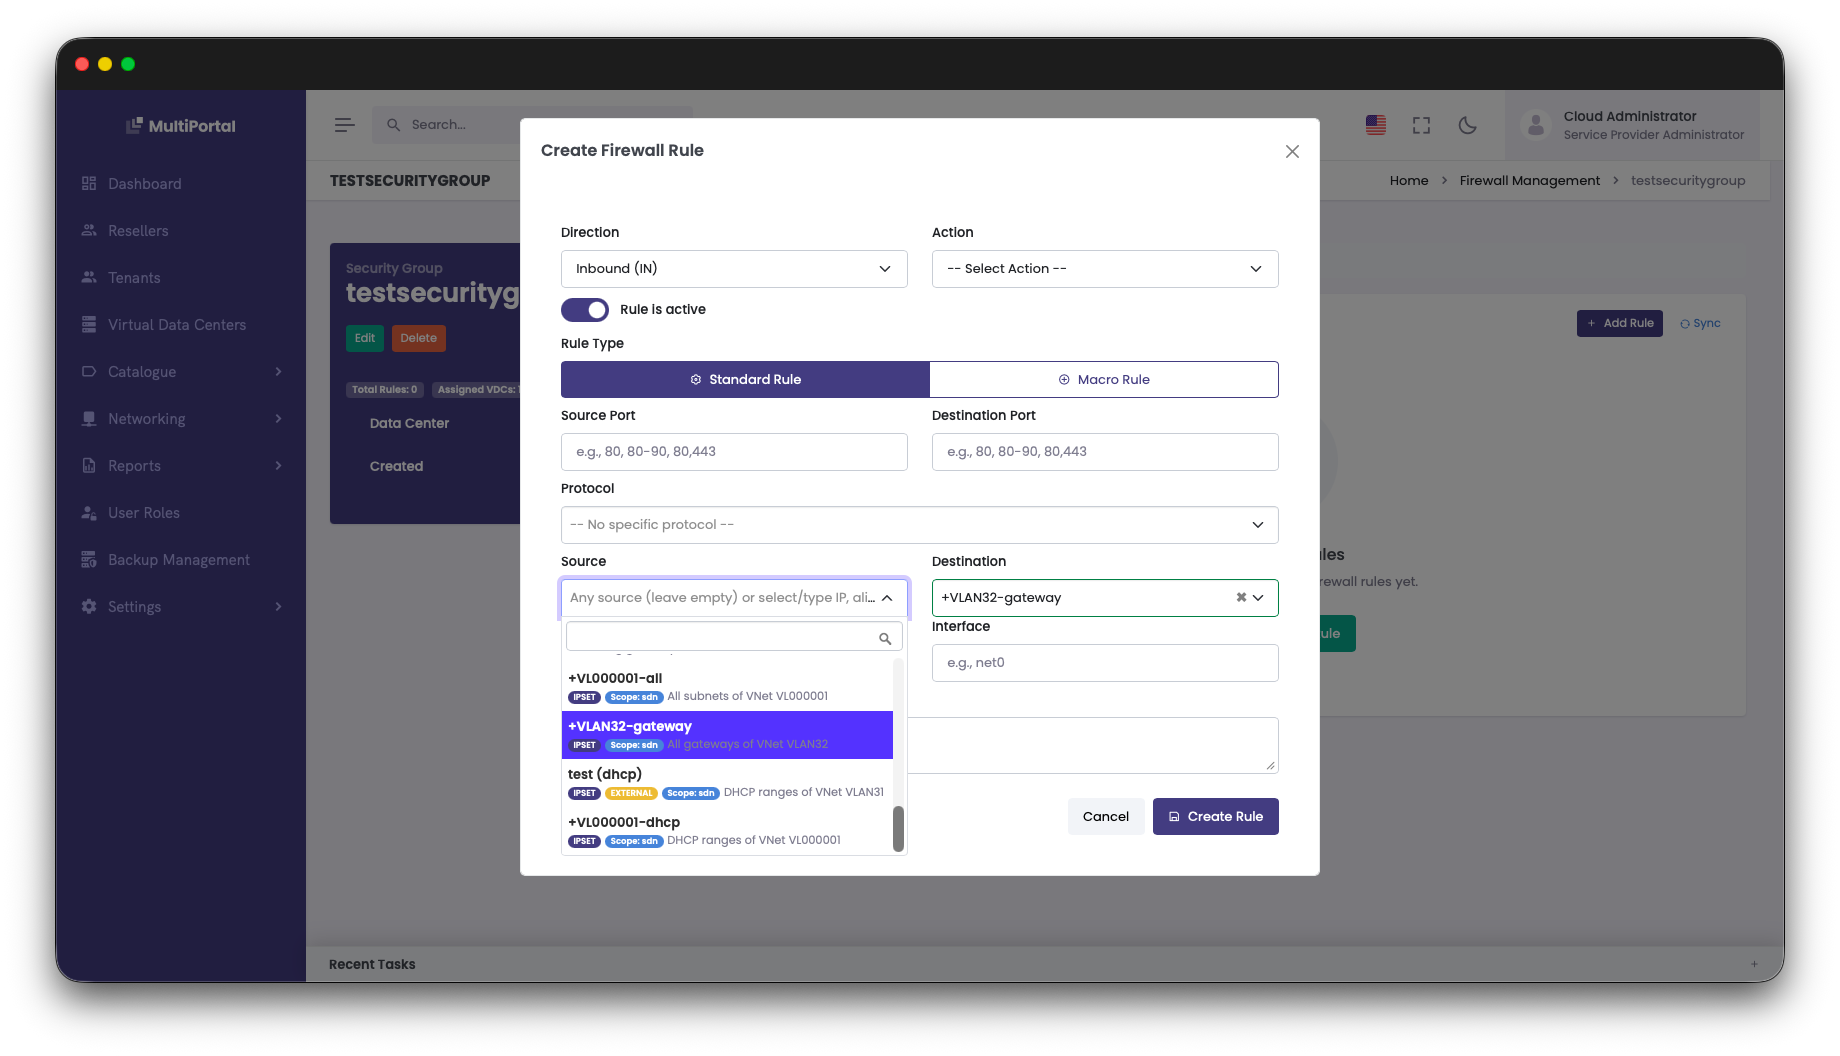
– Firewall Rule Improvements: We have tidied up the firewall rule dropdowns showcasing friendly names for your Virtual Networks. This also allows tenants to create their own firewall rules & security groups.
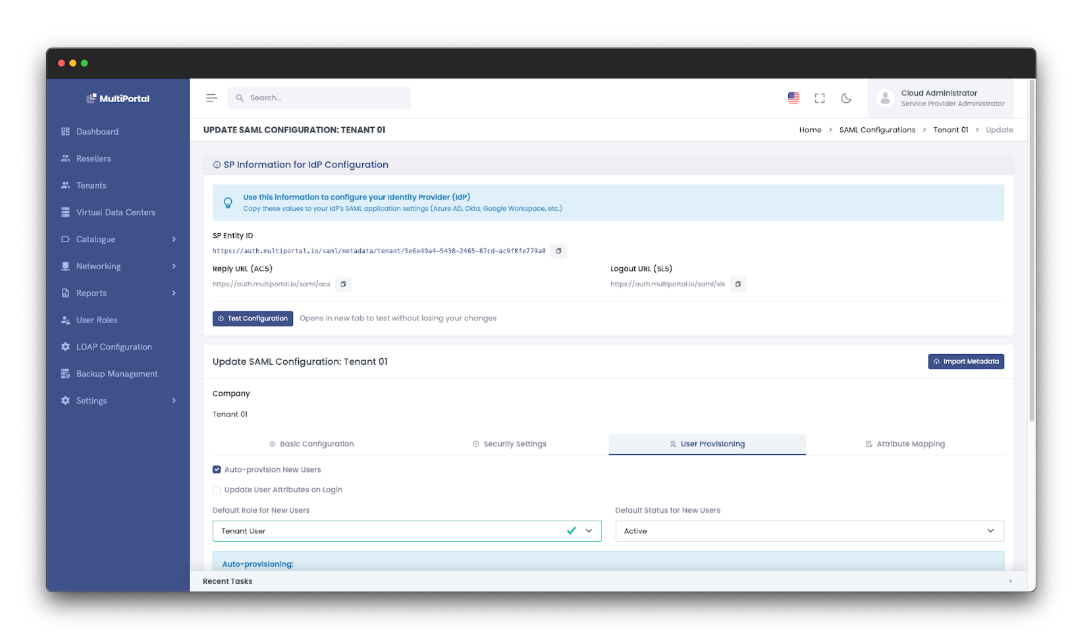
– SAML for Service Providers: Service Provider administrators can now configure a SAML IDP at the Service Provider level
Our New Software Release Process
Finally, we are introducing a formalised software release process designed to improve release quality and opportunities for our customers to provide early feedback.
We are moving to a staged approach – Alpha, Closed Beta, Pre-Release, and Production – to ensure issues are identified and resolved before they ever reach your production environment.
– Alpha: Our internal testing phase to validate core functionality.
– Closed Beta: A period where invited customers and early adopters help validate the release in real-world scenarios.
– Pre-Release (Public Preview): A public download available for broader testing to catch any final edge cases.
– Production: The fully supported, general availability release.
We are actively looking for customers to participate in our Closed Beta and Pre-Release stages. This is your chance to preview upcoming features and help shape the final release. If you are interested in joining the Closed Beta program, please reach out.
We can’t wait to get this release into your hands. Stay tuned for the official rollout!

Since Broadcom acquired VMware in 2023, plenty of long-time VMware users have started exploring other options. Proxmox has become a popular choice as a pure hypervisor, and MultiPortal then steps in as the multi-tenant layer on top of Proxmox, similar to how Cloud Director sits above vCenter. That shift has led to a growing number of teams looking for a clean, self-service portal experience for their Proxmox environments.
One of the biggest hurdles in any move like this is the worry about how hard it will be to migrate workloads from one hypervisor to another. MultiPortal helps take that fear out of the equation. Its built-in import tool lets you pull VMs straight from your Proxmox cluster, making it simple to bring virtual machines across from your existing VMware environment.
In this guide, we’ll walk through the process in two parts: first, migrating each VM from VMware ESXi into Proxmox, then importing those VMs from Proxmox into your MultiPortal VDC.
Importing from VMware to Proxmox
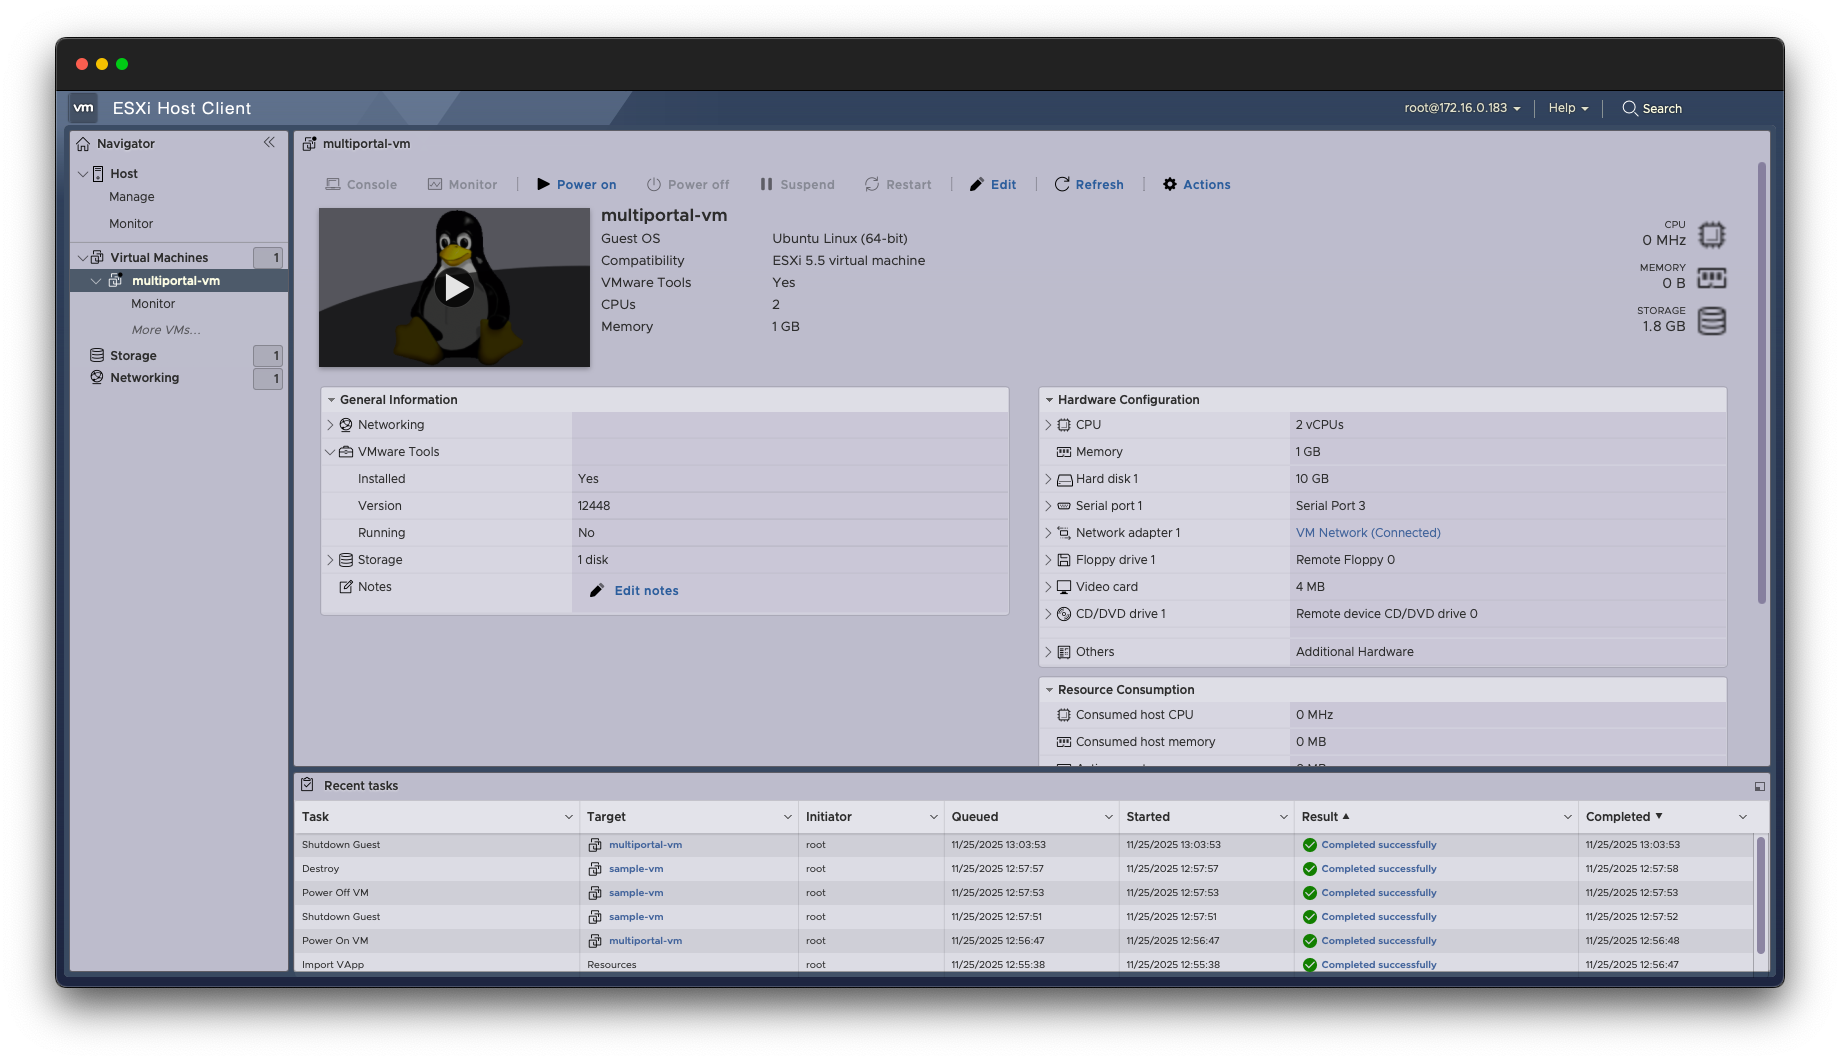
Ensure that you have a virtual machine on your ESXi host that is ready to migrate
In Proxmox, browse to Datacenter > Storage. Click “Add” and select “ESXi”. Enter an ID of your choice (this is what the “Import” storage device will be called) and your ESXi connection credentials.
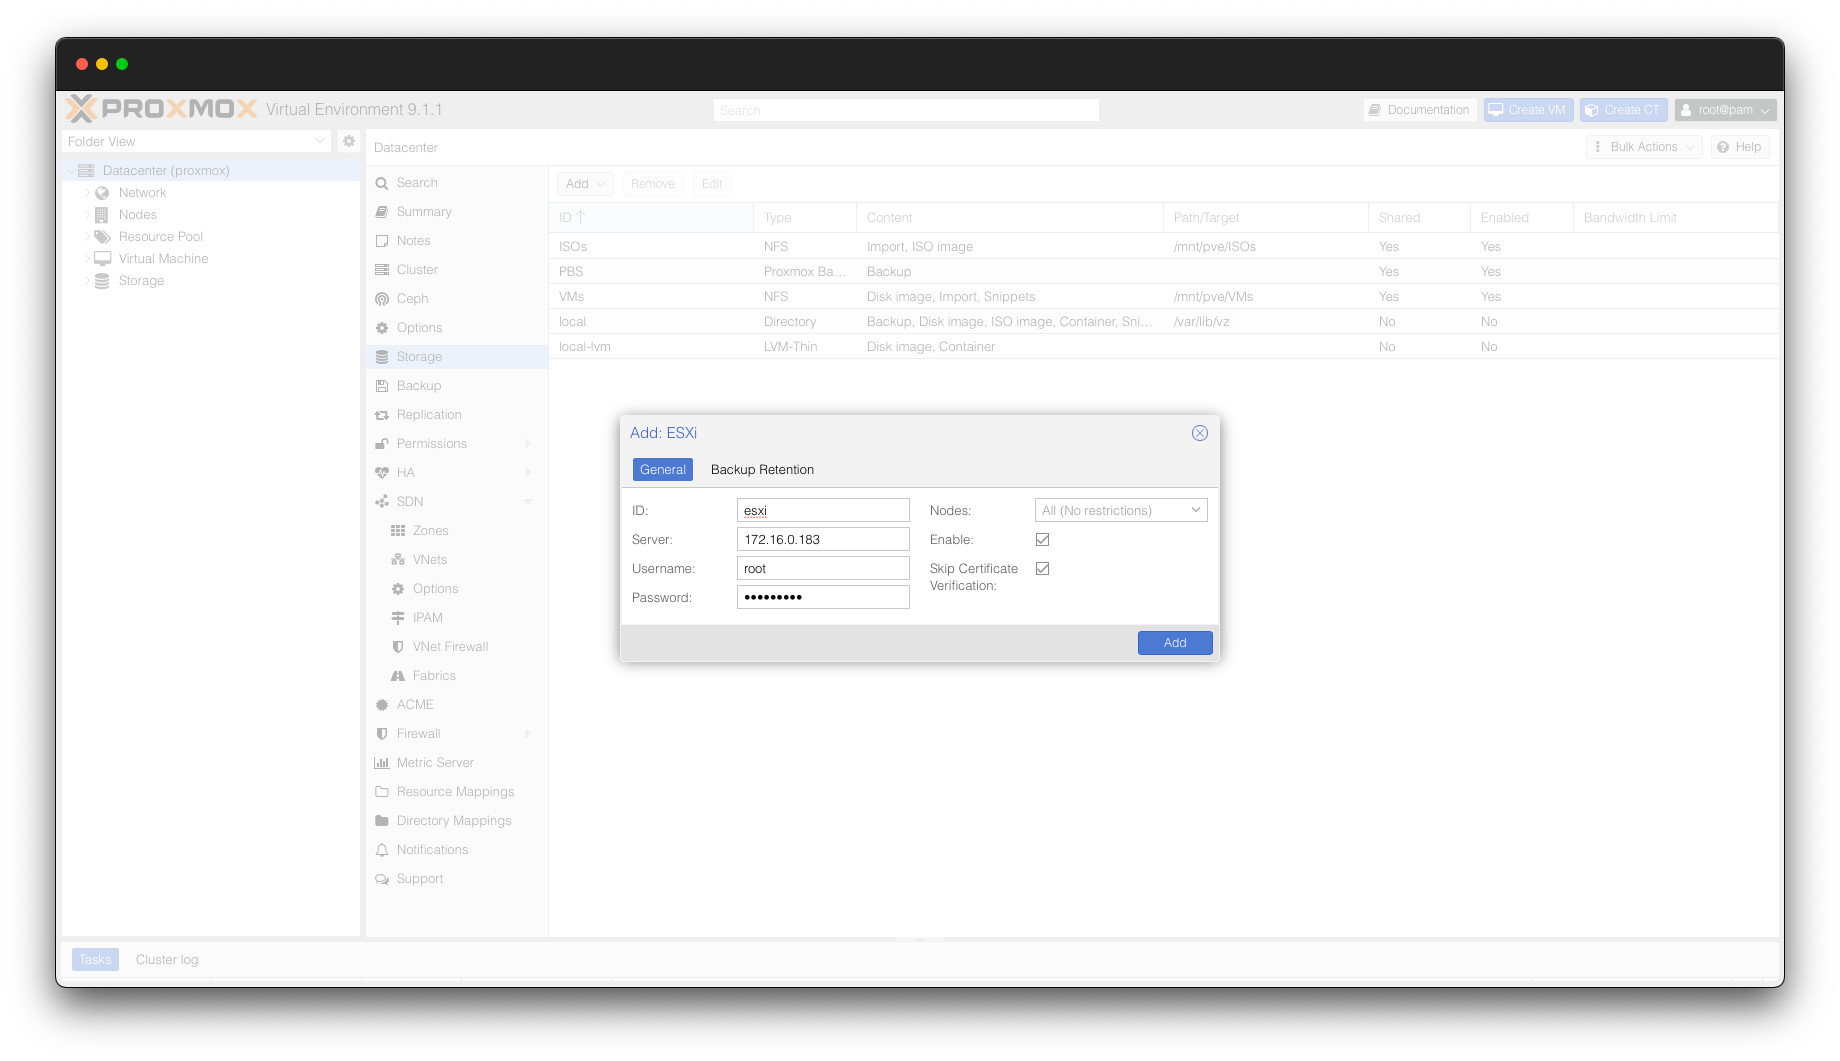
On the Proxmox sidebar, expand “Storage” and you will now see your ESXi storage device. By selecting “Virtual Guests”, you will see a list of all VMs available to import from your ESXi server.
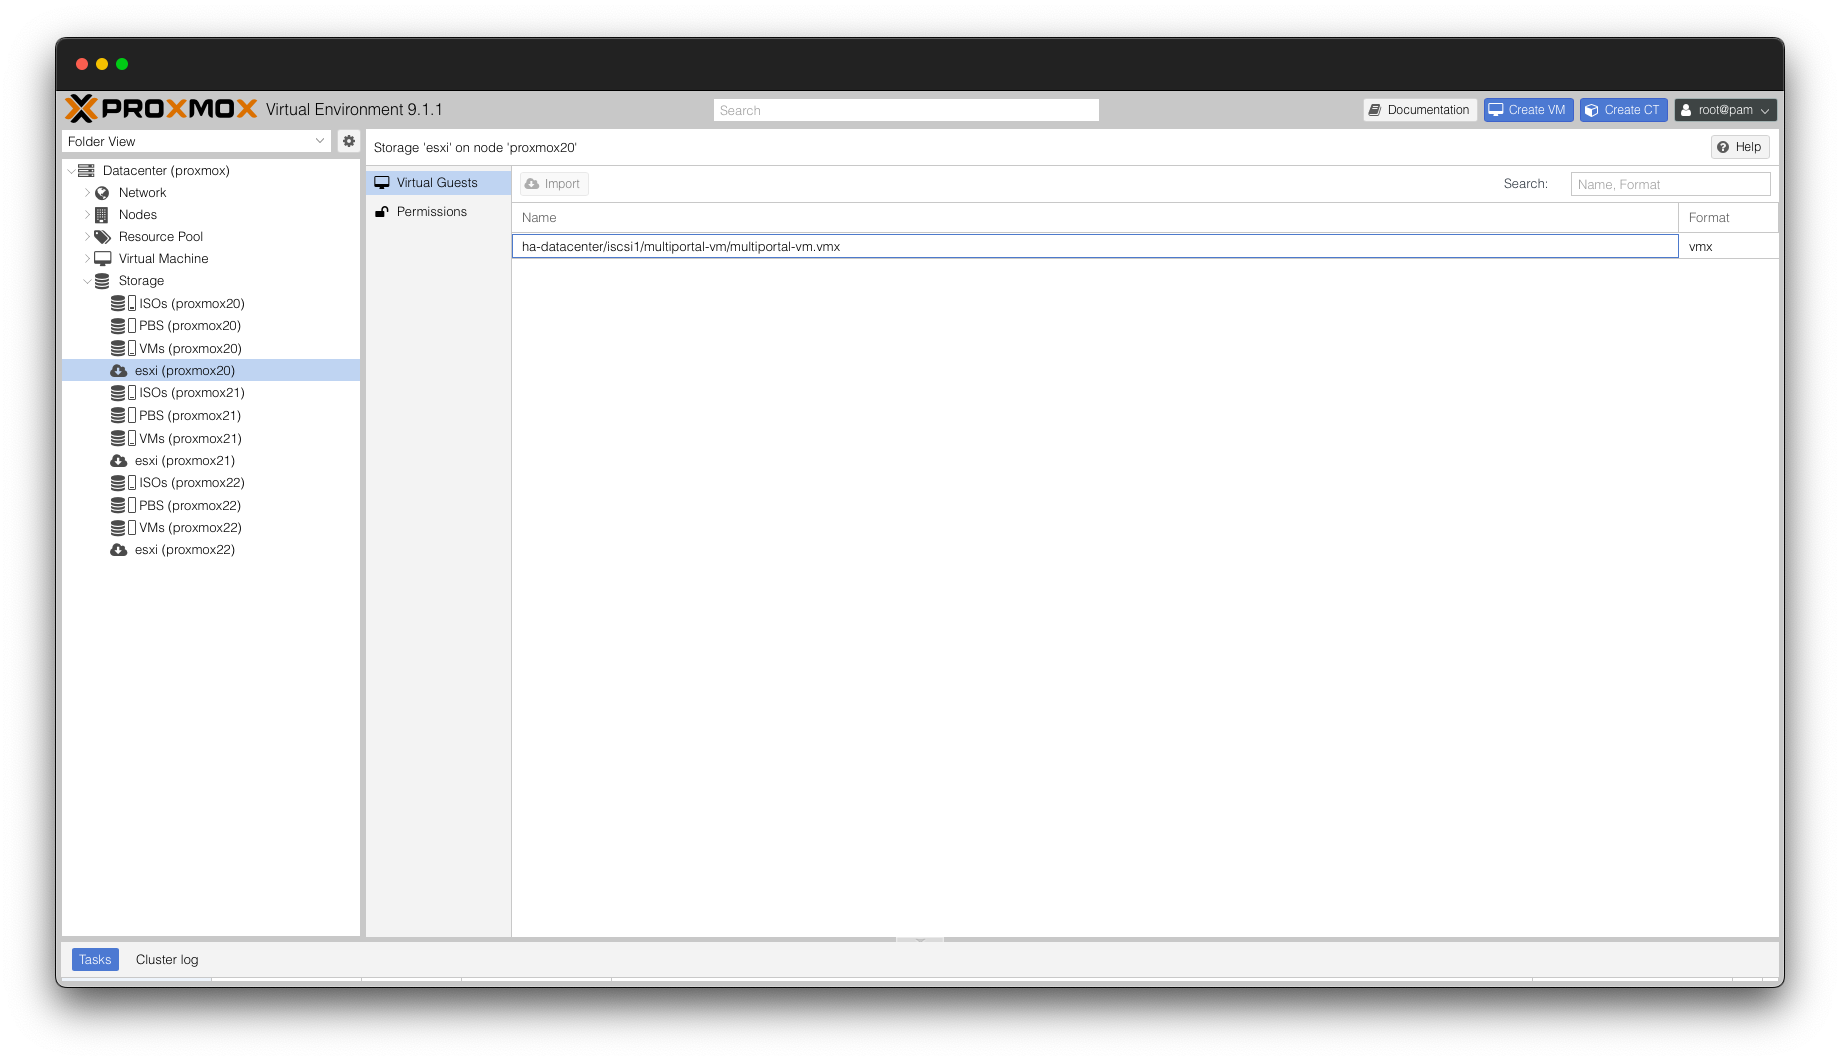
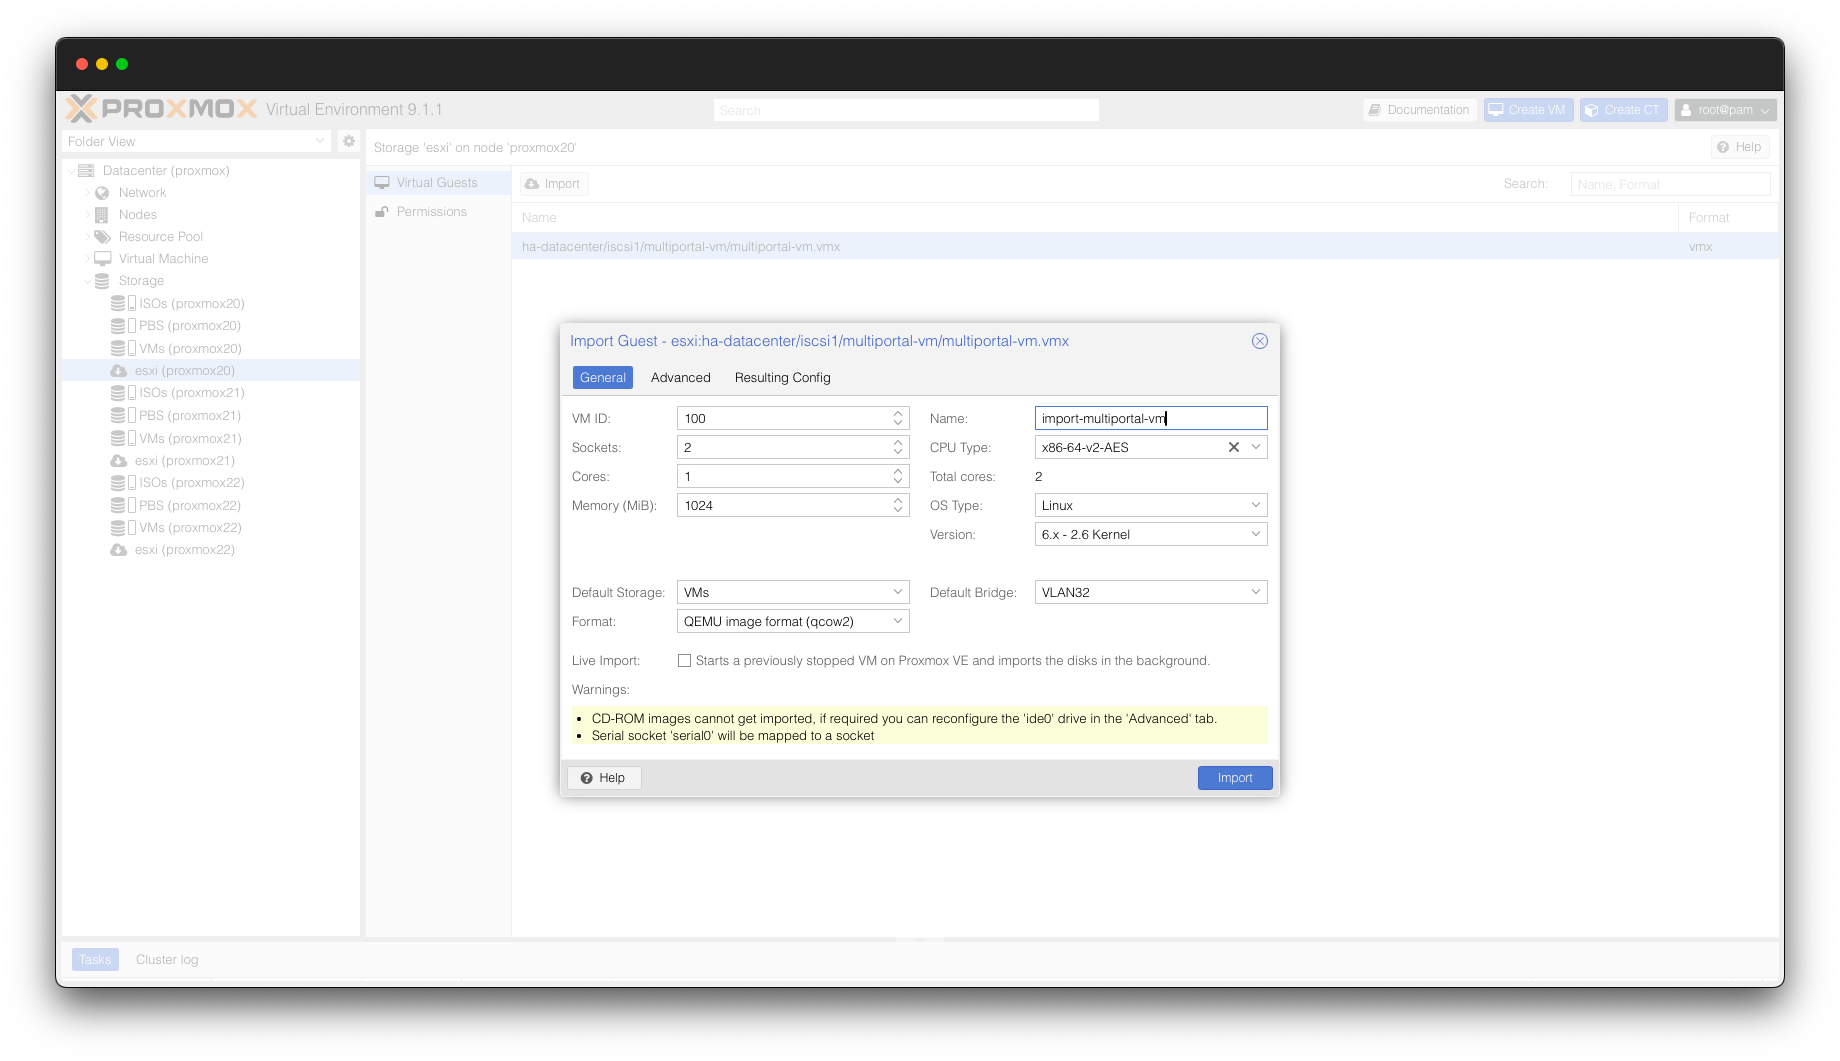
Select your preferred VM and click the “Import” button. You will be presented with a familiar screen within Proxmox where you will be able to customise the resources of the imported VM if you wish. Typically, you can leave this as per the default settings but you are able to customise these settings if you wish.
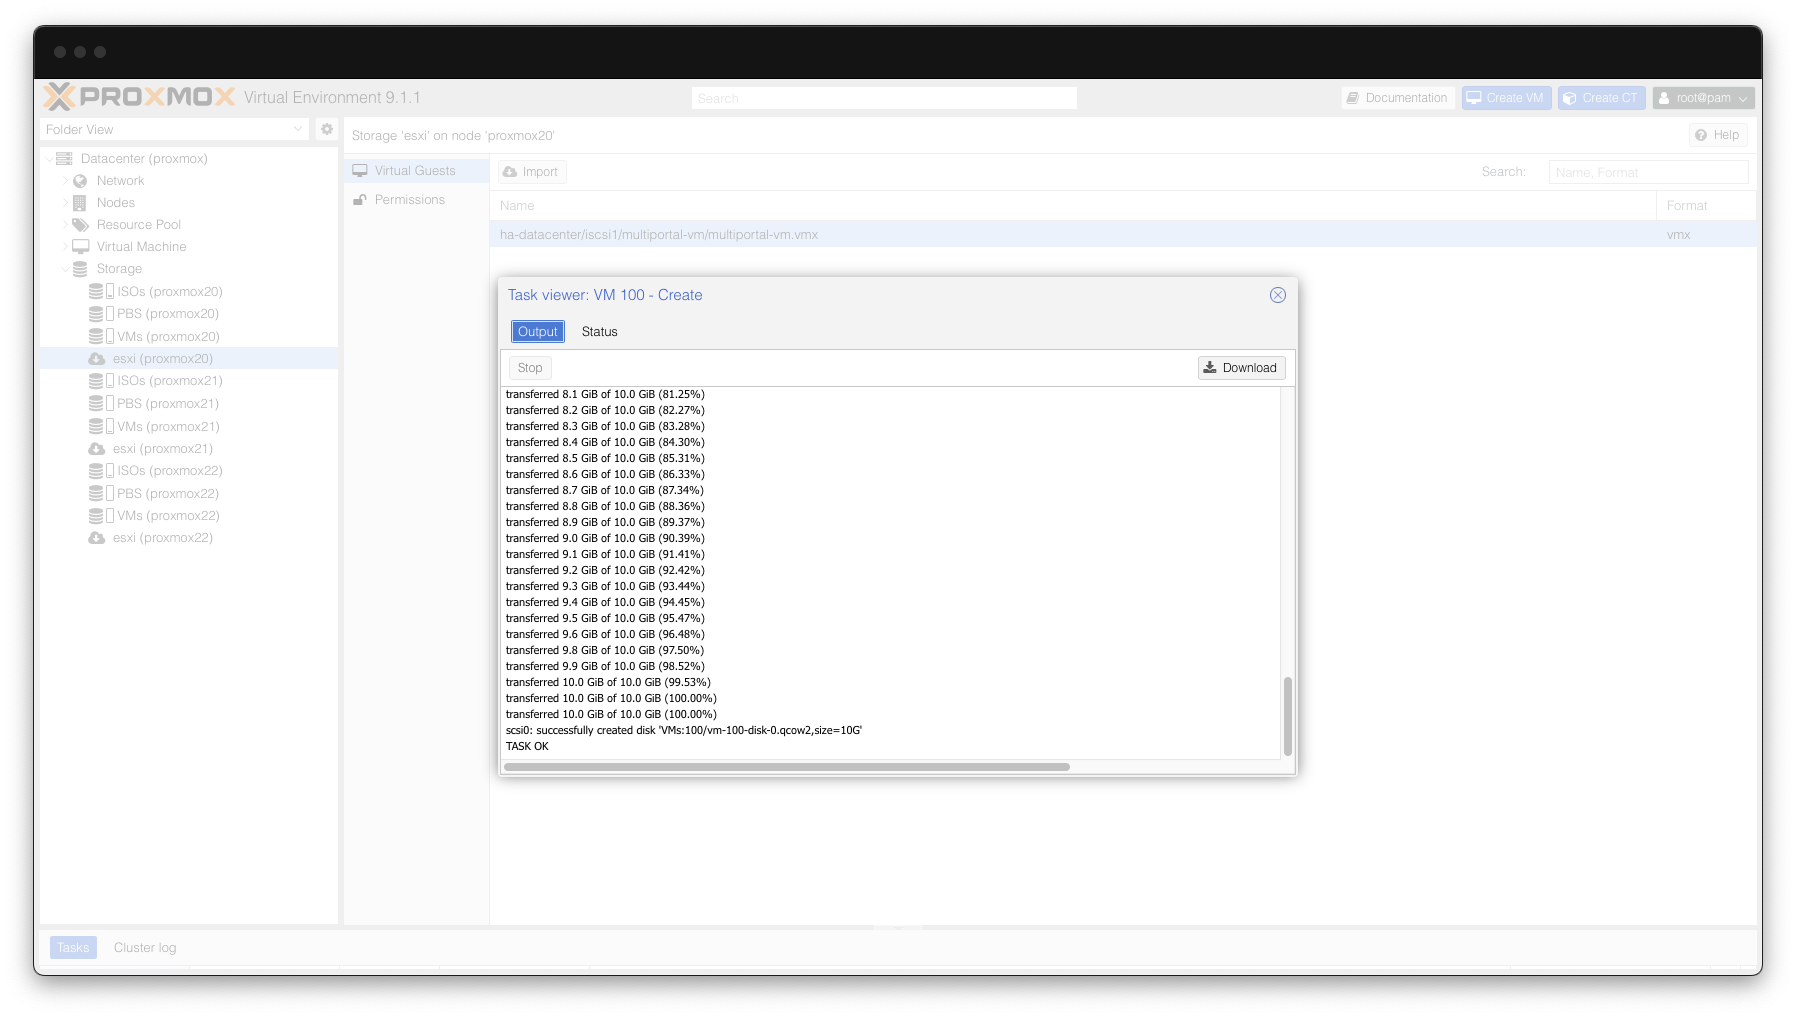
Proxmox will then import the VM from ESXi – this should take a few moments to complete depending on the size of the virtual disks.
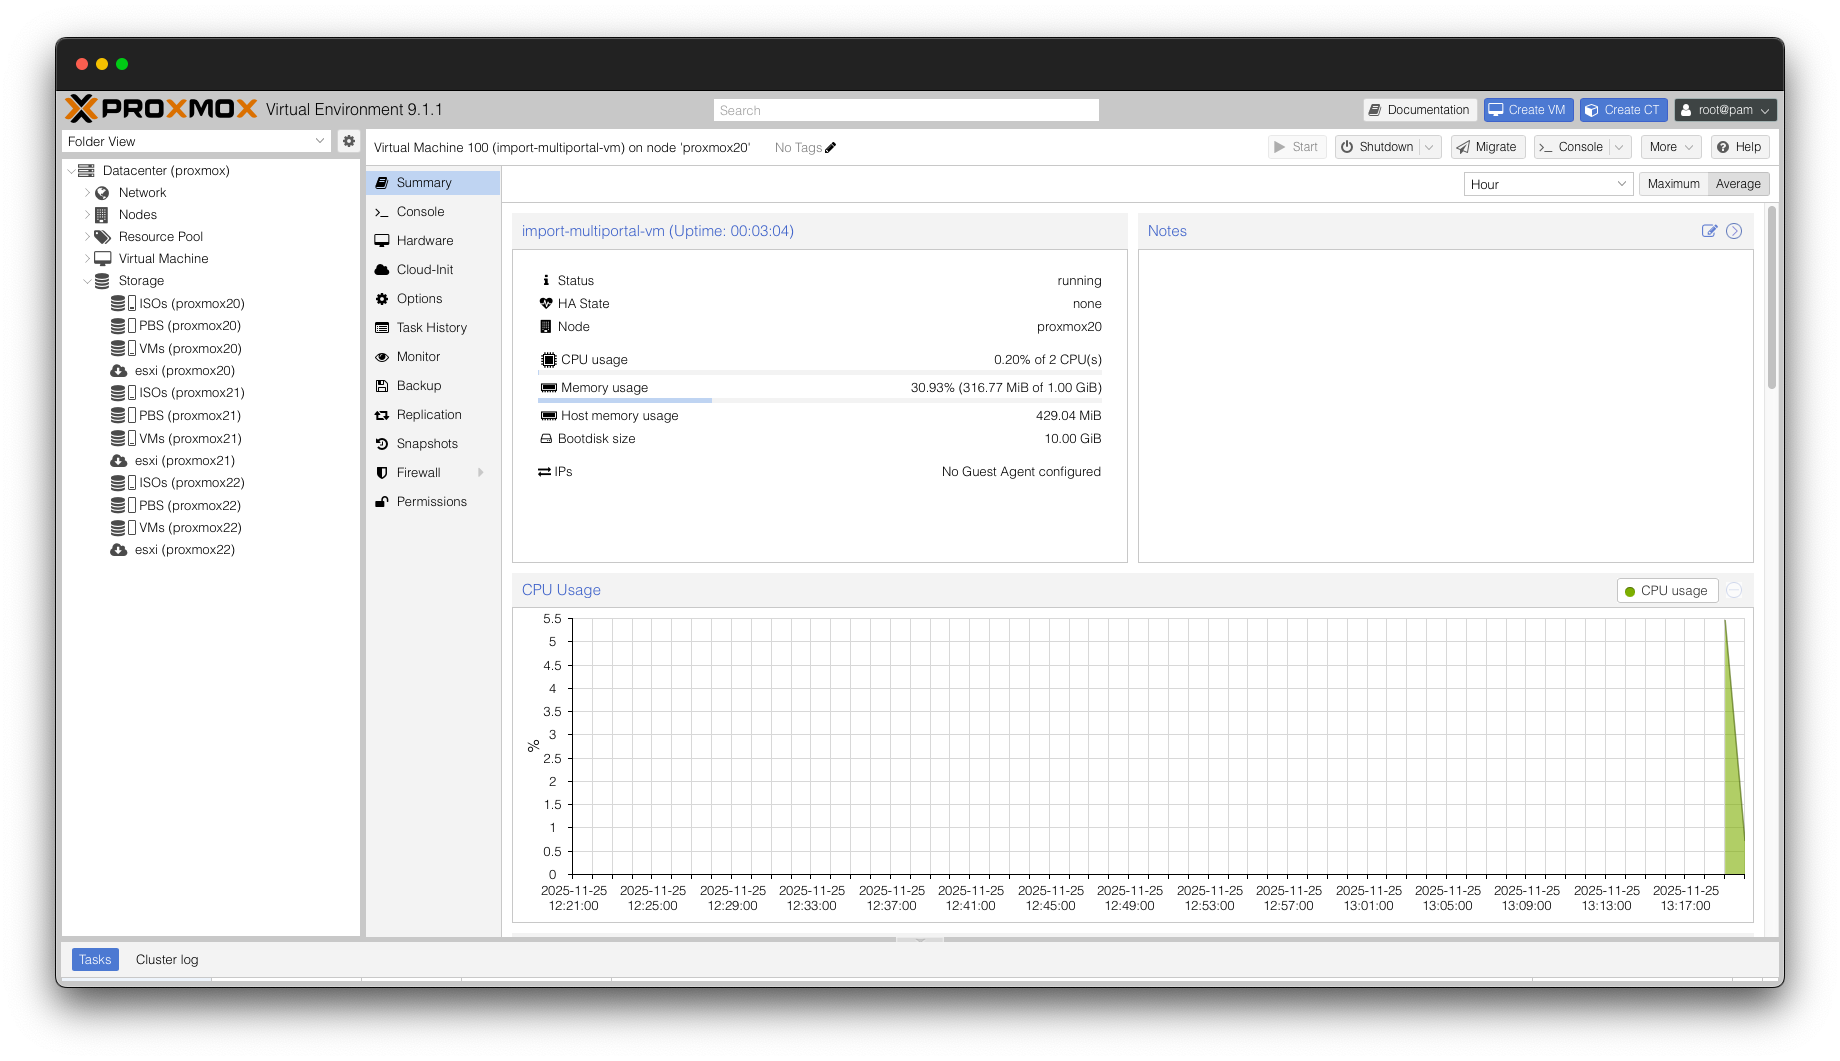
You can then browse to the imported VM in Proxmox and power the VM on. We are now ready to move on to getting this VM into MultiPortal!
NOTE: For further information on importing VMs from VMware into Proxmox, Proxmox has a great guide on their wiki: https://pve.proxmox.com/wiki/Migrate_to_Proxmox_VE
Importing VM into MultiPortal
Ensure you are logged into MultiPortal as a Service Provider Administrator. Browse to Settings > Import > Virtual Machines.
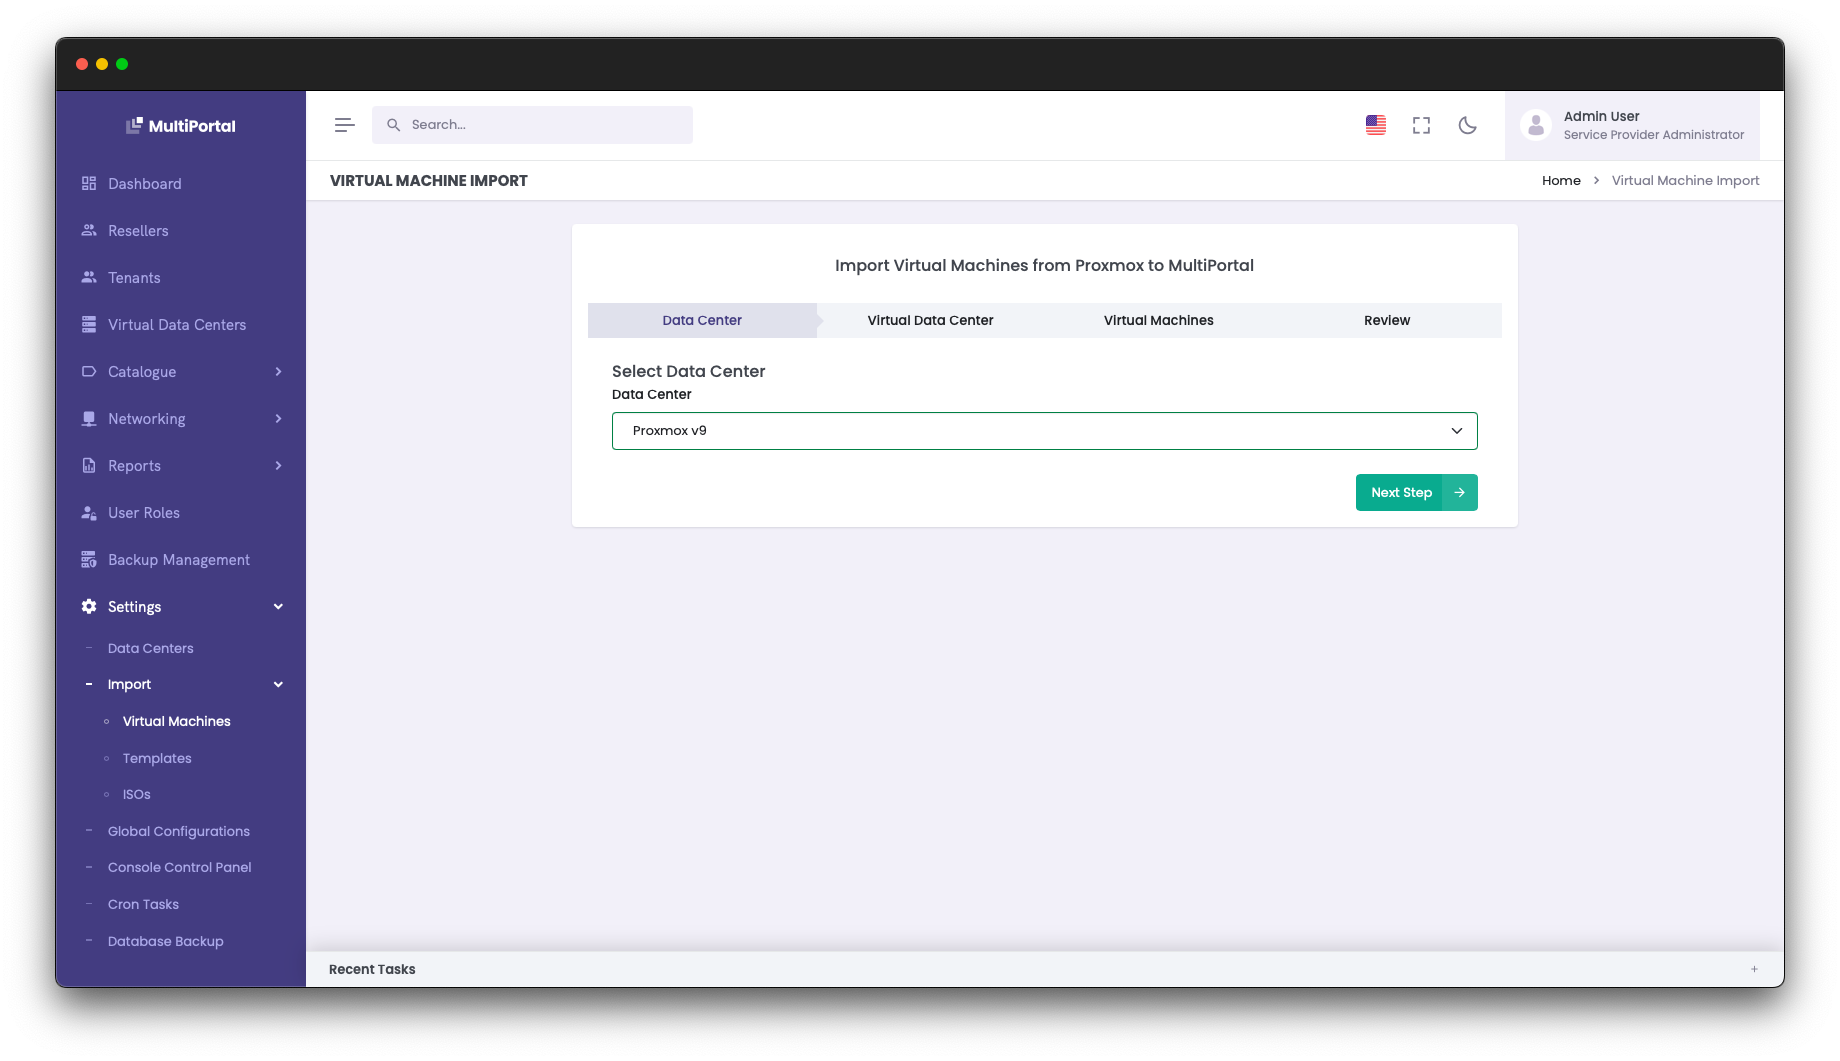
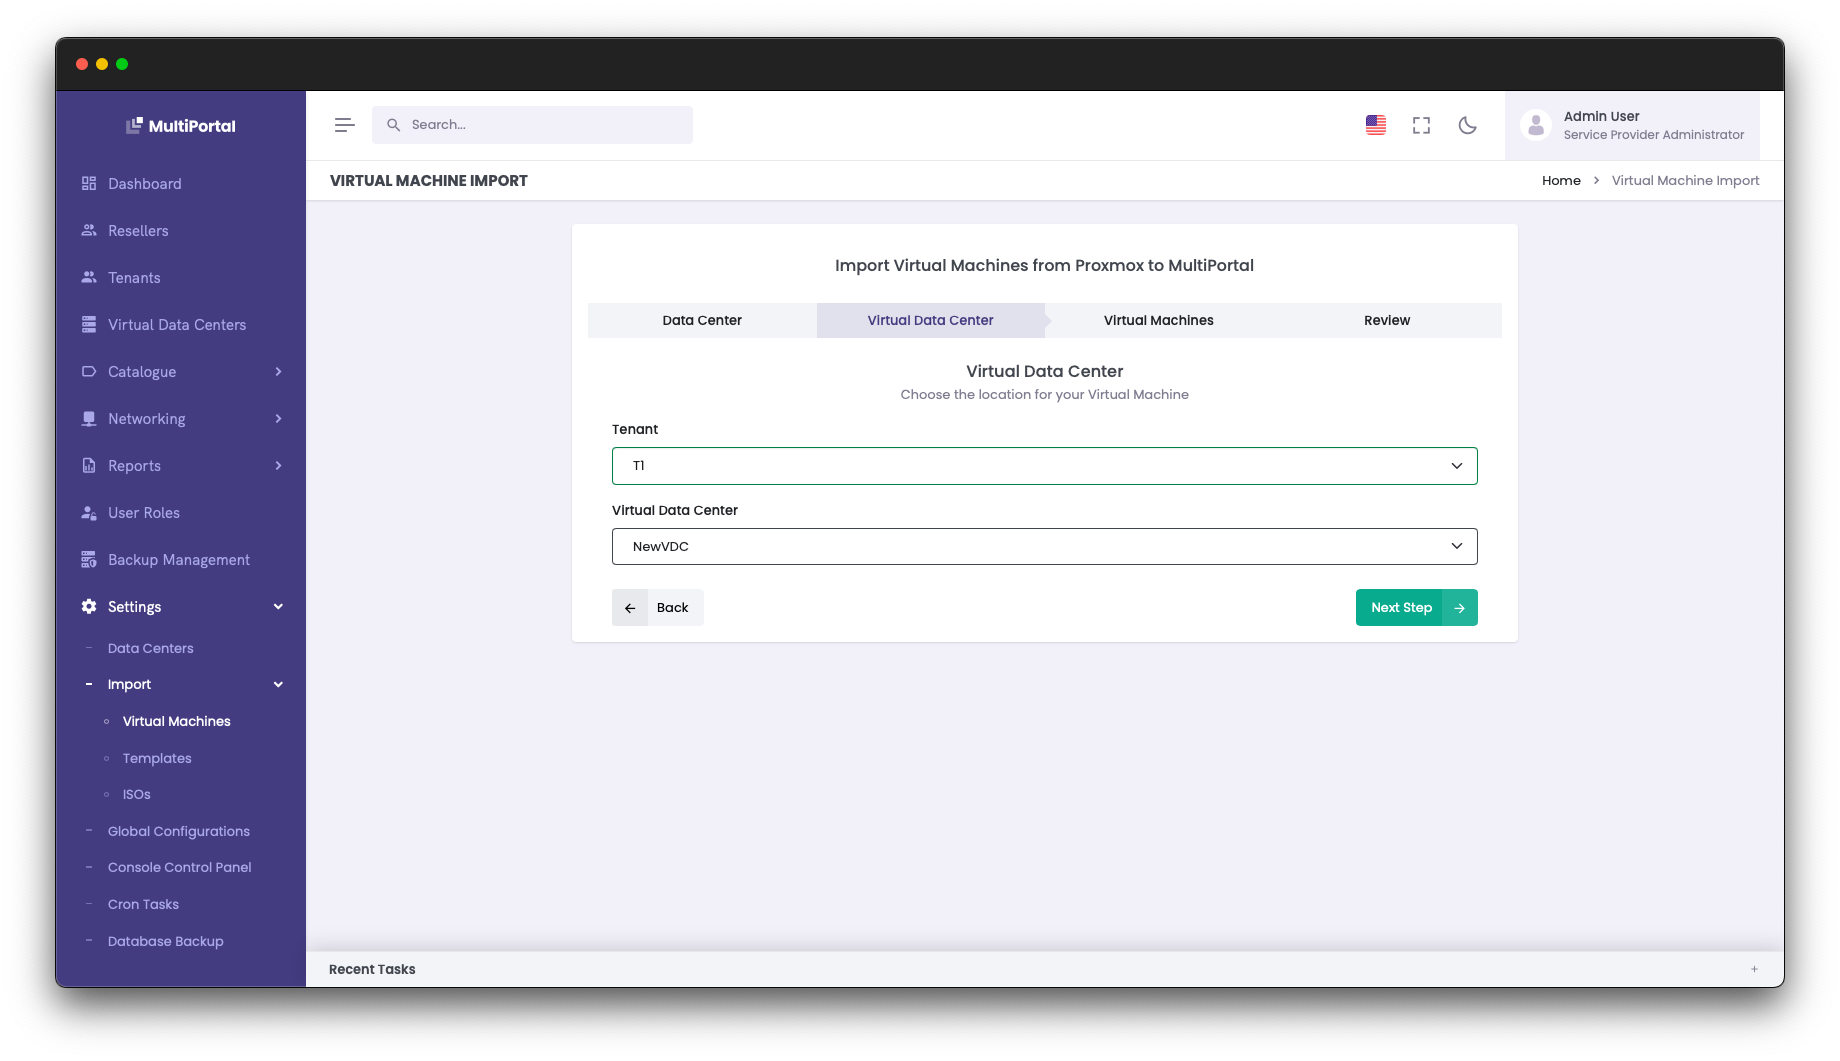
Select your Proxmox Datacenter and click “Next Step”. Then select the Tenant and Virtual Data Center you wish to import the VM into.
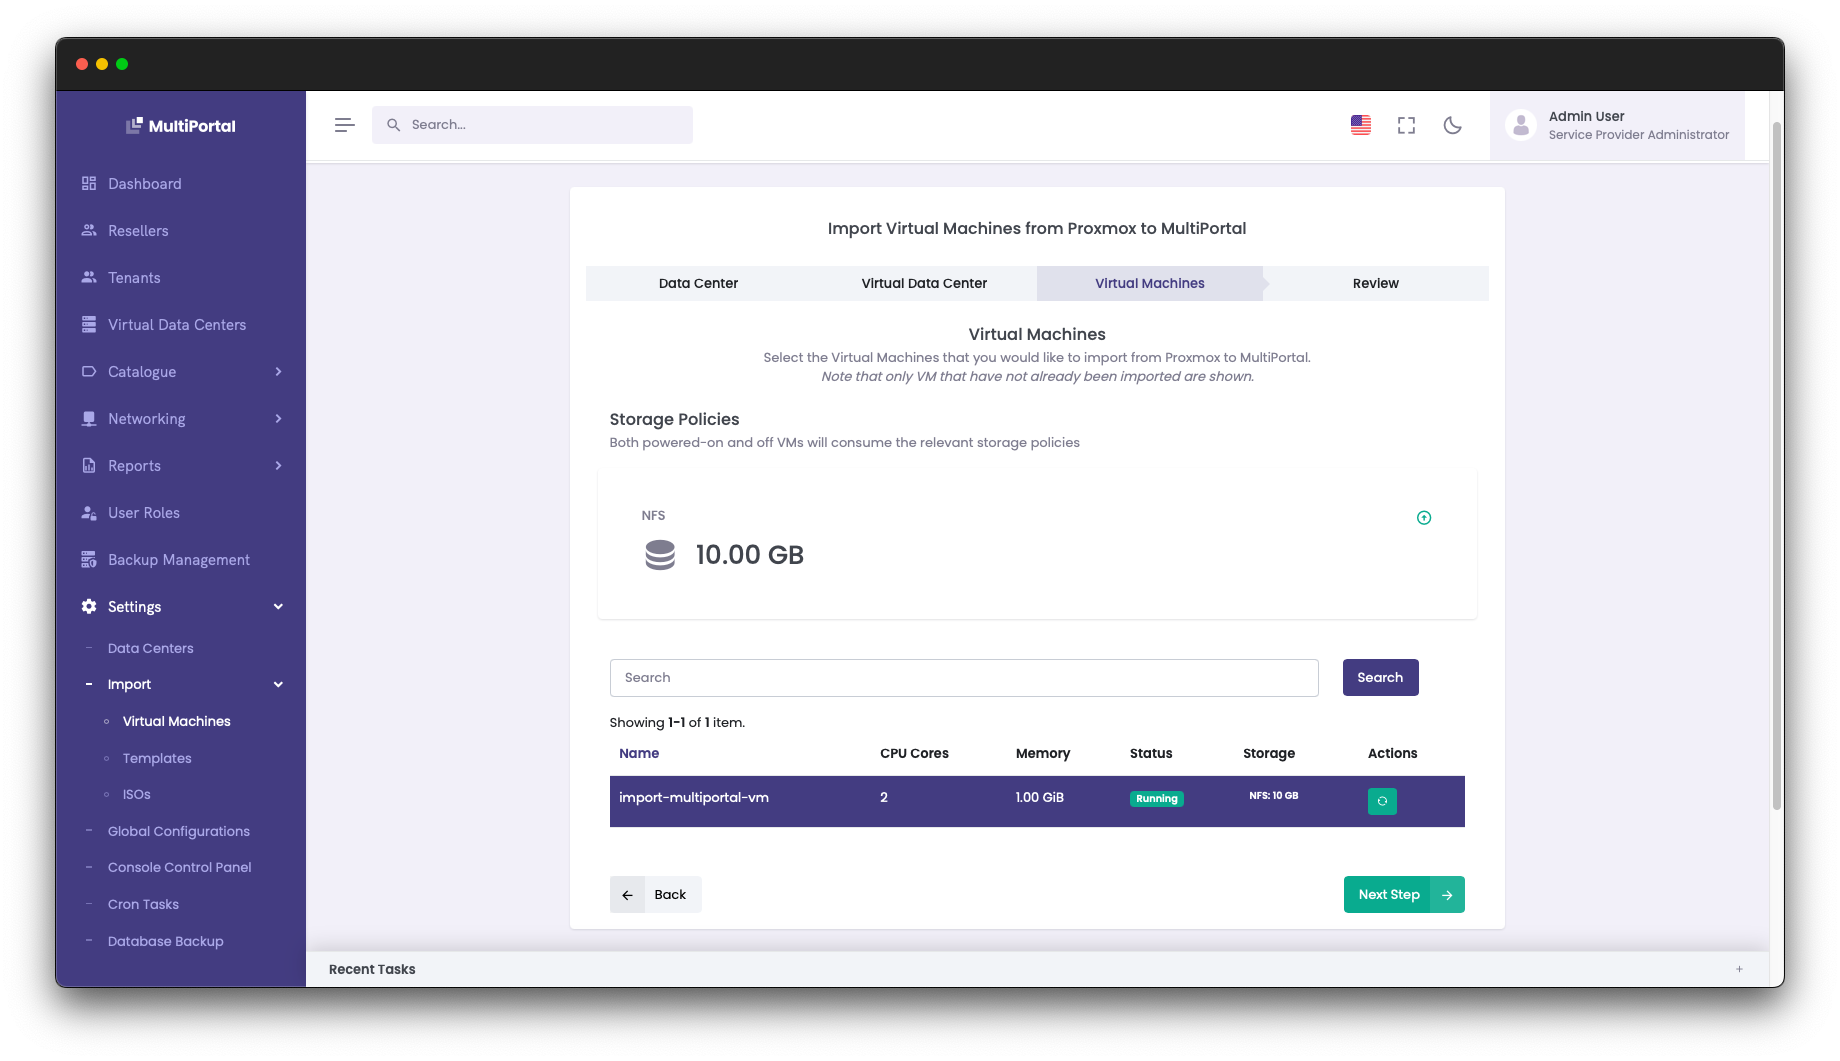
- Choose your imported VM from the list and click “Next Step”.
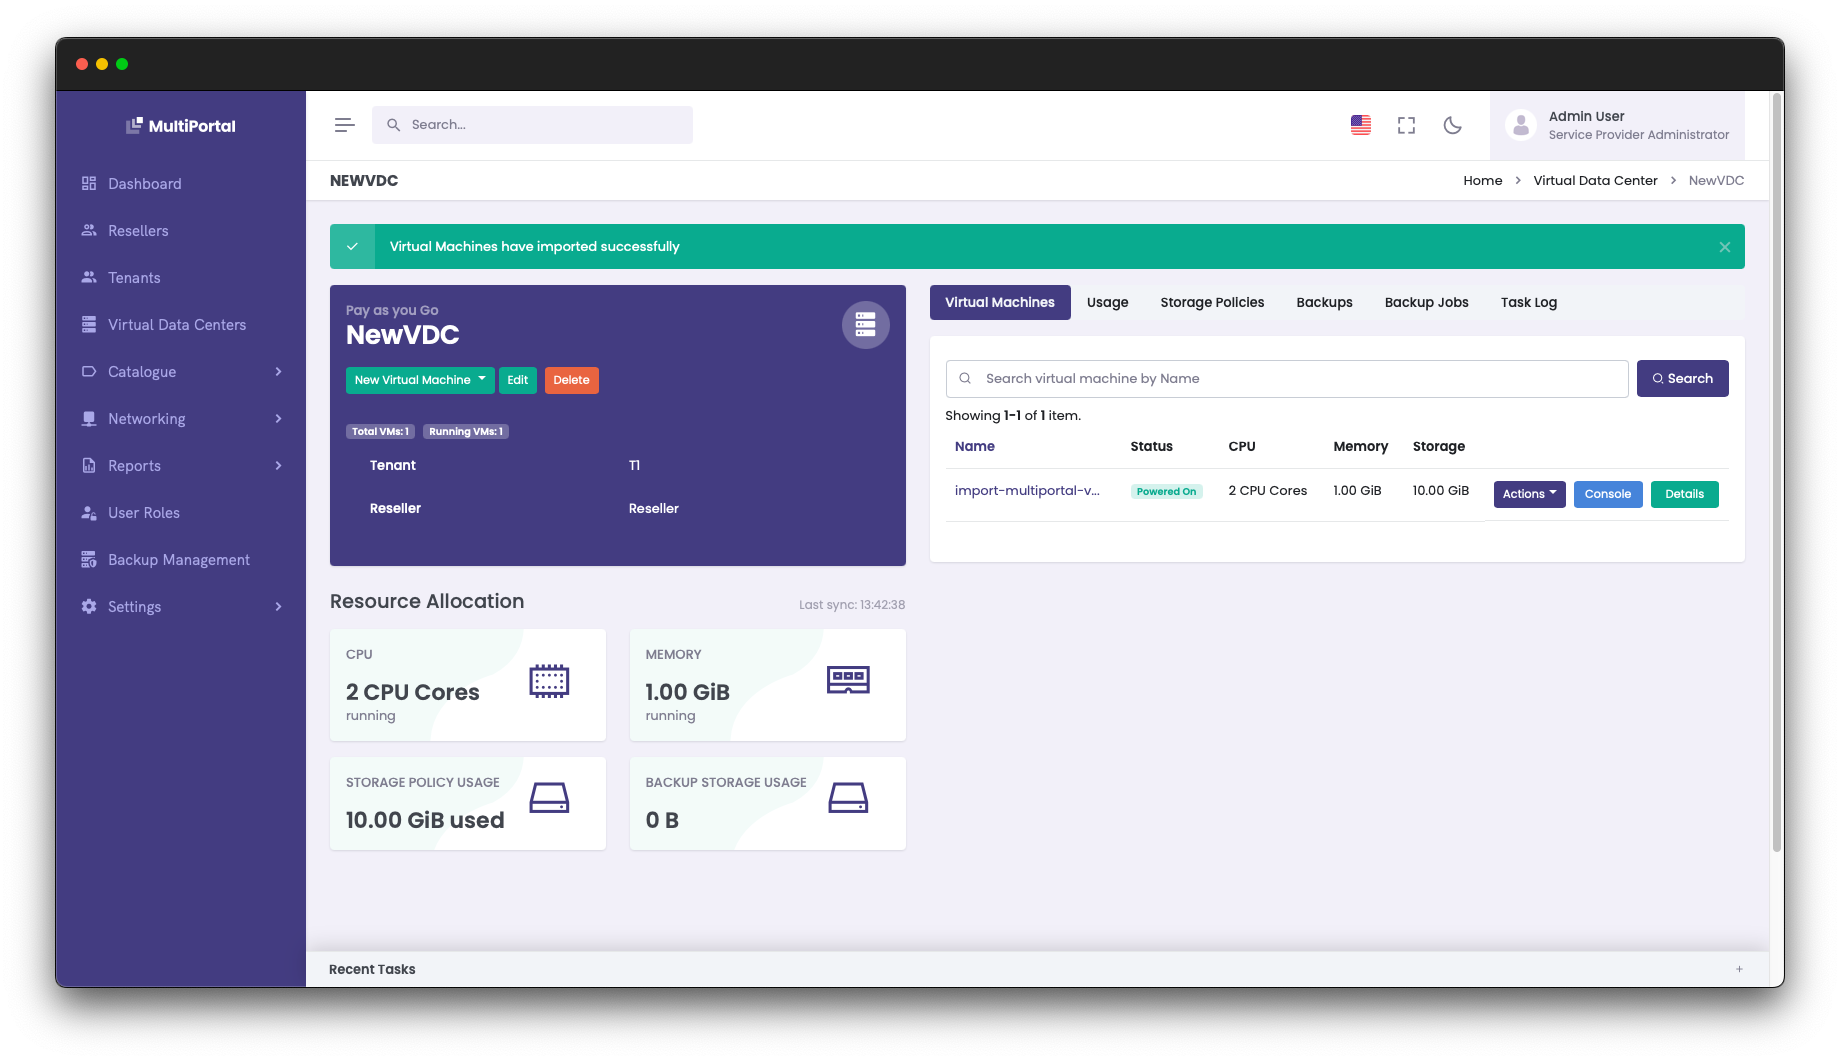
You will see a final confirmation of the imported VM. Click “Submit” to complete the import process.
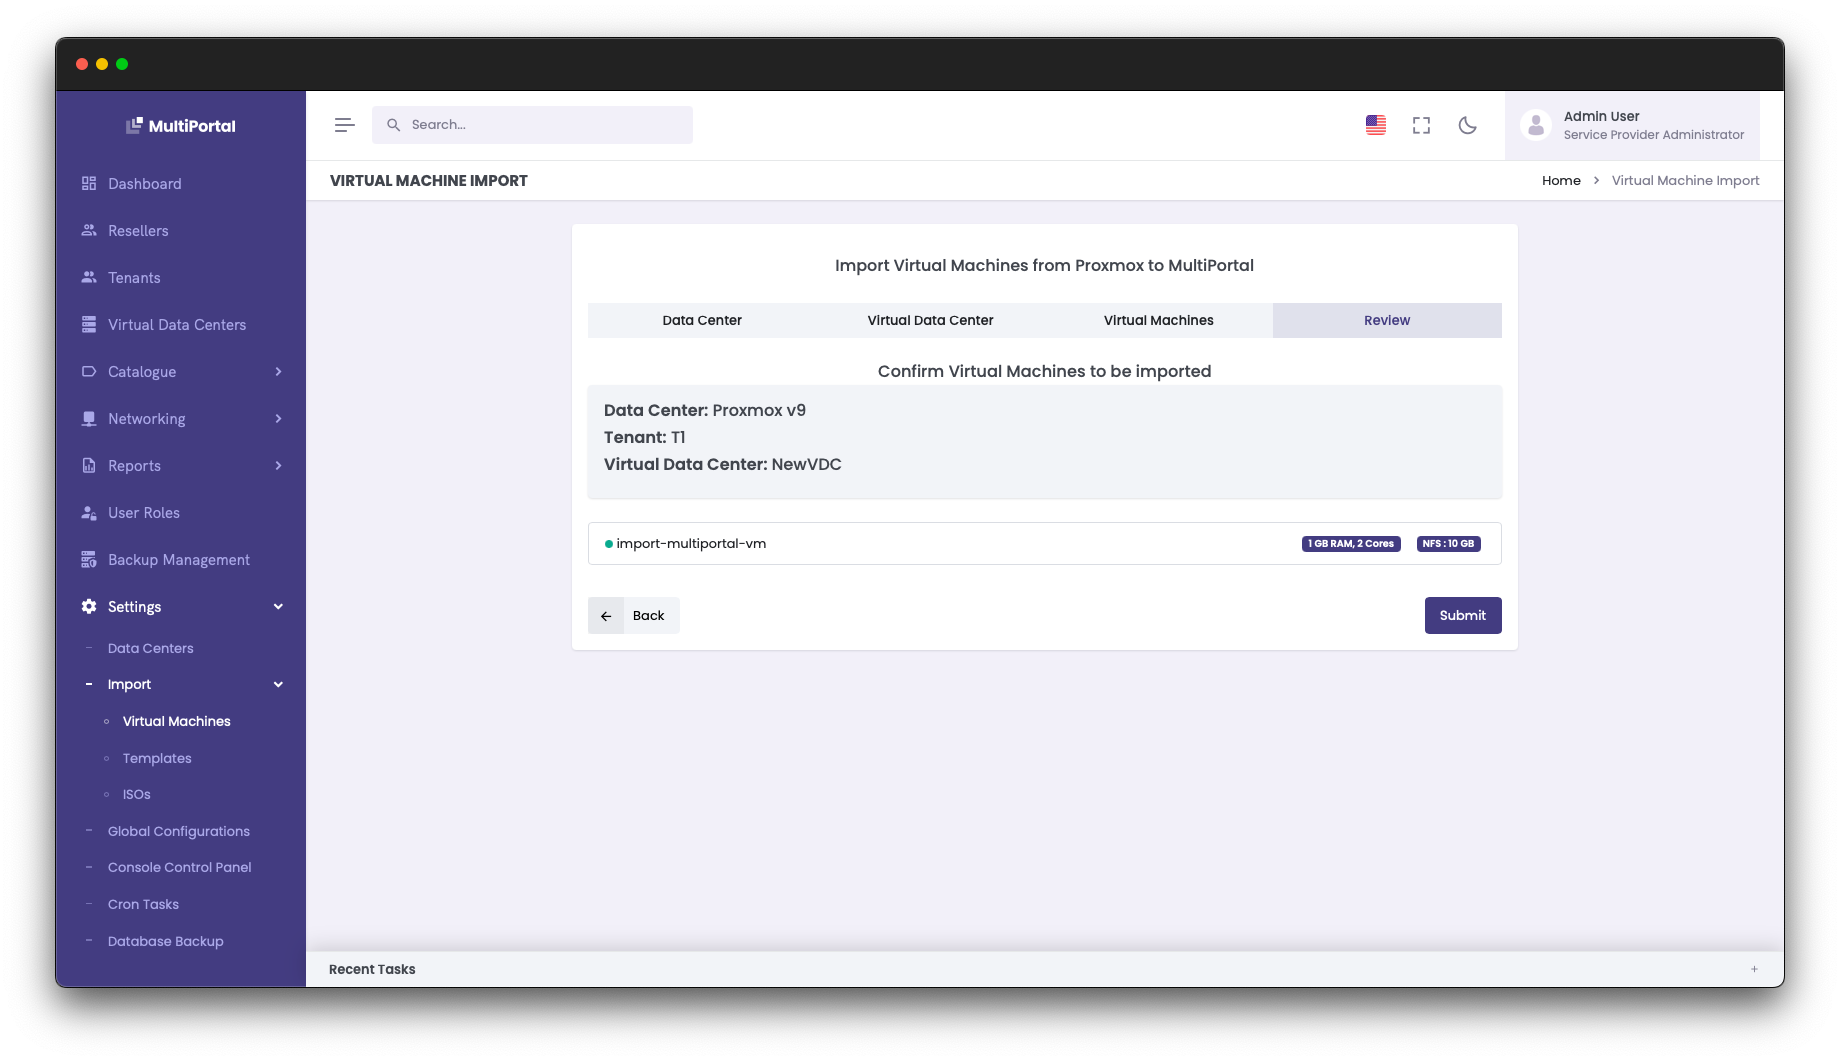
You will then be able to see and manage the imported VM from within MultiPortal.
NOTE: For further information on importing VMs into MultiPortal from Proxmox, we have a detailed step-by-step guide in the MultiPortal documentation.
—
If you are a Cloud Director user affected by the ripple effects from VMware’s acquisition, we’d love to get in touch and discuss MultiPortal. Please reach out at https://multiportal.io/contact-us
When setting up MultiPortal for your tenants, it’s often a good idea to pre-create templates for popular operating systems and applications to speed up provisioning and deployment.
Within a MultiPortal Virtual Data Center, your end users have the ability to build VMs from scratch or deploy from the aforementioned template. In this blog post, I will show you how you can configure this in Proxmox so it can be imported into MultiPortal. This, combined with our improved CloudInit support, creates a great experience for your end users.
To get started, we are going to use a pre-created Cloud Image from Ubuntu that can be found on Ubuntu’s Cloud Images repository. Many popular operating systems have their own repositories for such images, including Alma Linux, Debian, Oracle Linux and many more. Make sure you download your desired version and correct architecture (amd64, arm64, etc.) for your environment.
I will be downloading the latest LTS version of Ubuntu as of this document being written, Ubuntu 24.04 LTS (Noble Numbat). Download this to one of your Proxmox nodes:
root@proxmox20:~# wget https://cloud-images.ubuntu.com/noble/current/noble-server-cloudimg-amd64.img
As the default download size is quite small, resize this to an appropriate base size for your own environment (10GB in my example):
root@proxmox20:~# qemu-img resize noble-server-cloudimg-amd64.img 10G
Now we have our disk image downloaded, we will create a VM in Proxmox that we will eventually convert to a template.
qm create 9999 --name "ubuntu24-template" --ostype l26 --memory 2048 --agent 1 --bios ovmf --machine q35 --scsihw virtio-scsi-single --efidisk0 <DataStore_Name>:0,format=qcow2 --sockets 1 --cores 1
Many aspects of this can be changed based on your own requirements, for example the VM specification, machine/BIOS types. Check out the Proxmox documentation for full details. Also, be sure to replace <DataStore_Name> with the name of a datastore in your own environment that can be used for disk image storage.
Note: All of these examples will be using file-based (qcow2) images – if you are using block-based storage (eg. LVM Thin, which is the Proxmox local storage default), you may need to change the format to “raw” instead.
Next, we will import our previously downloaded Cloud Image from Ubuntu, and assign it to the virtual machine:
qm set 9999 --scsi0 <DataStore_Name>:0,import-from=/<PATH_TO>/noble-server-cloudimg-amd64.img,format=qcow2,iothread=1
Remember to replace <DataStore_Name> with the name of a datastore in your own environment that can be used for disk image storage and the correct path to the downloaded Cloud Image.
Now we will set our newly imported disk image to be the primary boot disk:
qm set 9999 --boot order=scsi0
We will now add a CloudInit disk to allow us to define our own run-once script, as well as allowing MultiPortal to automatically set additional configurations, such as networks, SSH keys and authentication credentials.
qm set 9999 --scsi1 <DataStore_Name>:cloudinit
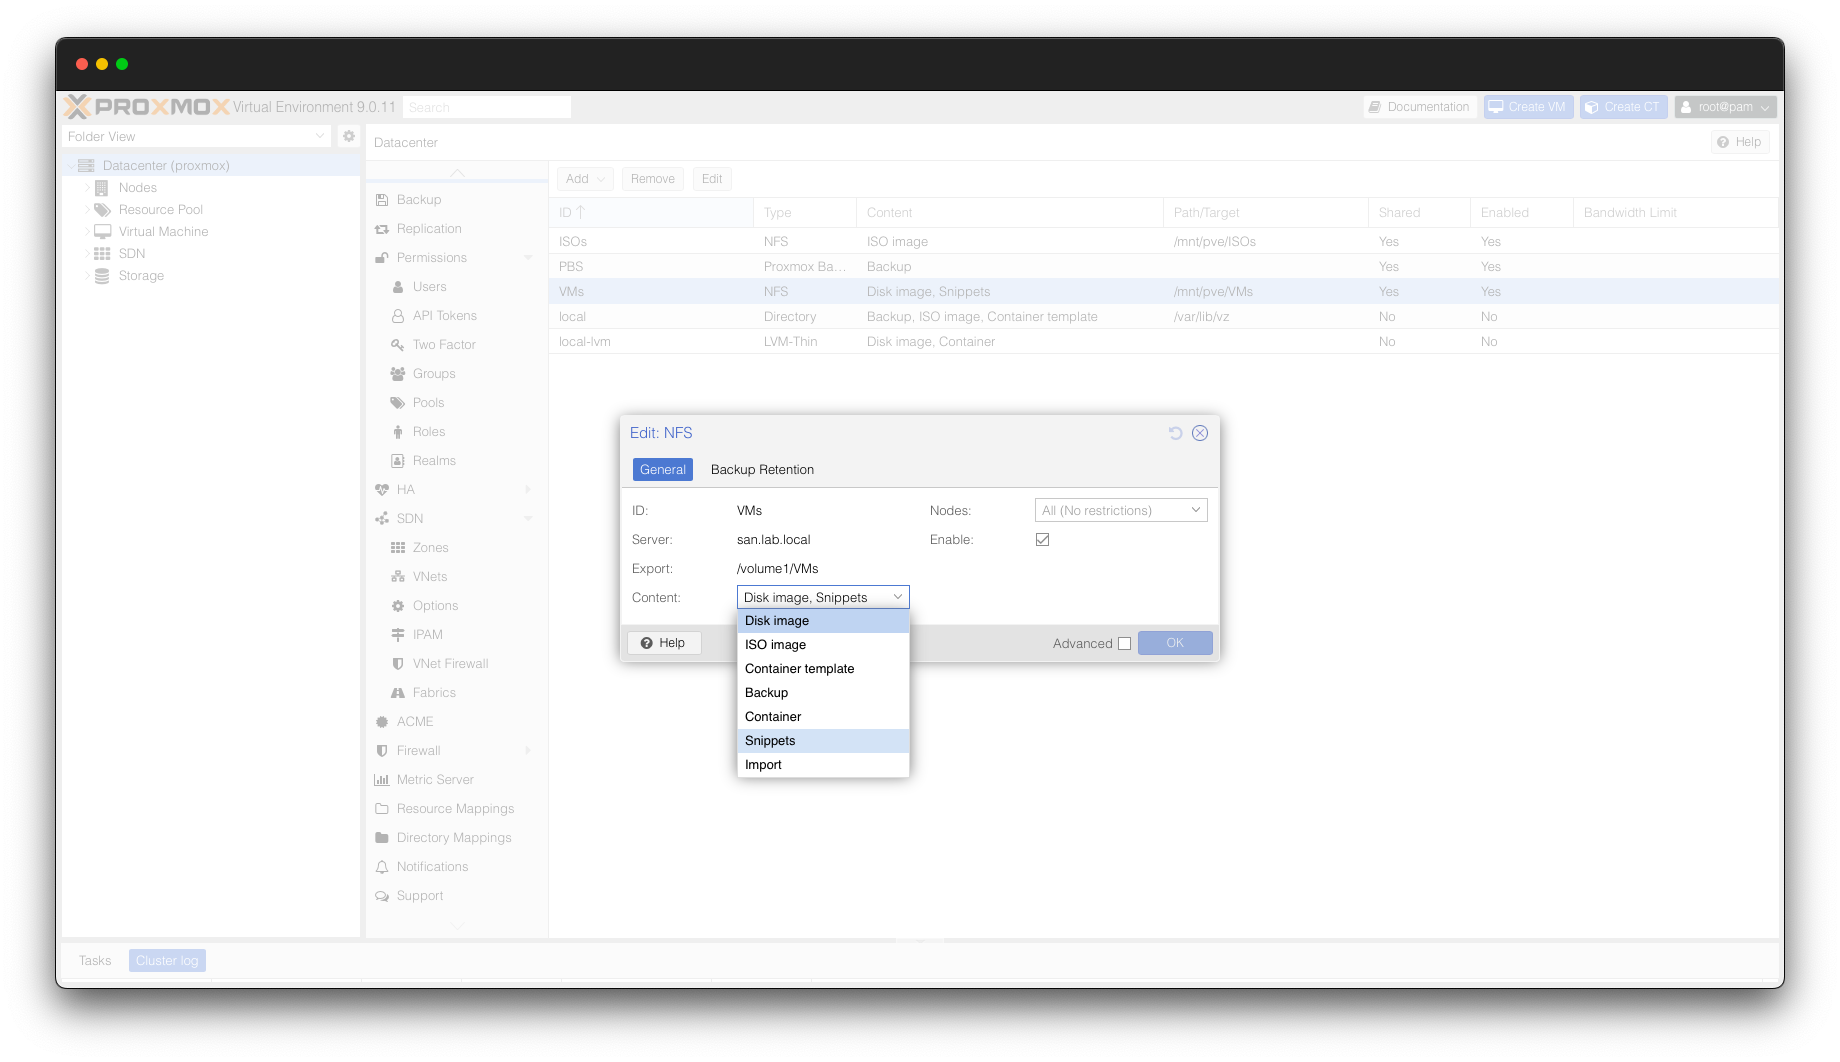
Next, we will ensure we have a Datastore that is configured for snippets – this could be the same shared or local datastore that you are using for your virtual machine storage. In Proxmox, go to your DataCenter, click “Storage” and ensure there is a Datastore that supports the “snippets” content type.
Once there is an available snippets datastore, browse to it via the CLI – if it is a local datastore it should be located at:
/var/lib/vz/snippets
If it is on a remote datastore (eg. NFS), it should be located at:
/mnt/pve/<DataStore_Name>/snippets
Create a file in this directory to be associated with the template we are creating, for example:
vim /mnt/pve/<DataStore_Name>/snippets/ubuntu24.yaml
In this file, we will define any custom items that will be performed after the initial configuration. In this example, it will install the qemu guest agent and set it to automatically start on VM boot.
#cloud-config

runcmd:

    - apt install -y qemu-guest-agent

    - systemctl enable qemu-guest-agent --now
You can add your own commands based on your specific use case – you can find more information around the format of this yaml file on the official CloudInit documentation.
Now that this has been saved, we can apply this to the virtual machine:
qm set 9999 --cicustom "vendor=<DataStore_Name>:snippets/ubuntu24.yaml"
The remaining CloudInit items will be set during the provisioning process inside of MultiPortal, so we can now convert this VM to a template and prepare to import it.
qm template 9999
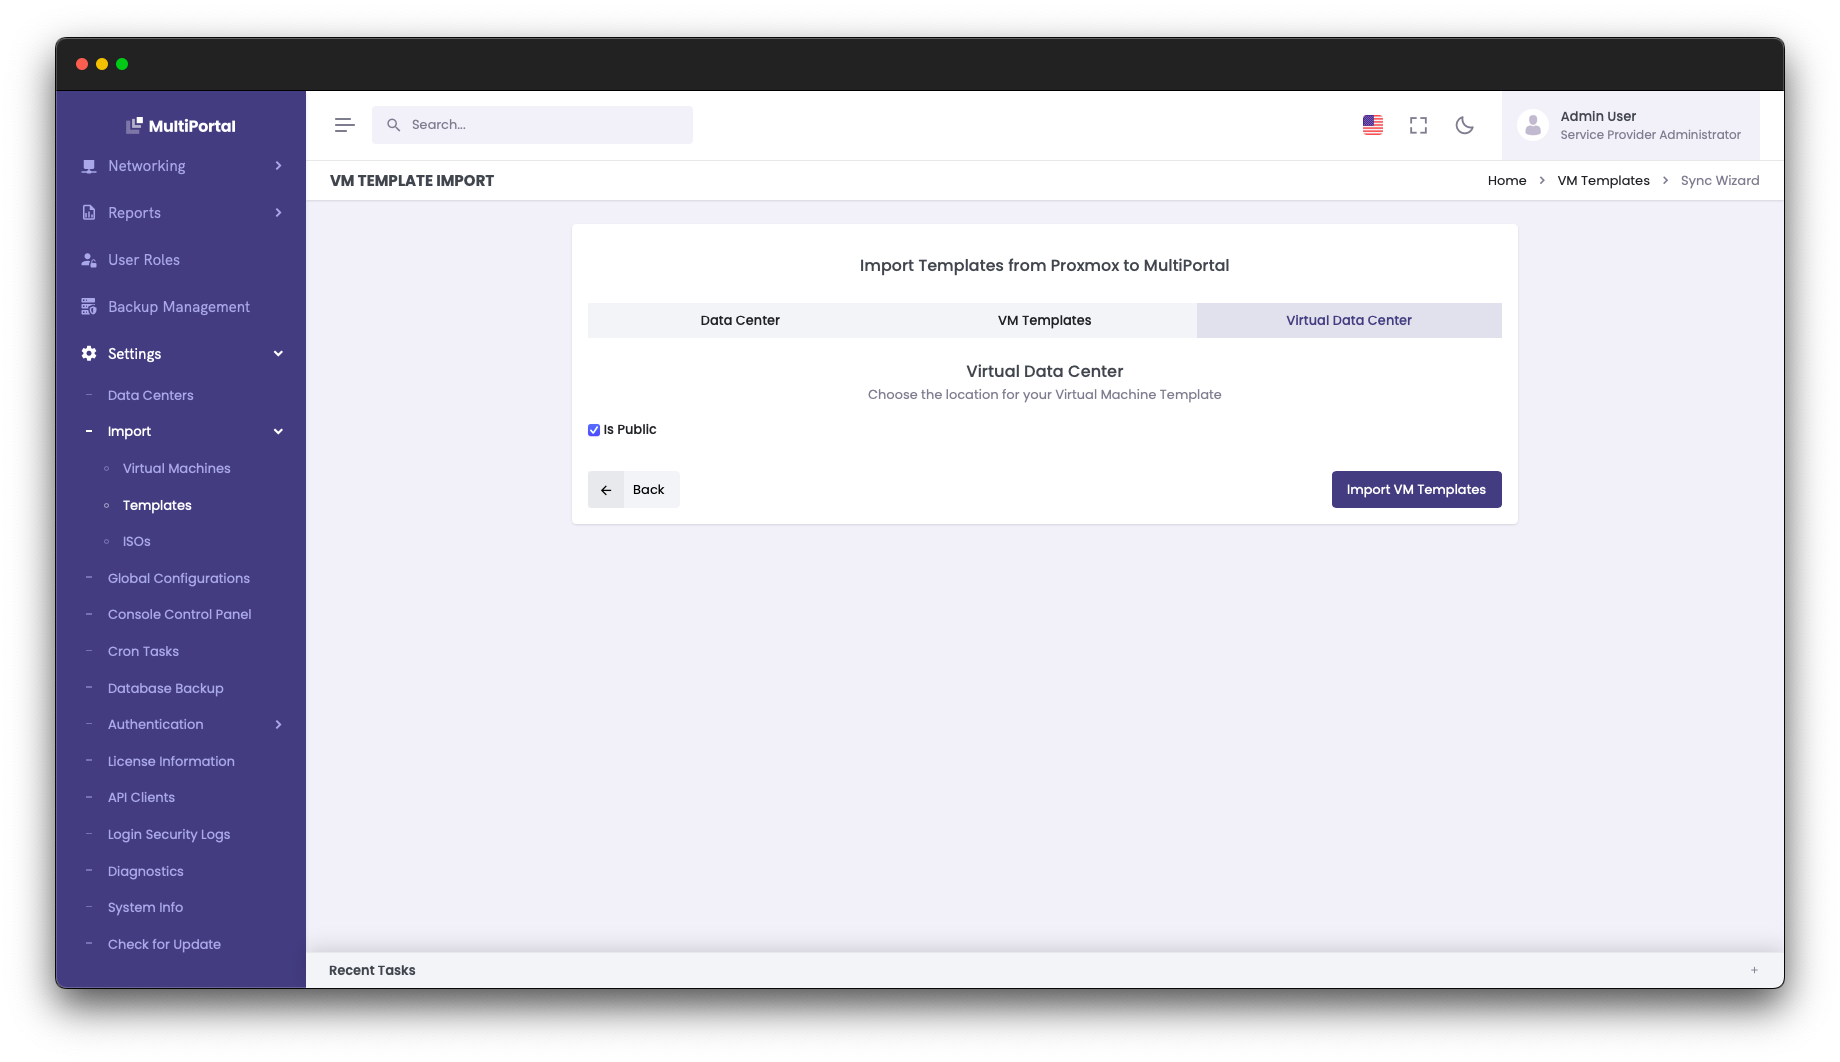
Now that it is presented as a template in Proxmox, we can import it into MultiPortal – it can either be presented to specific VDCs, or made public so any tenants that have access to this Proxmox Datacenter can deploy it.
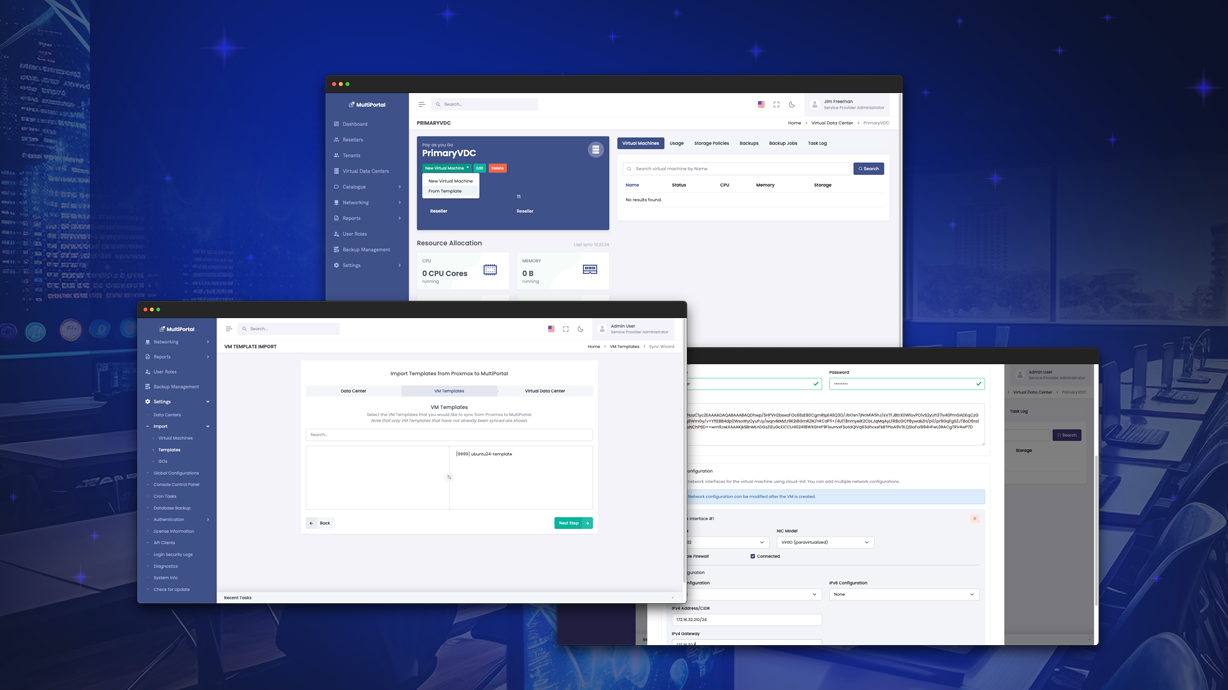
As a Service Provider Administrator user, browse to Settings > Import > Templates. Select your Proxmox Datacenter and choose your recently created template.

Assign it to a specific Tenant and Virtual Data Center, or make it Public and then click “Import VM Templates”.
Now that the template is present in MultiPortal, we can browse to a Virtual Data Center, click the “New Virtual Machine” button and then select “From Template”.
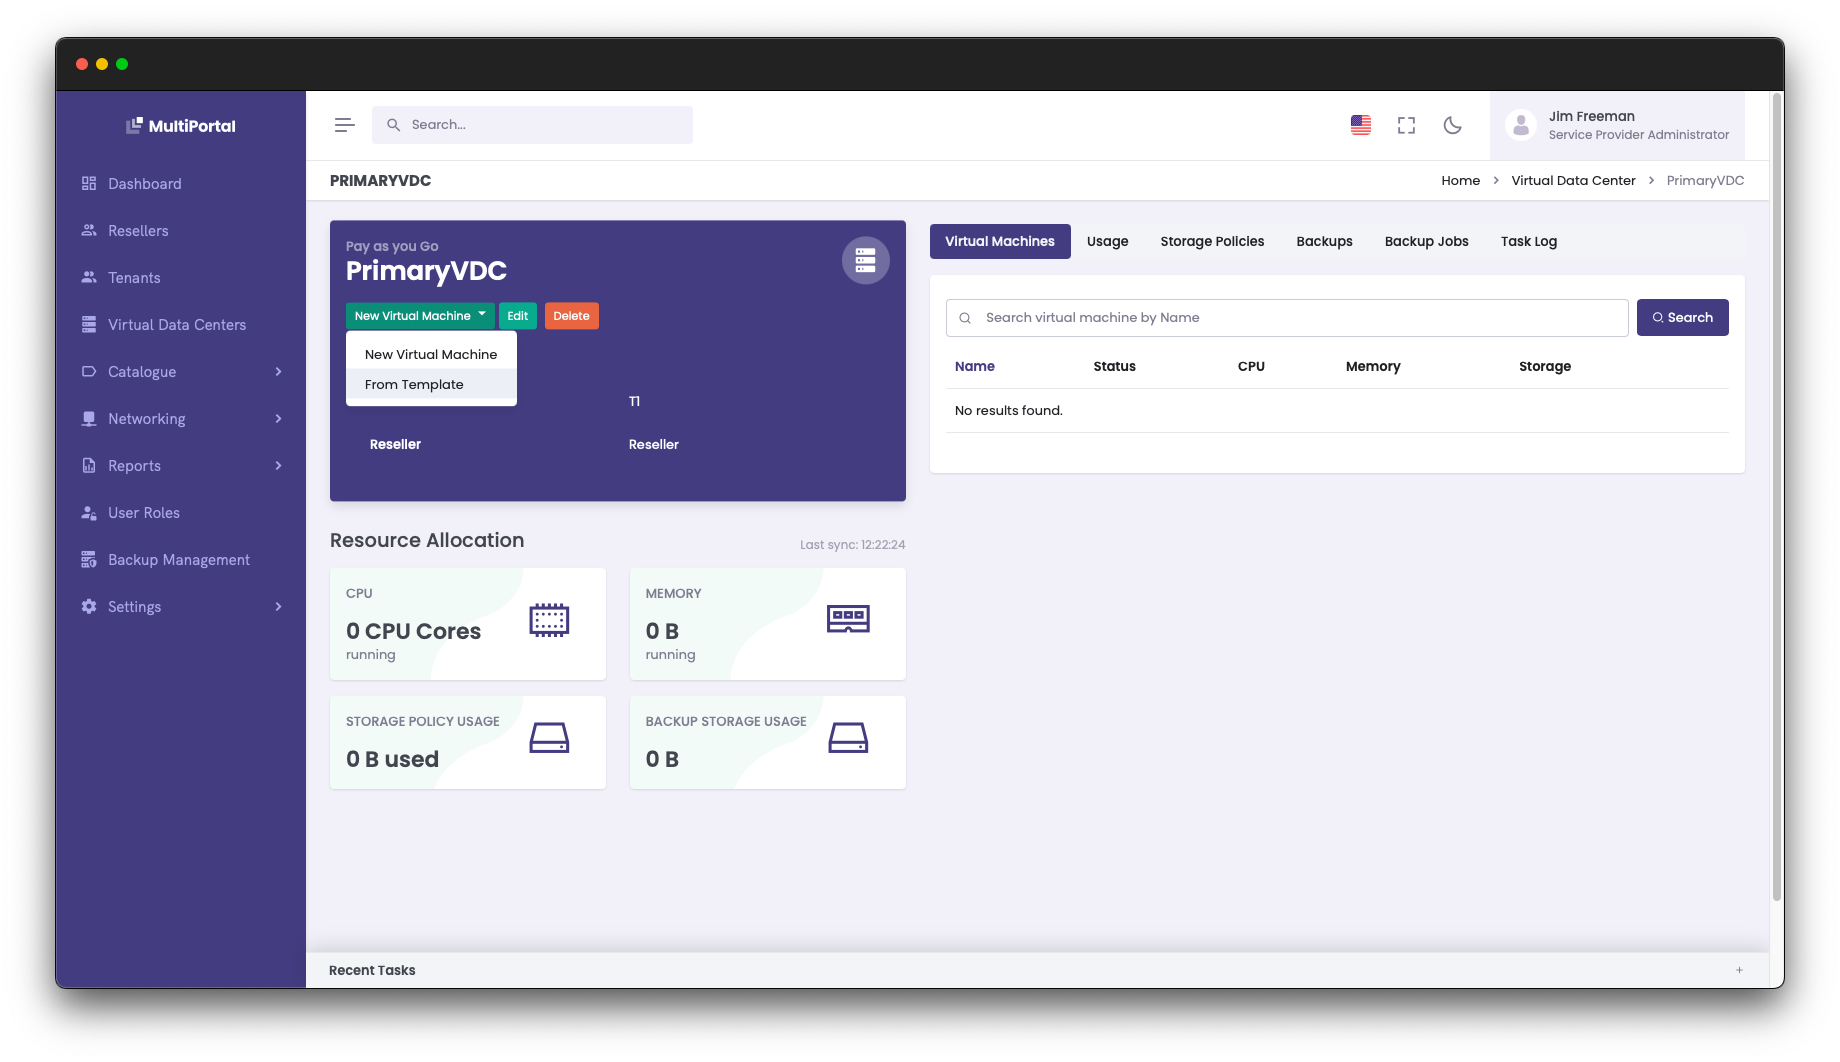
Run through the VM deployment wizard by selecting a VM name, choosing an operating system type and selecting your newly created VM template.
In the last step of the wizard, select the storage that you wish the VM to be deployed on, and MultiPortal then allows you to create a username, password and assign an SSH key to this new VM. You can also assign a network interface, assign a network and either set a static IP or set the NIC to assign an IP address via DHCP.

After a few moments, the clone process will be complete and you will be able to power on the virtual machine and manage it via the credentials that were set during the VM provisioning wizard.
Setting up a solid library of templates is a simple way to give your tenants a faster, cleaner provisioning experience. Once you’ve imported your templates into MultiPortal, you’ll have repeatable, reliable deployments ready to go whenever you need them.
If you’re already using MultiPortal, jump into your portal and try creating a template for your environment. If you haven’t had a chance to try MultiPortal yet, you can take it for a spin with our 30-day free trial and see how easy it is to manage Proxmox at scale.

Today is the day! One of the largest releases in terms of sheer features and functionality is now available for download. MultiPortal 1.1.0 is packed full of new features and improvements, many of which were announced in our previous blog post, but also some additional items based on feedback from our community and users.
Full Proxmox v9 Support
A few months ago, Proxmox released version 9 and this included the introduction of Affinity Rules which are now fully supported, as well as other Proxmox v9 functionality, in MultiPortal. This allows you to run your Proxmox clusters, with full HA support without any issues using MultiPortal’s multi-tenant user interface
Performance & Load time Improvements
As part of 1.1.0, we’ve made some huge improvements to load times & performance that involve transactions interacting with your Proxmox datacenters. For example, when loading virtual machines with virtual datacenters
SAML, LDAP & Authentication Features
These highly requested authentication features are now fully included in the Premium Edition of MultiPortal. While the Enterprise Edition gives you key benefits such as priority support and onboarding assistance, we are also bringing in some advanced features into this new package. For the keen eyed out there, you will also have noticed we have renamed our Enterprise package to Premium to keep it in line with our goal to release more Premium features over the coming months.
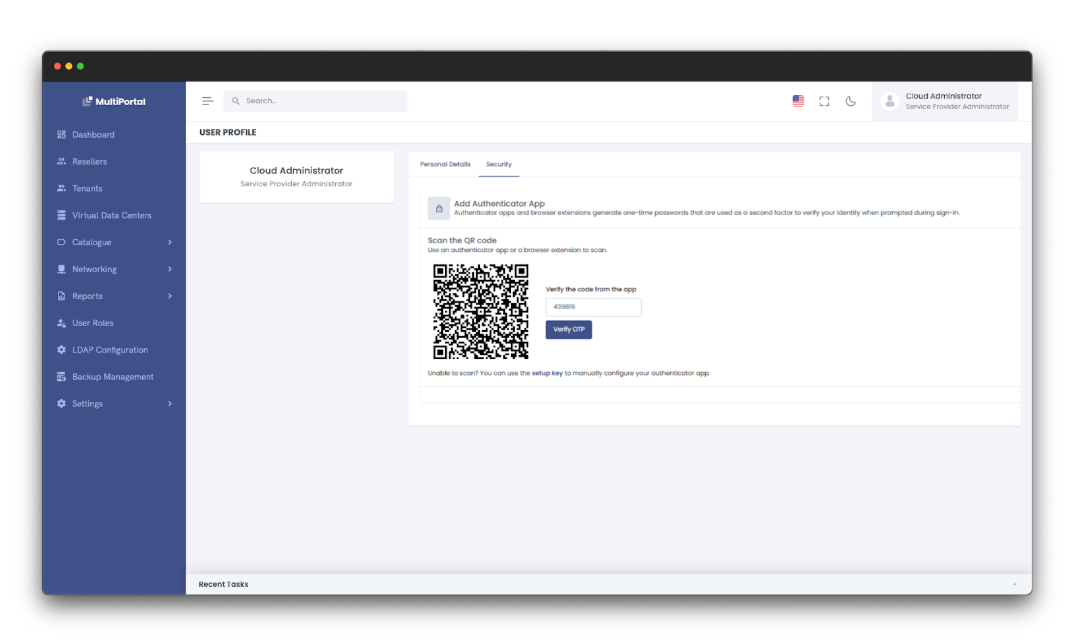
MultiPortal now includes a plethora of different authentication features – whether you have existing directories (SAML or LDAP), want to use existing oAuth providers (Google & Microsoft) or just use standard username & password authentication, it is is all included in MultiPortal. You can also now also use a TOTP based authenticator (eg. Authy, Google Authenticator, etc.) for additional security on your user accounts.
Community Edition Changes
This is just a reminder from our announcement last month, with this upgrade, version 1.1.0 of MultiPortal, the Community Edition will have the following limitations applied:
- Maximum limits on number of resellers allowed (2)
- Each Reseller has maximum limit on number of tenants allowed (5)
- Each Tenant has a maximum number of concurrent VDCs (1)
- Each VDC can support a maximum of (10) concurrent virtual machines
- These limits do not apply to paid Standard or Premium editions of MultiPortal. Please reach out to us if you are interested in talking about upgrading.
But not to worry, we have increased our free trial period that you get when you install MultiPortal from 14 to 30 days, giving you more time to evaluate. Feel free to reach out to us to discuss your evaluation efforts as we are always happy to assist you to make MultiPortal work for you.
That is not all, check out our full release notes for every feature, improvement and bug fix we are delivering in 1.1.0. Try out MultiPortal today free of charge – we would love to help you try it out and we are always interested in getting feedback from our community for the future as well.
To get started with MultiPortal today, check out our installation guide. If you have any questions, our support team is available at support@multiportal.io, and you can also connect with our communities on Discord and Reddit.
We are delighted to announce the upcoming version 1.1.0 release of MultiPortal, which includes a ton of new features and improvements coming to the platform. This update is scheduled for release in October, and we’d like to give our customer base and community a sneak peek of some of the new functionality that you will be able to access very soon.
Proxmox v9 Support
Those of you who upgraded to Proxmox version 9 on its release last month will have noticed that while MultiPortal is still functional for the most part, the introduction of Affinity Rules for Proxmox HA clusters wasn’t supported in MultiPortal initially. The next release of MultiPortal will include full support for utilizing Proxmox v9 Affinity Rules when using a cluster based Proxmox architecture.
External Directory Integrations
One of our most requested features to date has been the ability to use your existing user directories with MultiPortal. The next release includes support for both SAML and LDAP(s) protocols, with an intuitive interface that allows staff members, resellers and end customers to authenticate via your existing directory. Both of these methods will allow you to map your existing attributes from your directory to similar equivalents inside of MultiPortal, including the implementation of JIT (Just in Time) authentication so accounts can be created within MultiPortal automatically.
Changes to MultiPortal Community Edition
We are incredibly thankful to everyone who has downloaded and tried out the Community Edition of MultiPortal over the past year. We’re making changes to the Community Edition to help us dedicate the right resources for future features and fixes. With version 1.1.0, the following limitations will be applied to MultiPortal Community Edition Licenses:
- Maximum limits on number of resellers allowed (2)
- Each Reseller has maximum limit on number of tenants allowed (5)
- Each Tenant has a maximum number of concurrent VDCs (1)
- Each VDC can support a maximum of (10) concurrent virtual machines
- These limits do not apply to paid Standard or Premium editions of MultiPortal. Please reach out to us if you are interested in talking about upgrading.
Improved Two-Factor Authentication Support
While external directories can provide two-factor authentication, this release also introduces native support for accounts using the local user database. This is a TOTP (time-based one-time password) authentication method that will allow you, and your customers, to use popular authentication applications such as Authy and Google Authenticator to authenticate securely into your MultiPortal application.
Updated CloudInit Usability
CloudInit disks in Proxmox give tenants the ability to automatically configure internal settings within the VM, to make their resources instantly usable. In version 1.0.9 we added initial support for CloudInit, and version 1.1.0 improves this further by adding the ability to configure network interfaces automatically.
Finally, we’ve made a huge number of minor improvements and bug fixes in this upcoming release as well. While a full changelog will be provided once version 1.1.0 is public, here is a sneak peek of some of them that are already confirmed:
- Massively improved VM loading times and pagination
- Optimized importing of VMs from Proxmox
- Additional and improved API methods (Tenant creation improvements, VM creation from template, and much more)
- Added the ability to use Proxmox datastores in multiple MultiPortal Storage Policies
- Updated Dashboard screen with additional information and improved aesthetics
- Improved updating of Allocation VDCs usage statistics
- And many miscellaneous user experience and error fixes
Stay tuned for the official release date announcement, coming soon.
We’ve got a new update for you v1.0.13, along with some manual steps for anyone who installed MultiPortal starting from v1.0.12, plus an update on Proxmox V9 support.
MultiPortal and Proxmox V9 Support
We have been testing the new release of Proxmox V9 and currently have identified issues with the HA functionality within the latest version, due to Proxmox removing the HA Groups in favour of Affinity Rules.
While general functionality remains intact, we recommend not upgrading to Proxmox VE 9 until MultiPortal is updated to support both Proxmox VE 8 Groups and Proxmox VE 9 Affinity Rules moving forward.
We are currently working on adding the ability for MultiPortal to handle the new Affinity Rules in the following update.
For information regarding MultiPortal and the supported versions, please refer to Proxmox Support Status | MultiPortal
Important for First-Time Updaters
If you’ve never updated MultiPortal before, you may hit an error when going to v1.0.13. This is due to a configuration issue introduced by the v1.0.12 installation script.
To prevent issues, please run the following command inside your MultiPortal instance before updating. This ensures your system can properly fetch the update:
“`
sudo sed -i ‘s#fetch = +refs/heads/.*:refs/remotes/origin/.*#fetch = +refs/heads/*:refs/remotes/origin/*#’ .git/config
“`
If you’re not sure whether you’ve updated via the built-in updater before, you can safely run this command.
For those looking forward to the next update here’s what’s included:
Version 1.0.13 Update
Highlights
- New: Running tasks monitoring
- Early access: Security Groups
- Internal Network Fixes
- Expanded API usage + VDC improvements
- 10+ bug fixes including SSO, VLAN handling, and dark mode
Features
- Running tasks now added where items run in the background
- Currently supported functions: Create Virtual Machine, Deletion of Tenants and VDCs, More functions to be added in future releases
- Security Groups (early access) Initial support for proxmox Firewall Rules
- Allows you to set firewall rules
- Feature is disabled by default and can be enabled via the Update Tenant form for Tenant users to see
Improvements
- Added NIC model filtering at the Data Center Level
- Updated the VM Update process so only the changes items are pushed to Proxmox
- Resolved an issue where sessions weren’t passed correctly when trying to connect to a console instance when using MultiPortal and Proxmox in HA mode.
- Removed Obsolete error log exporter
- Fixed HA error message when trying to sync
- Fixed error handling for storage sync when a Proxmox data center is unavailable
Bug Fixes:
- Fixed internal network failing to validate zone when attempting to create a new internal network
- Resolved issue where VLAN Starting Range was incorrectly applied when creating Internal Networks (Bug 10)
- Fixed issue where Internal Network VLAN IDs were incrementing each time the network was saved
- Corrected issue with SSO values not saving
- Usernames can now include hyphens
- Fixed Darkmode not saving correctly
- Fixed issue for storage not displaying when your Fully Qualified Domain Name contains the word “console”
- Fixed Delete All function for Tenant not completing
- Filtering on virtual machine import fixed.
- Improved delete network validation when entering the network name
- Improved Proxmox Storage prioritization based on usage
- Fixed database constraint when trying to delete a data center
- Fixed Imported template assigned to VDC when marked as public (Bug 11)
- Stopped MAC addresses updating every time you saved a VM
- Improved importing of Virtual Machine filtering
API Improvements
- API now includes Virtual Machine status on GET requests
- VDC API updated: returns both raw byte values and formatted data (GB/TB), with validation fixes for consistency
- User status now able to be set via the API, by default it is active
Known Issues
- When re-importing a template the hash id is duplicated (Bug 12)
VLAN help tooltip shows null instead of displaying the available VLANs (Bug 13)
How to Update?
You can update MultiPortal by navigating to Settings > Check for Update.
As always, we appreciate your feedback and support! If you have any questions, reach out via support@multiportal.io or use the internal feedback tool.
Thanks for being part of the MultiPortal community!
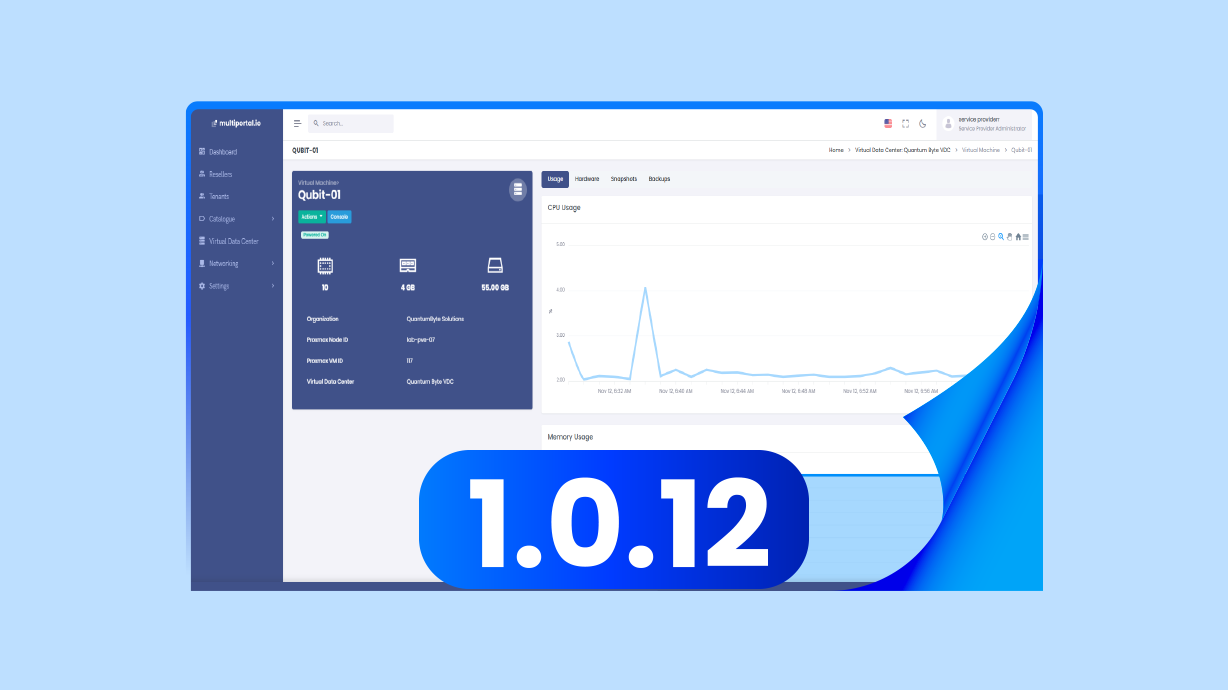
Version 1.0.12 is now live! This release includes fixes from last Friday’s update as well as resolutions for previously reported issues. We’ve focused on improving permissions, backup reliability, session handling, and error visibility. Here’s what’s included:
Improvements
- Improved usage data syncing
- VM Deletion Now Preserves Historical Usage
- Enhanced gathering of usage data
- Updated error log export to include backup-sync.log
- Added 1 Day filter option to Error Logs for improved troubleshooting
Bug Fixes:
- Tenant Administrator permission to create new Virtual Machines
- Fixed issue where graphs were not loading for some virtual machines
- Fixed error when updating VMs using FQDN (Fully Qualified Domain Names)
- Fixed issue where Service Providers could see backups from different VDCs
- Fixed Backup Cron not consistently saving backups
- Fixed login timeout incorrectly set to 30 days
- Resolved inconsistencies in the display of VM action controls for read-only users.
- Addressed edge cases involving role-based impersonation where permission scoping was not fully respected.
API Improvements
- Virtual Data Center create and update
- Improved querying and exporting of usage data via the API
Session Management Updates
- If “Remember Me” is selected: session lasts 5 days
- Default session length: 24 hours
- Both values can be configured in the environment file:
- LOGIN_SESSION_TIMEOUT_DAYS (Default: 5 days)
- LOGIN_SESSION_LENGTH (Default: 24 hours)
How to Update?
You can update MultiPortal by navigating to Settings > Check for Update.
As always, we appreciate your feedback and support! If you have any questions, reach out via support@multiportal.io or use the internal feedback tool.
Thanks for being part of the MultiPortal community!

We’re excited to share some important updates from the team at MultiPortal.
Over the past few months, we’ve been scaling fast, growing our user base, expanding our platform, and delivering the features our community has been asking for.
Now, we’re rolling out our most significant release yet, and we want you to be the first to know what’s new, what’s changing, and what’s coming next.
The Standard Plans are getting a major upgrade
If you’re already on the Standard Plan, you’ll soon be getting access to a more powerful set of features designed to support production-grade workloads:
🔒 2FA, SAML, and LDAP/LDAPS authentication options
📝 Centralised audit logging to track user activity
🛡️ Security groups for VM network access control
🚀 Interactive VM migration between virtual data centres
These updates are all about giving you more control, flexibility, and scale, without complexity.
Are you on our Community Edition? It’s time to level up
Our free Community edition has been a great starting point for hundreds of users. But, it has its limits; 4 CPU sockets, single environment, and no custom branding, just to name a few.
If you’re starting to serve customers or scale your cloud operations, this is the time to move to Standard.
With Standard, you unlock:
✅Support for multiple Proxmox environments
✅Full white-labelling and custom branding
✅Business-grade support when it matters
✅All the latest features listed above
Starting 1st July 2025, the price for new Standard customers will increase from $25 USD to $30 USD per CPU Socket per month, with annual, 2-year, and 3-year term options also available.
If you upgrade before that date, you’ll secure the current $25 USD rate, no changes for the lifetime of your plan.
Introducing the Premium Plan — now live
We’re also thrilled to officially launch the MultiPortal Premium Plan.
This is built for teams operating at scale, with advanced infrastructure, automation requirements, and complex tenant management.
Premium includes everything in Standard, plus:
🔁 API-first provisioning and tenant orchestration
⚙️ Early access to roadmap features
🧾 Hands-on onboarding and deployment planning
📞 SLA-backed support with priority access to our team
🧩 Multi-cluster, multi-region tenancy (Coming Soon)
📡 Federated SSO and external identity support (Coming Soon)
Premium pricing is US$50 per CPU Socket per month, with annual, 2-year, and 3-year term options also available, and it’s available now.
If you’re running large-scale operations or building your next-generation cloud platform, Enterprise is designed for you.
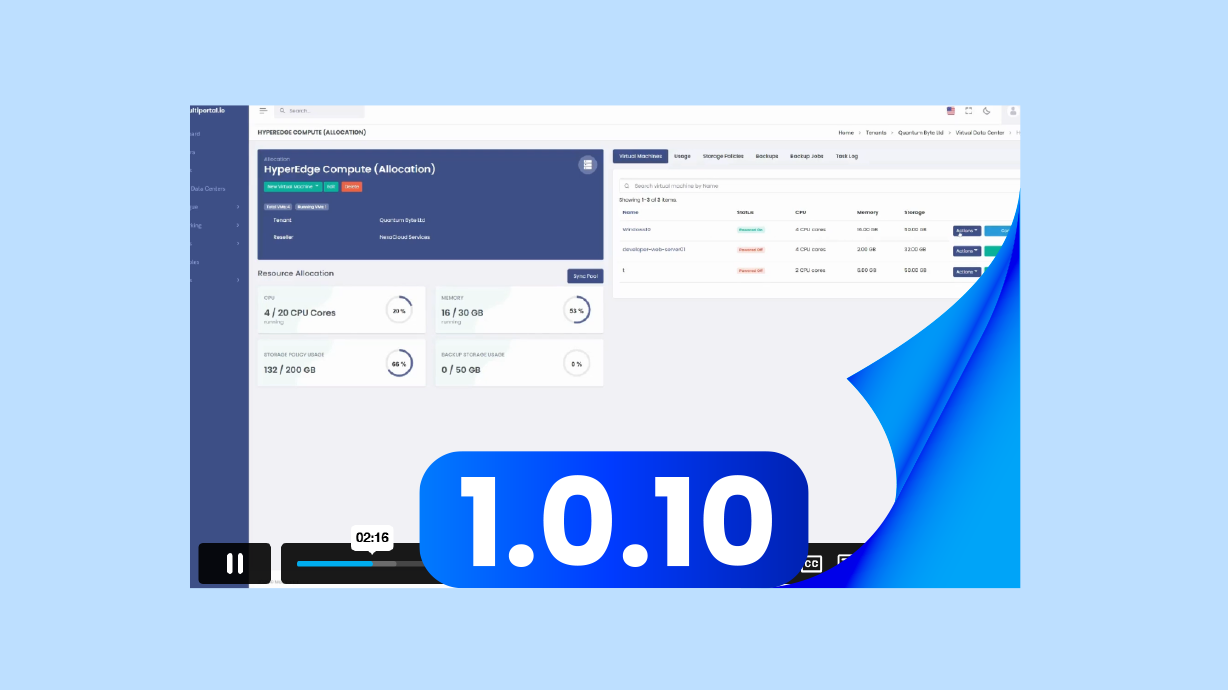
We’ve got another release ready with a bunch of improvements and a few bug fixes. This one includes adding VLAN-aware network support, new backup management tools for Service Providers, some UI tweaks, and more control when setting up VMs.
Improvements
- Added support for VLAN-aware external networks, enabling SPs to restrict allowed VLANs and permit authorized VDC users to assign VLANs to VMs during creation and editing.
- Added detection of EVPN type for External Networks
- Introduced Backup Management for Service Providers to view all backups when using Proxmox Backup Server
- Updated Backup Interface for improved usability
- Added caching option for virtual disks per data center
- Refreshed ‘Create from Template’ UI for better clarity
- Moved ‘Reset Password’ functionality to the Profile page
- Enabled setting of Virtual Machine boot order
- Updated usage export to include allocated storage values
- Cloudinit fields are now optional when creating from templates
Bug Fixes
- Fixed incorrect terminology for Blocked IPs for Login Attempts from “IP Management”
- Fixed incorrect error message when creating VM Templates
- Resolved error when setting Read-Write limits with no values provided
Upcoming
As mentioned in our Discord, we’re releasing the WHMCS module soon and are looking for early testers! If you’re keen to try it out, let us know by sending us a message on Reddit or joining our Discord. We’re aiming to have it ready for the first users by mid-June. This module will be open source.
We’re on Discord!
MultiPortal is now on Discord! Get support, resources, and join in on community events — come hang out with us! Click here to join our community.
How to Update?
You can update MultiPortal by navigating to Settings > Check for Update.
As always, we appreciate your feedback and support! If you have any questions, reach out via support@multiportal.io or use the internal feedback tool.
Thanks for being part of the MultiPortal community!

We’ve got a fresh update packed with improvements and new features!
What’s New?
- New External Network Wizard – Service Providers can now import external networks instead of MultiPortal creating them. This ensures better flexibility and compatibility with different setups.
- Brute Force Prevention – Enhanced login security to protect against unauthorized access.
Improvements
- Streamlined how Service Providers assign roles to Resellers and Tenants.
- Fixed an issue where the Console server wouldn’t handle invalid certificates in some instances.
- Added a warning when attempting to impersonate a Reseller or Tenant while Maintenance Mode is enabled.
Bug Fixes
- Resolved an issue allowing duplicate Role names across Tenancies.
- Fixed a bug where VM creation from a template didn’t allow hyphens in names.
- Addressed errors when creating a user from a Service Provider account.
- Fixed duplicate dates appearing in Usage Reporting when no timezone was set.
- Resolved issues when importing VMs where storage was a floating value.
- Fixed handling of hyphenated names when updating a Virtual Machine.
Known Issues
Detaching a Hard Disk from MultiPortal deletes the disk in Proxmox.
We’re actively working on a solution for this!
We’re on Discord!
MultiPortal is now on Discord! Get support, resources, and join in on community events — come hang out with us! Click here to join our community.
How to Update?
You can update MultiPortal by navigating to Settings > Check for Update.
As always, we appreciate your feedback and support! If you have any questions, reach out via support@multiportal.io or use the internal feedback tool.
Thanks for being part of the MultiPortal community!