Creating a Proxmox Template for use in MultiPortal

Published On: November 19, 2025 | Categories:  Updates

When setting up MultiPortal for your tenants, it’s often a good idea to pre-create templates for popular operating systems and applications to speed up provisioning and deployment. 


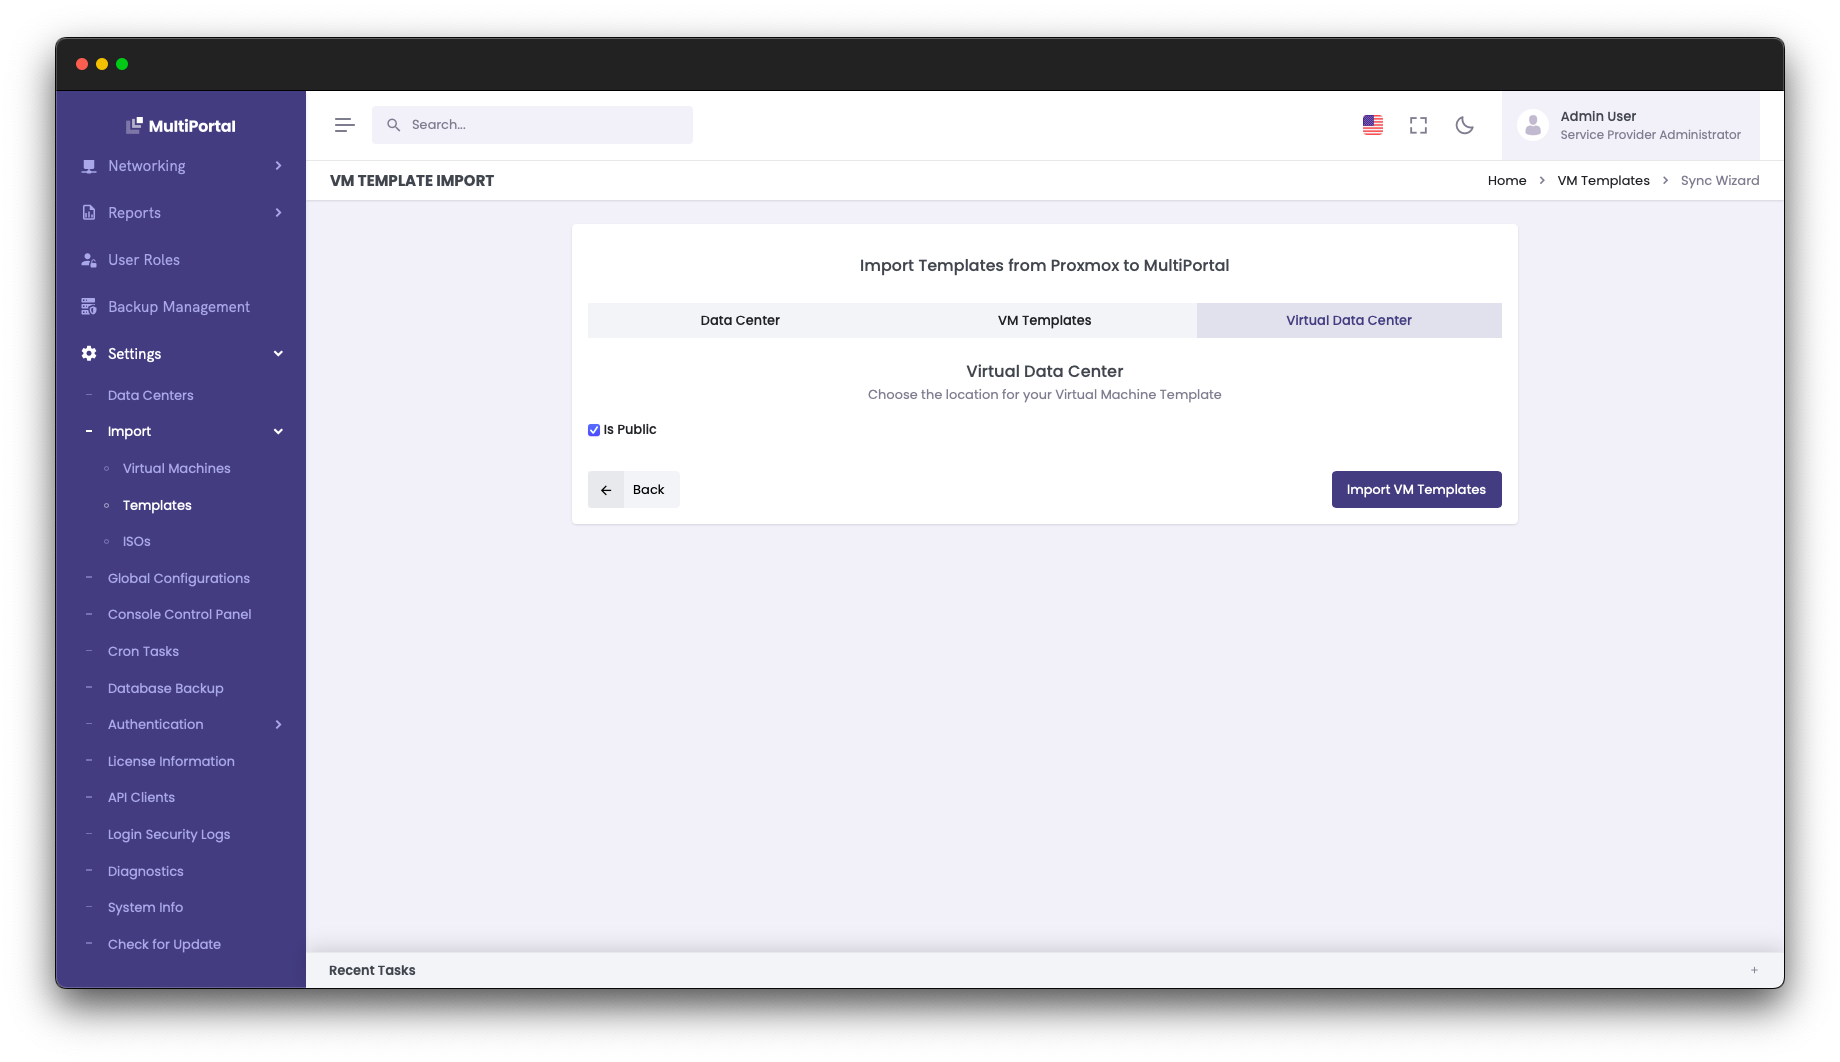
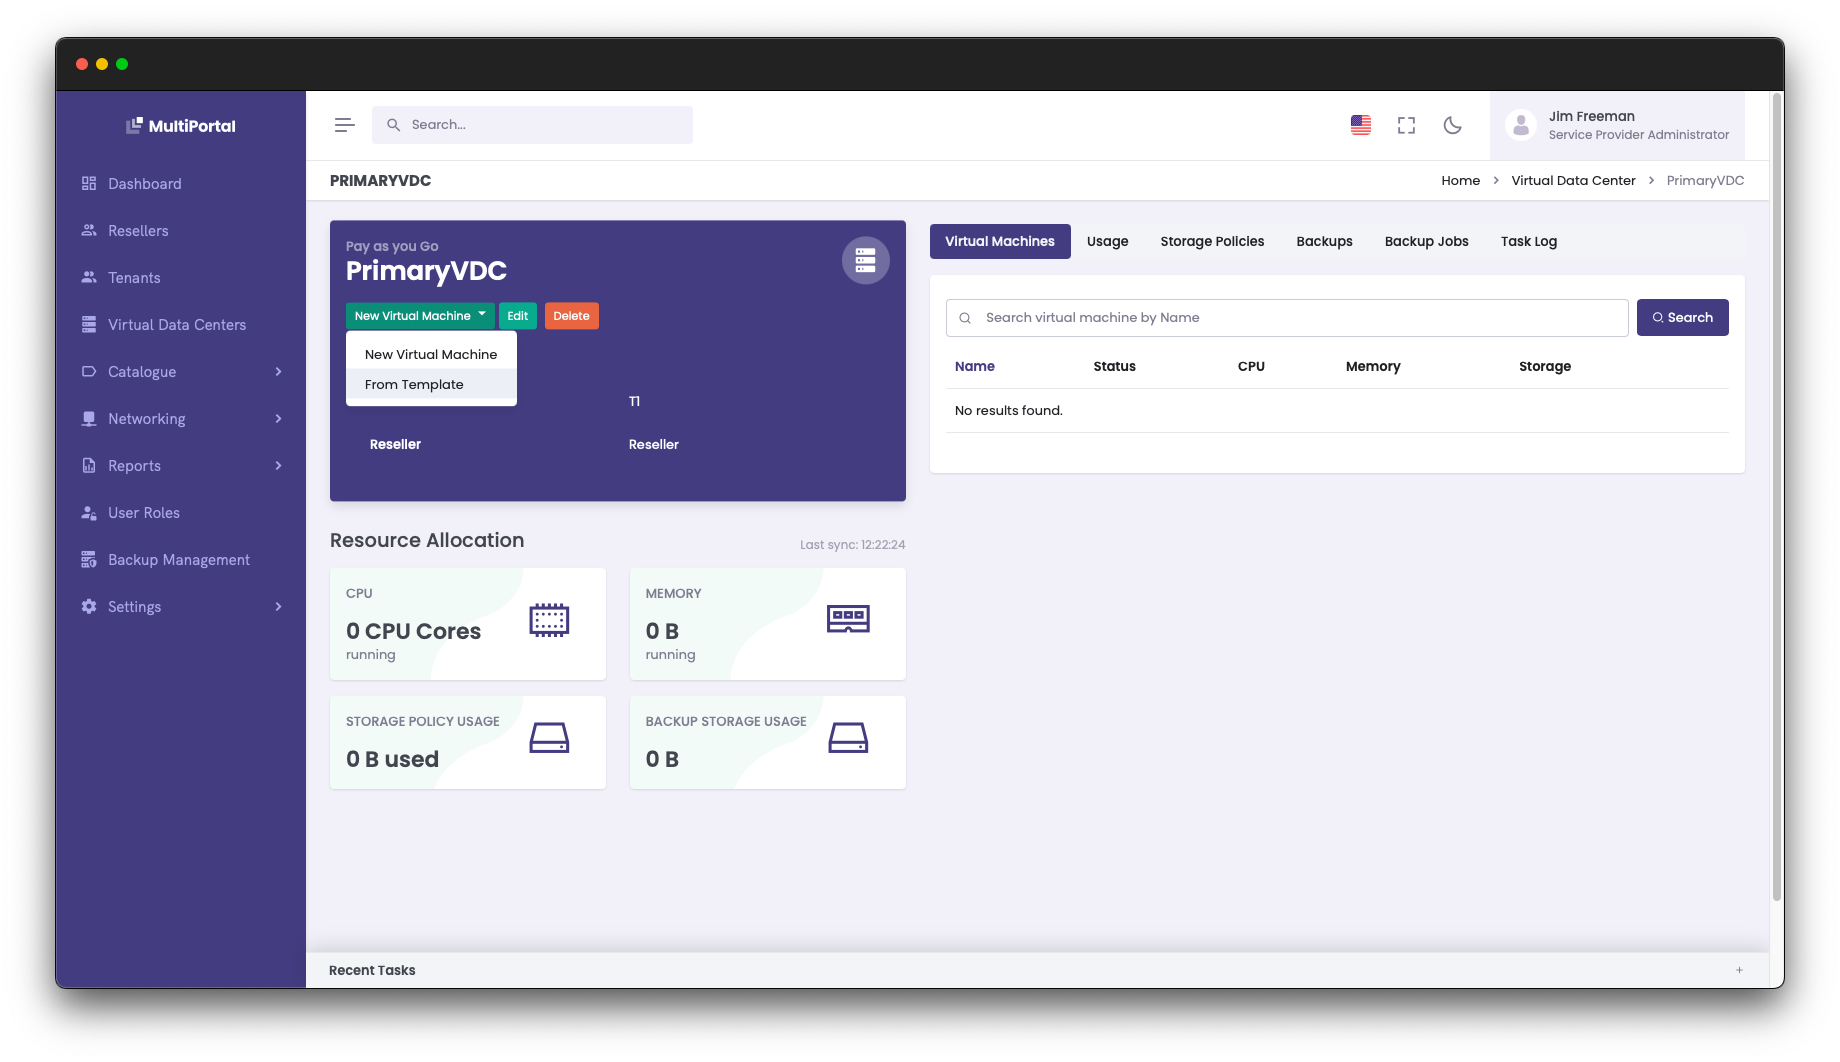
Within a MultiPortal Virtual Data Center, your end users have the ability to build VMs from scratch or deploy from the aforementioned template. In this blog post, I will show you how you can configure this in Proxmox so it can be imported into MultiPortal. This, combined with our improved CloudInit support, creates a great experience for your end users.


To get started, we are going to use a pre-created Cloud Image from Ubuntu that can be found on Ubuntu’s Cloud Images repository. Many popular operating systems have their own repositories for such images, including Alma Linux, Debian, Oracle Linux and many more. Make sure you download your desired version and correct architecture (amd64, arm64, etc.) for your environment.


I will be downloading the latest LTS version of Ubuntu as of this document being written, Ubuntu 24.04 LTS (Noble Numbat). Download this to one of your Proxmox nodes:


root@proxmox20:~# wget https://cloud-images.ubuntu.com/noble/current/noble-server-cloudimg-amd64.img


As the default download size is quite small, resize this to an appropriate base size for your own environment (10GB in my example):


root@proxmox20:~# qemu-img resize noble-server-cloudimg-amd64.img 10G


Now we have our disk image downloaded, we will create a VM in Proxmox that we will eventually convert to a template.

qm create 9999 --name "ubuntu24-template" --ostype l26 --memory 2048 --agent 1 --bios ovmf --machine q35 --scsihw virtio-scsi-single --efidisk0 <DataStore_Name>:0,format=qcow2 --sockets 1 --cores 1


Many aspects of this can be changed based on your own requirements, for example the VM specification, machine/BIOS types. Check out the Proxmox documentation for full details. Also, be sure to replace <DataStore_Name> with the name of a datastore in your own environment that can be used for disk image storage.


Note: All of these examples will be using file-based (qcow2) images – if you are using block-based storage (eg. LVM Thin, which is the Proxmox local storage default), you may need to change the format to “raw” instead.


Next, we will import our previously downloaded Cloud Image from Ubuntu, and assign it to the virtual machine:


qm set 9999 --scsi0 <DataStore_Name>:0,import-from=/<PATH_TO>/noble-server-cloudimg-amd64.img,format=qcow2,iothread=1


Remember to replace <DataStore_Name> with the name of a datastore in your own environment that can be used for disk image storage and the correct path to the downloaded Cloud Image.


Now we will set our newly imported disk image to be the primary boot disk:


qm set 9999 --boot order=scsi0


We will now add a CloudInit disk to allow us to define our own run-once script, as well as allowing MultiPortal to automatically set additional configurations, such as networks, SSH keys and authentication credentials.


qm set 9999 --scsi1 <DataStore_Name>:cloudinit


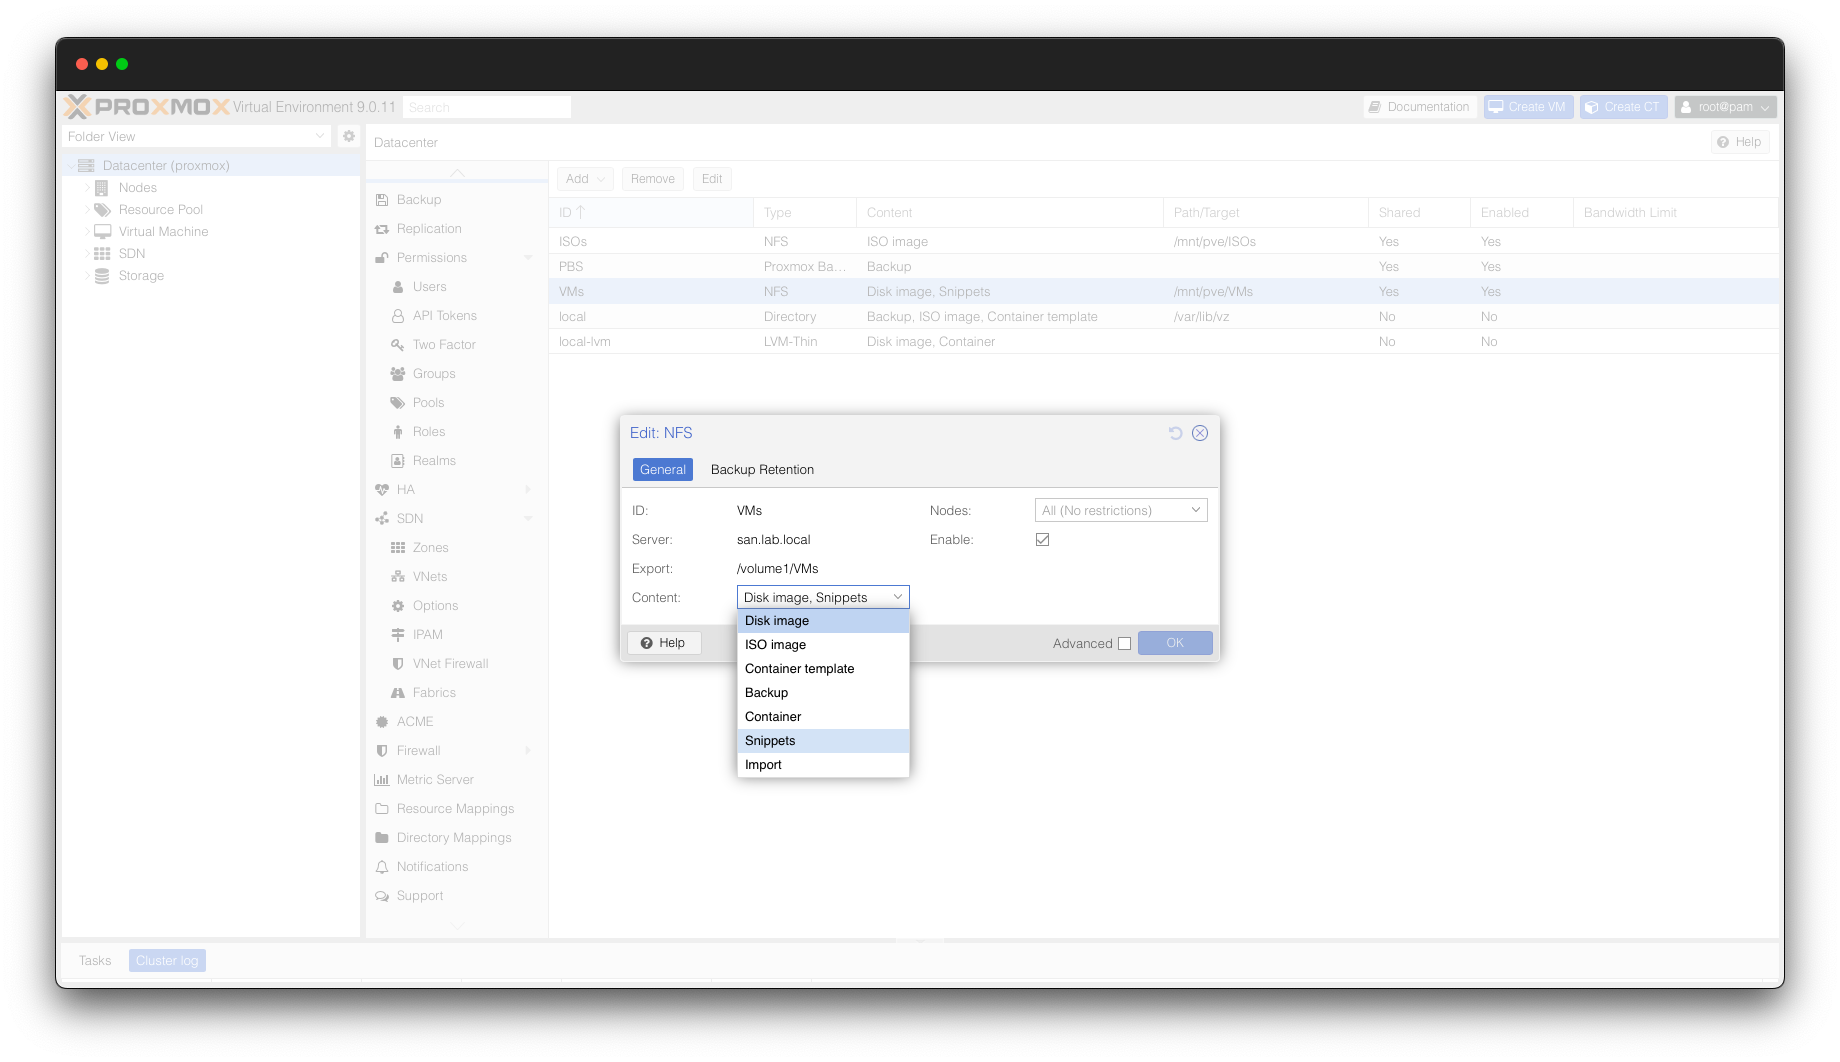
Next, we will ensure we have a Datastore that is configured for snippets – this could be the same shared or local datastore that you are using for your virtual machine storage. In Proxmox, go to your DataCenter, click “Storage” and ensure there is a Datastore that supports the “snippets” content type.

Once there is an available snippets datastore, browse to it via the CLI – if it is a local datastore it should be located at: 


/var/lib/vz/snippets

If it is on a remote datastore (eg. NFS), it should be located at:


/mnt/pve/<DataStore_Name>/snippets


Create a file in this directory to be associated with the template we are creating, for example:


vim /mnt/pve/<DataStore_Name>/snippets/ubuntu24.yaml


In this file, we will define any custom items that will be performed after the initial configuration. In this example, it will install the qemu guest agent and set it to automatically start on VM boot.


#cloud-config

runcmd:

    - apt install -y qemu-guest-agent

    - systemctl enable qemu-guest-agent --now


You can add your own commands based on your specific use case – you can find more information around the format of this yaml file on the official CloudInit documentation.


Now that this has been saved, we can apply this to the virtual machine:


qm set 9999 --cicustom "vendor=<DataStore_Name>:snippets/ubuntu24.yaml"


The remaining CloudInit items will be set during the provisioning process inside of MultiPortal, so we can now convert this VM to a template and prepare to import it.


qm template 9999


Now that it is presented as a template in Proxmox, we can import it into MultiPortal – it can either be presented to specific VDCs, or made public so any tenants that have access to this Proxmox Datacenter can deploy it.


As a Service Provider Administrator user, browse to Settings > Import > Templates. Select your Proxmox Datacenter and choose your recently created template.

Assign it to a specific Tenant and Virtual Data Center, or make it Public and then click “Import VM Templates”.

Now that the template is present in MultiPortal, we can browse to a Virtual Data Center, click the “New Virtual Machine” button and then select “From Template”.

Run through the VM deployment wizard by selecting a VM name, choosing an operating system type and selecting your newly created VM template.


In the last step of the wizard, select the storage that you wish the VM to be deployed on, and MultiPortal then allows you to create a username, password and assign an SSH key to this new VM. You can also assign a network interface, assign a network and either set a static IP or set the NIC to assign an IP address via DHCP.

After a few moments, the clone process will be complete and you will be able to power on the virtual machine and manage it via the credentials that were set during the VM provisioning wizard.


Setting up a solid library of templates is a simple way to give your tenants a faster, cleaner provisioning experience. Once you’ve imported your templates into MultiPortal, you’ll have repeatable, reliable deployments ready to go whenever you need them.


If you’re already using MultiPortal, jump into your portal and try creating a template for your environment. If you haven’t had a chance to try MultiPortal yet, you can take it for a spin with our 30-day free trial and see how easy it is to manage Proxmox at scale.

Related Articles

Major MultiPortal Update: New Standard & Premium Plans Launching July 2025

We’re excited to share some important updates from the team at MultiPortal. Over the past few months, we’ve been scaling fast, growing our user base, expanding our platform, and delivering the features our community has been asking for. Now, we’re rolling out our most significant release yet, and we want you to be the first […]

Published On: June 17, 2025 | Categories:  Updates

[UPDATE] MultiPortal Release 1.0.13

We’ve got a new update for you v1.0.13, along with some manual steps for anyone who installed MultiPortal starting from v1.0.12, plus an update on Proxmox V9 support.   MultiPortal and Proxmox V9 Support   We have been testing the new release of Proxmox V9 and currently have identified issues with the HA functionality within […]

Published On: August 22, 2025 | Categories:  Updates

[HOTFIX] MultiPortal 0.8.1 – Bug Fixes & Improvements

We’ve just rolled out a hotfix to address several issues some of our beta users raised and improve the overall experience. However, in the previous release, 0.8.0, we added some extra security checks to utilise the console, this broke the internal update function from within MultiPortal. This means you must run the update manually from […]

Published On: November 21, 2024 | Categories:  Updates