Creating a Proxmox Template for use in MultiPortal
Learn how to create Proxmox VM templates using Ubuntu cloud images and CloudInit for faster provisioning in MultiPortal.
When setting up MultiPortal for your tenants, it’s often a good idea to pre-create templates for popular operating systems and applications to speed up provisioning and deployment.
This guide demonstrates how to leverage Ubuntu’s cloud images alongside CloudInit configuration to streamline deployment processes for end users.
Obtaining Cloud Images
The first step is to download a pre-built cloud image. Official repositories like Ubuntu Cloud Images provide ready-to-use images. Alternatives include Alma Linux, Debian, and Oracle Linux.
For this guide, we’ll use Ubuntu 24.04 LTS:
wget https://cloud-images.ubuntu.com/noble/current/noble-server-cloudimg-amd64.img
VM Creation Process
Step 1 - Resize the Disk Image
Expand the cloud image to your desired size (10GB in this example):
qemu-img resize noble-server-cloudimg-amd64.img 10G
Step 2 - Create the VM
Create a new Proxmox virtual machine with the required specifications:
qm create 9999 --name "ubuntu24-template" --ostype l26 --memory 2048 --agent 1 --bios ovmf --machine q35 --scsihw virtio-scsi-single --efidisk0 <DataStore_Name>:0,format=qcow2 --sockets 1 --cores 1
Step 3 - Import the Cloud Image
Import the cloud image into the newly created VM and designate it as the primary boot device:
qm set 9999 --scsi0 <DataStore_Name>:0,import-from=/<PATH_TO>/noble-server-cloudimg-amd64.img,format=qcow2,iothread=1
Step 4 - Set the Boot Disk
Configure the VM to boot from the imported disk:
qm set 9999 --boot order=scsi0
CloudInit Setup
Step 5 - Add CloudInit Disk
Add a CloudInit disk for configuration automation:
qm set 9999 --scsi1 <DataStore_Name>:cloudinit
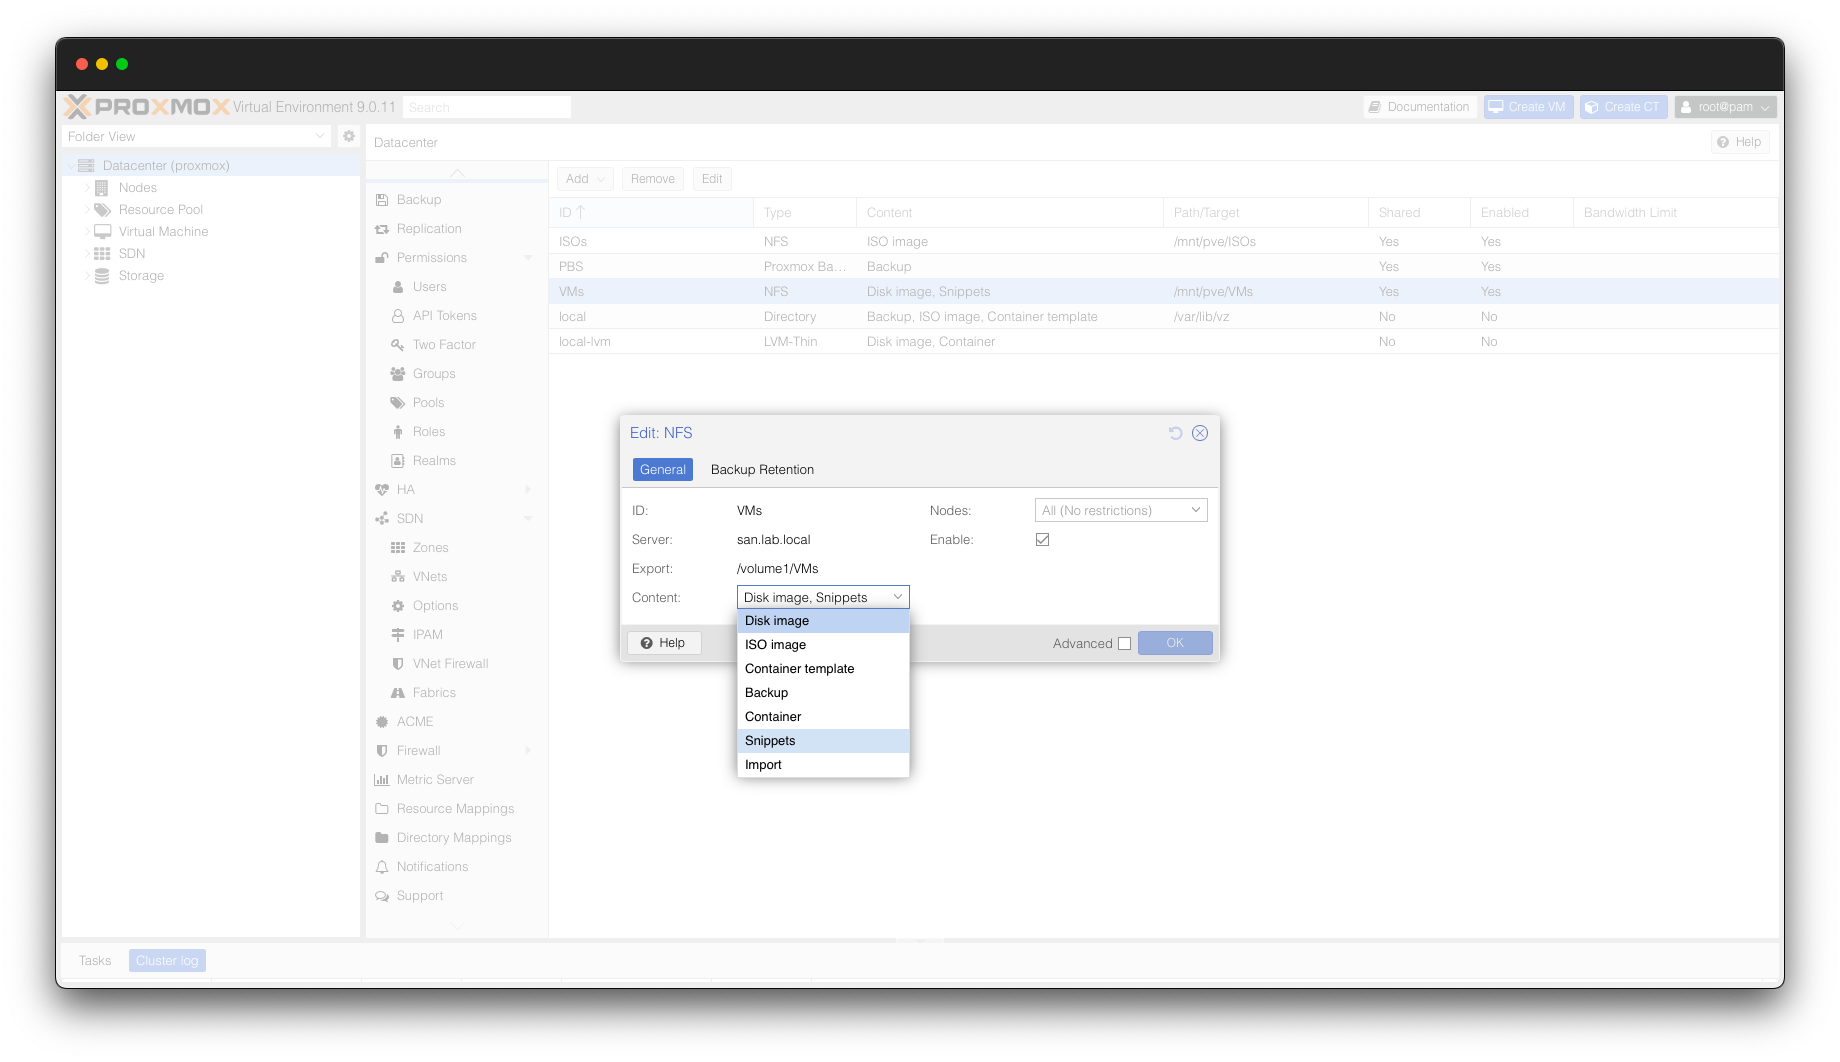
Step 6 - Create the Snippet File
Create a YAML configuration file at /mnt/pve/<DataStore_Name>/snippets/ubuntu24.yaml:
#cloud-config

runcmd:
    - apt install -y qemu-guest-agent
    - systemctl enable qemu-guest-agent --now
This script installs the QEMU guest agent and enables its automatic startup, which is essential for proper VM management in MultiPortal.
Step 7 - Apply CloudInit Configuration
Apply the CloudInit configuration to the VM:
qm set 9999 --cicustom "vendor=<DataStore_Name>:snippets/ubuntu24.yaml"
Template Conversion and Import
Step 8 - Convert to Template
Convert the VM to a template in Proxmox:
qm template 9999
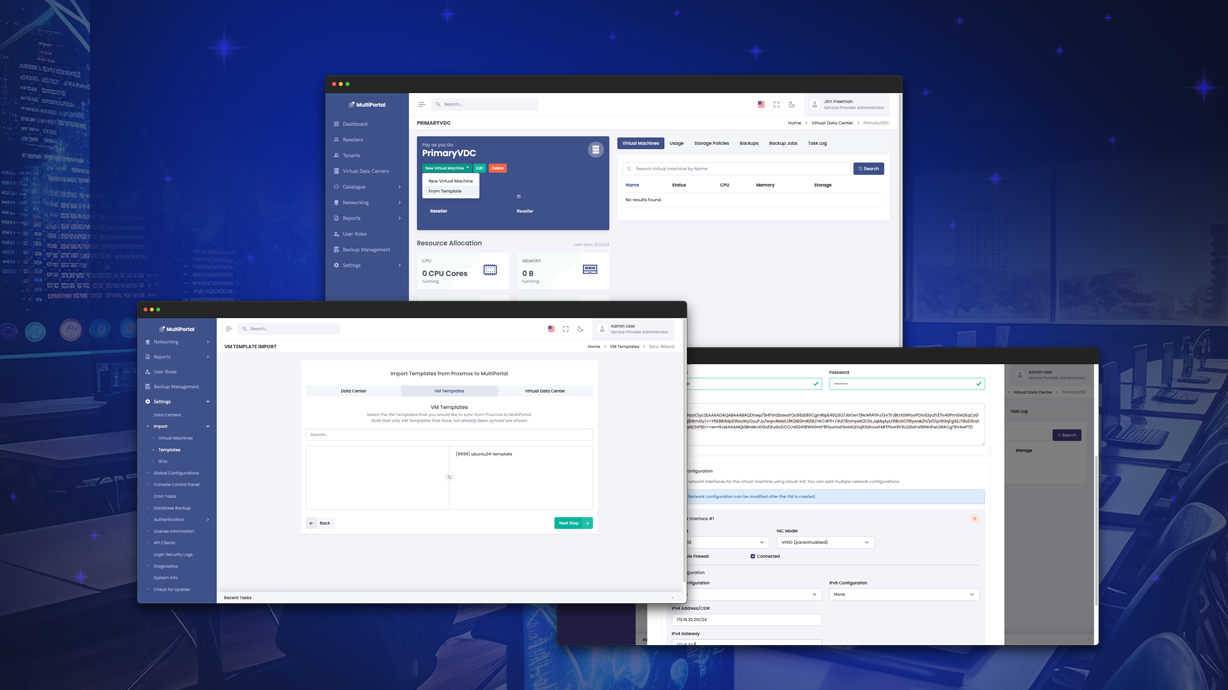
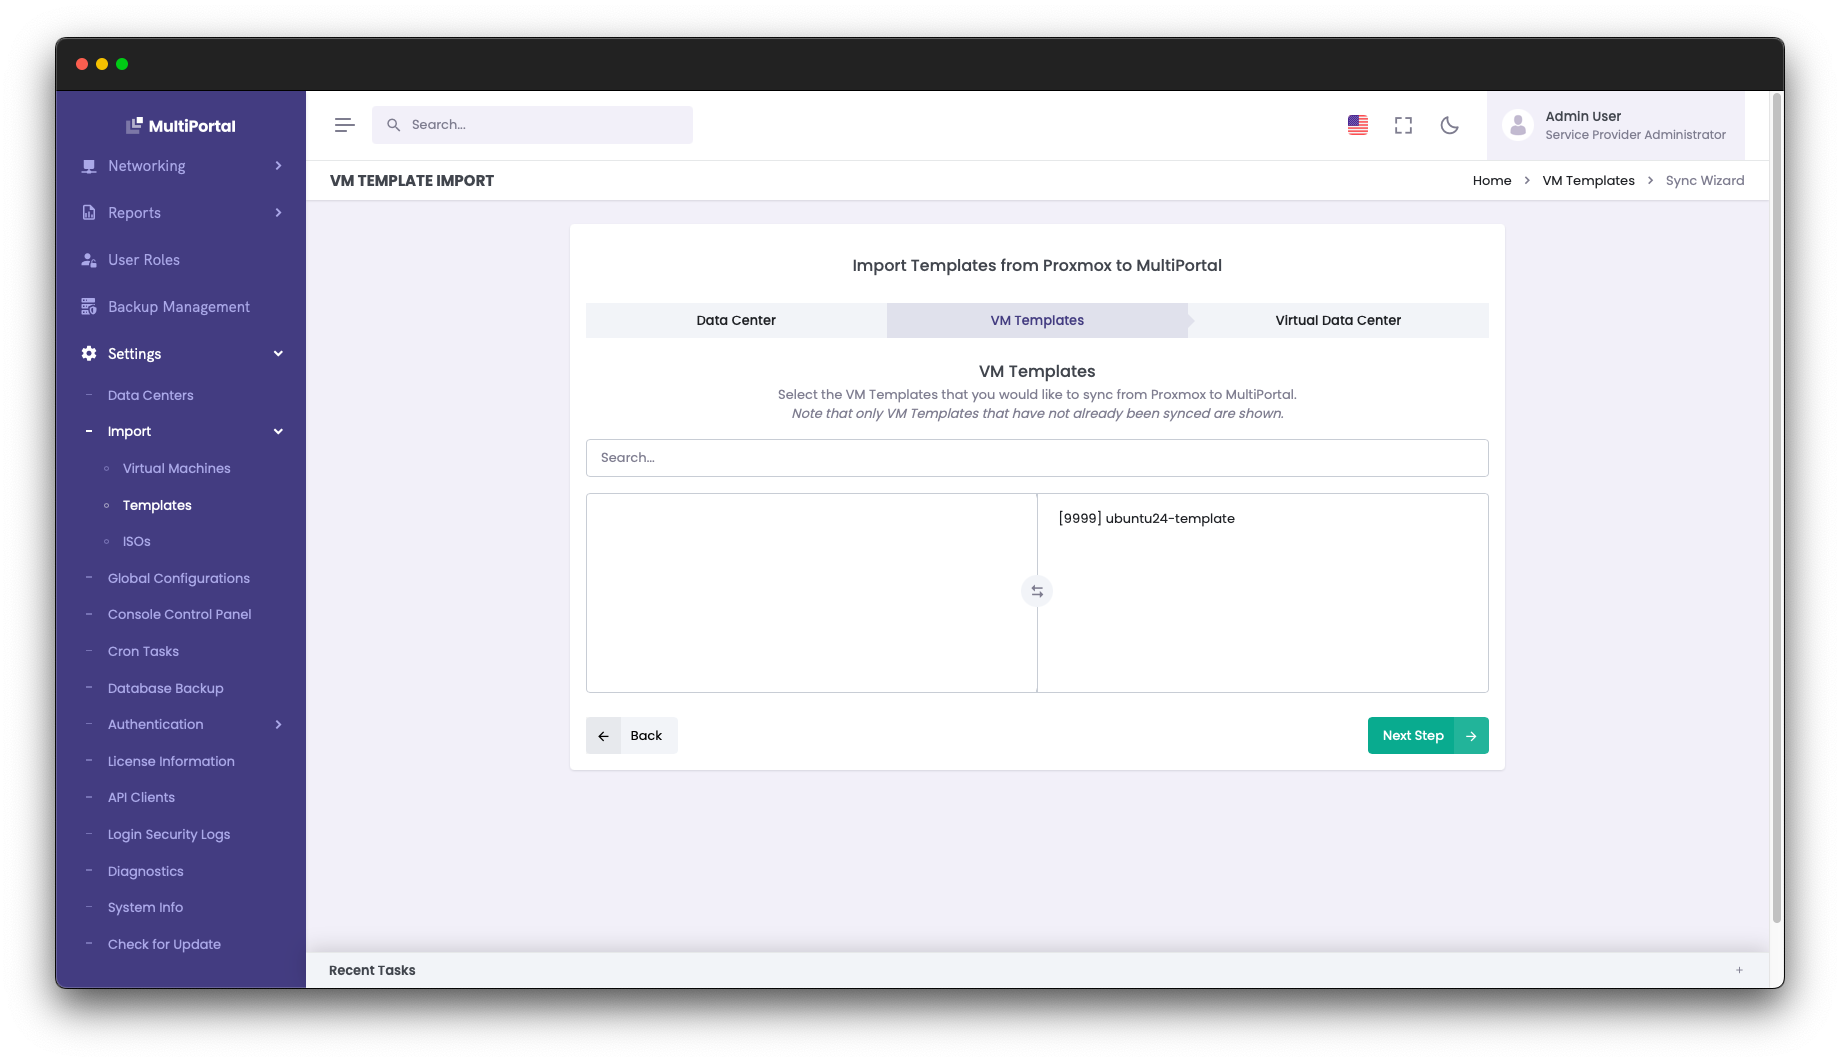
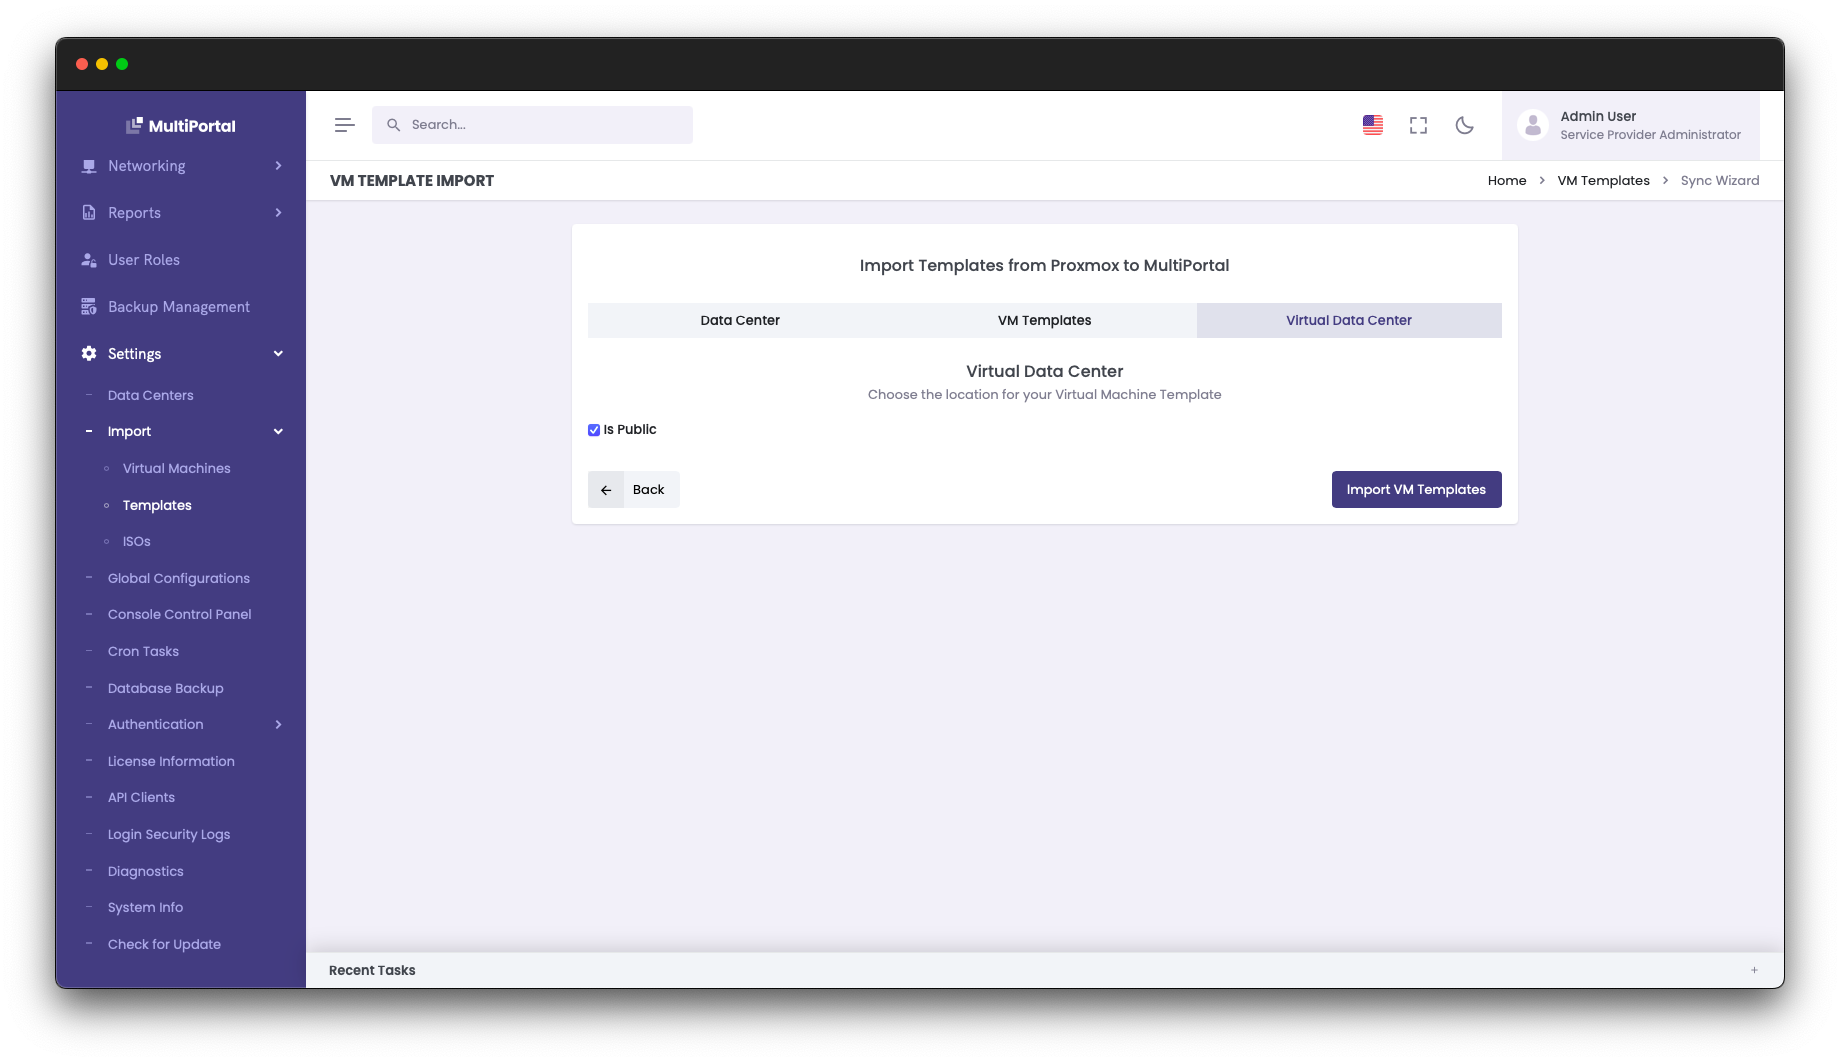
Step 9 - Import into MultiPortal
Navigate to Settings > Import > Templates in the MultiPortal administrator interface to import the newly created template.
Once imported, you can assign the template to specific tenants or make it available globally.
Deployment Through MultiPortal
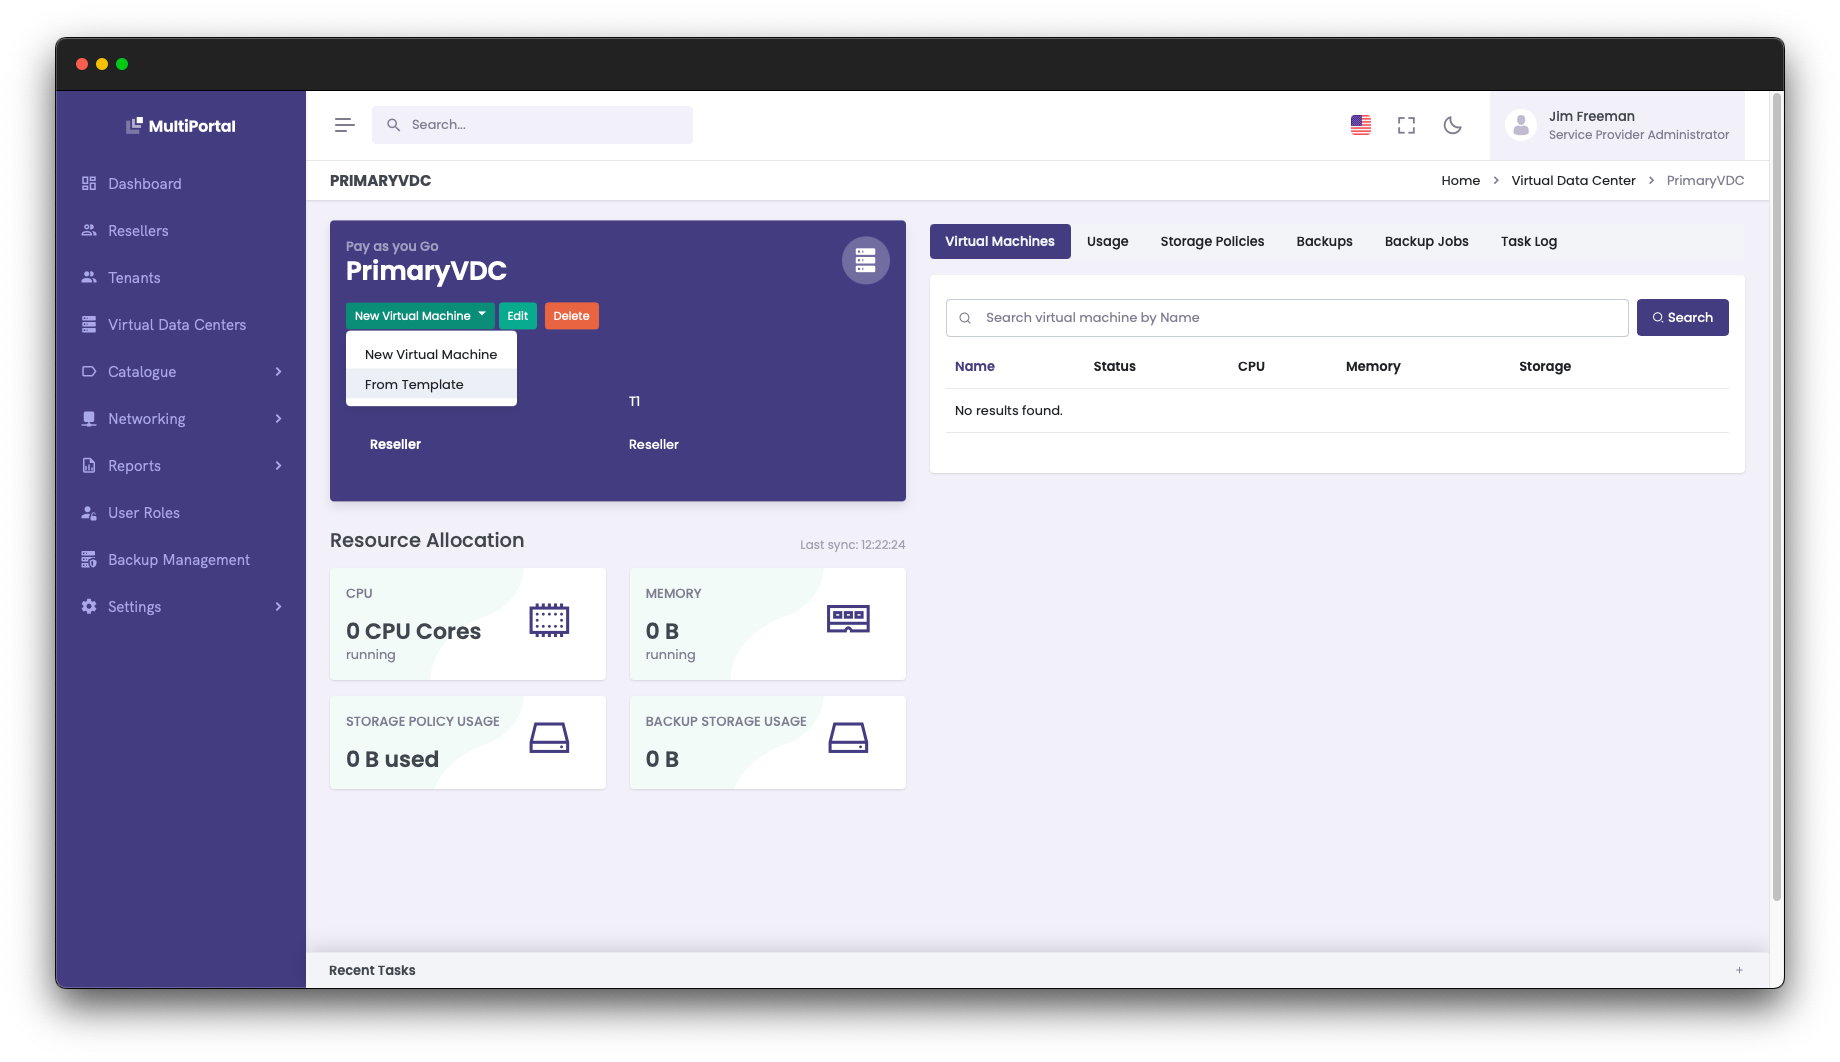
Users can now launch VMs from templates by selecting New Virtual Machine and choosing From Template.
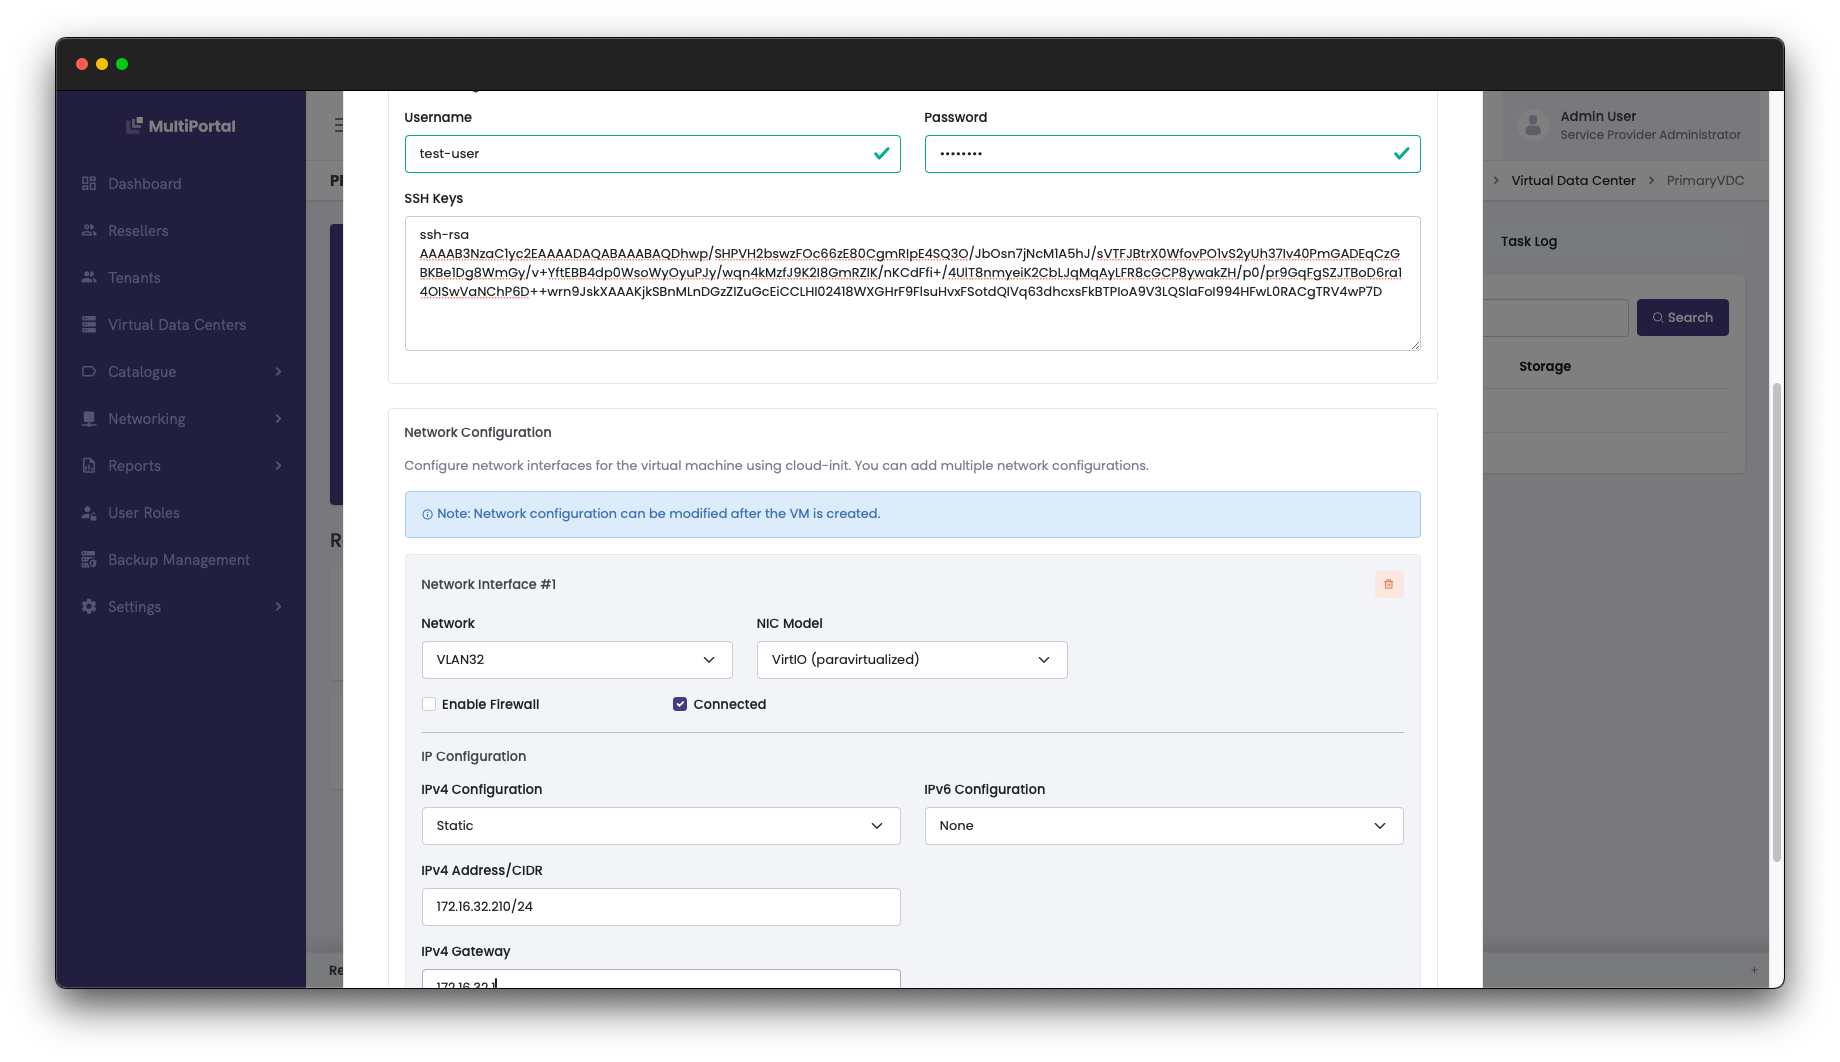
The deployment wizard allows configuration of credentials, SSH keys, and network settings during provisioning.
Setting up a solid library of templates is a simple way to give your tenants a faster, cleaner provisioning experience. For more information on template management, see the MultiPortal Documentation.