
Importing VMs from VMware to MultiPortal
Step-by-step guide to migrate virtual machines from VMware ESXi to Proxmox, then import them into MultiPortal for multi-tenant management.

Following Broadcom’s 2023 acquisition of VMware, many organizations have been seeking alternatives for their virtualization needs. Proxmox has emerged as a compelling open-source hypervisor choice, and MultiPortal serves as the multi-tenant management layer above it—similar to how Cloud Director operates above vCenter.
One of the biggest concerns when considering a platform switch is migration. MultiPortal helps take that fear out of the equation. Its built-in import tool lets you pull VMs straight from your Proxmox cluster.
This guide walks through a two-step process: first, transferring VMs from VMware ESXi to Proxmox, then importing those machines into MultiPortal’s Virtual Data Center.
Part 1: Importing from VMware to Proxmox
Step 1 - Initial Setup
Ensure you have a virtual machine on your ESXi host that you want to migrate.
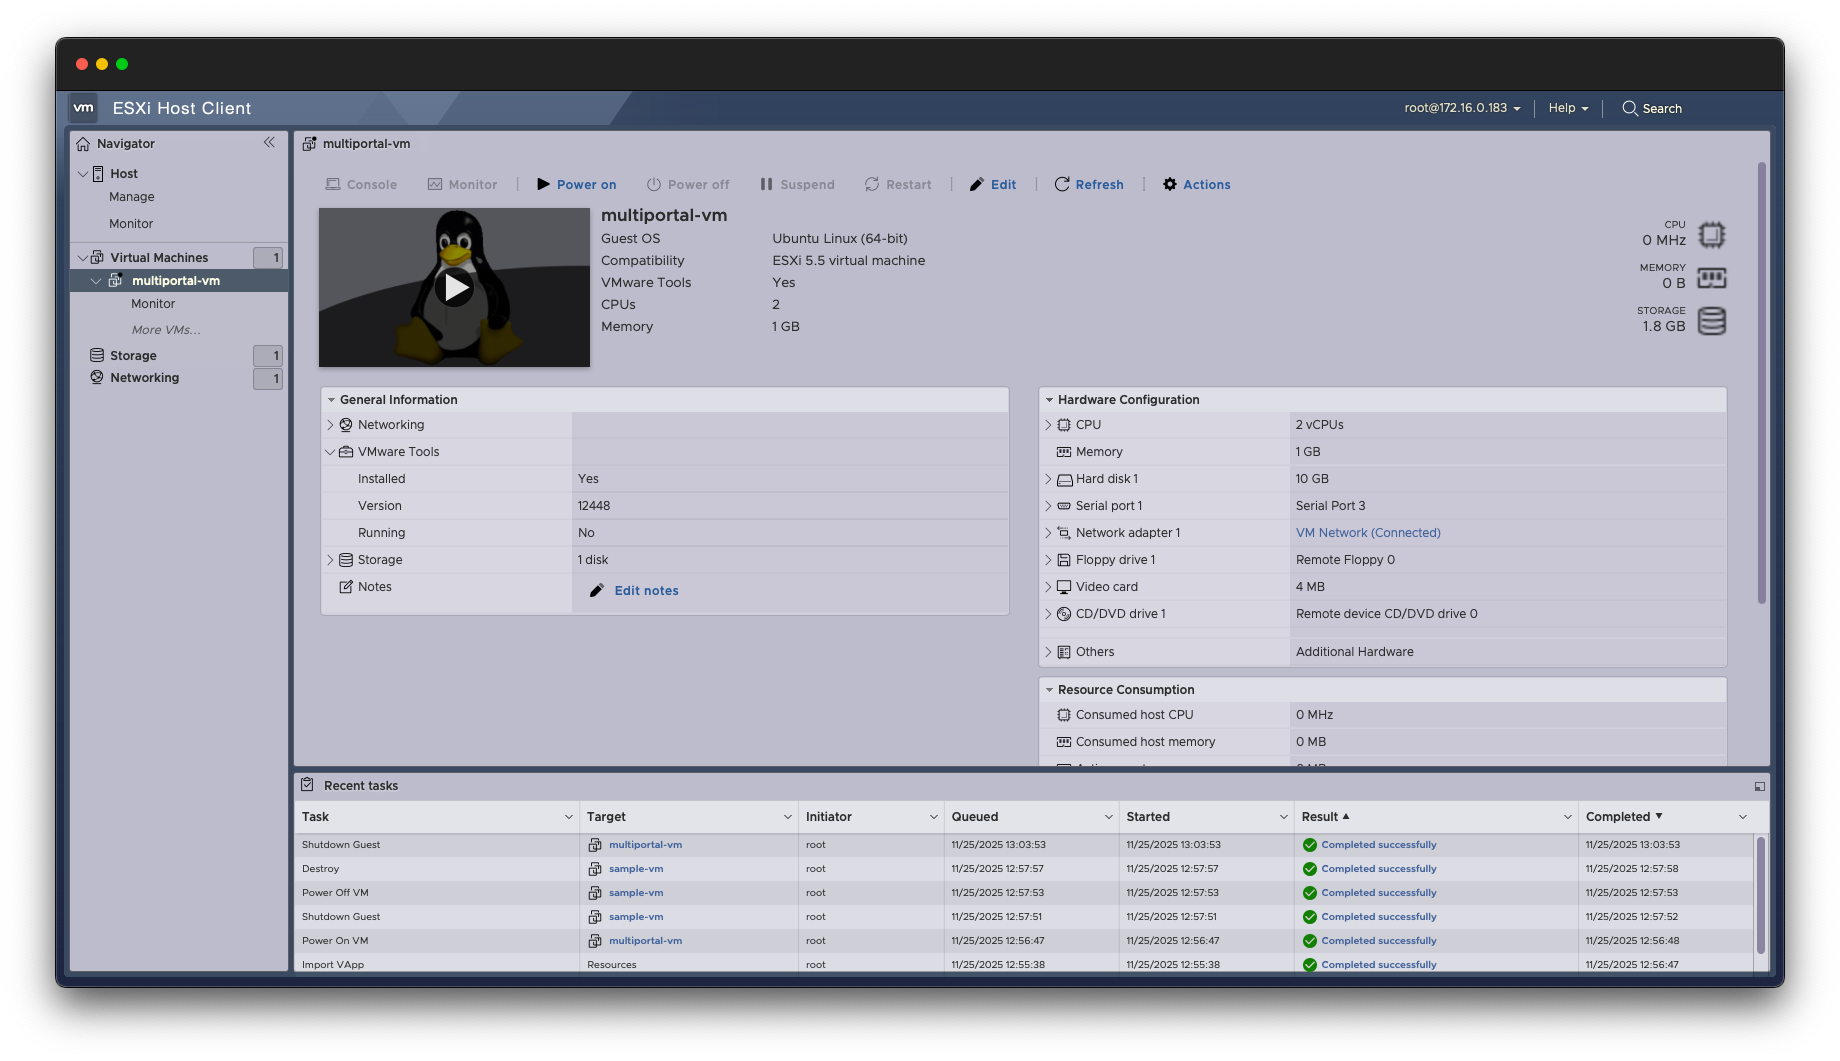
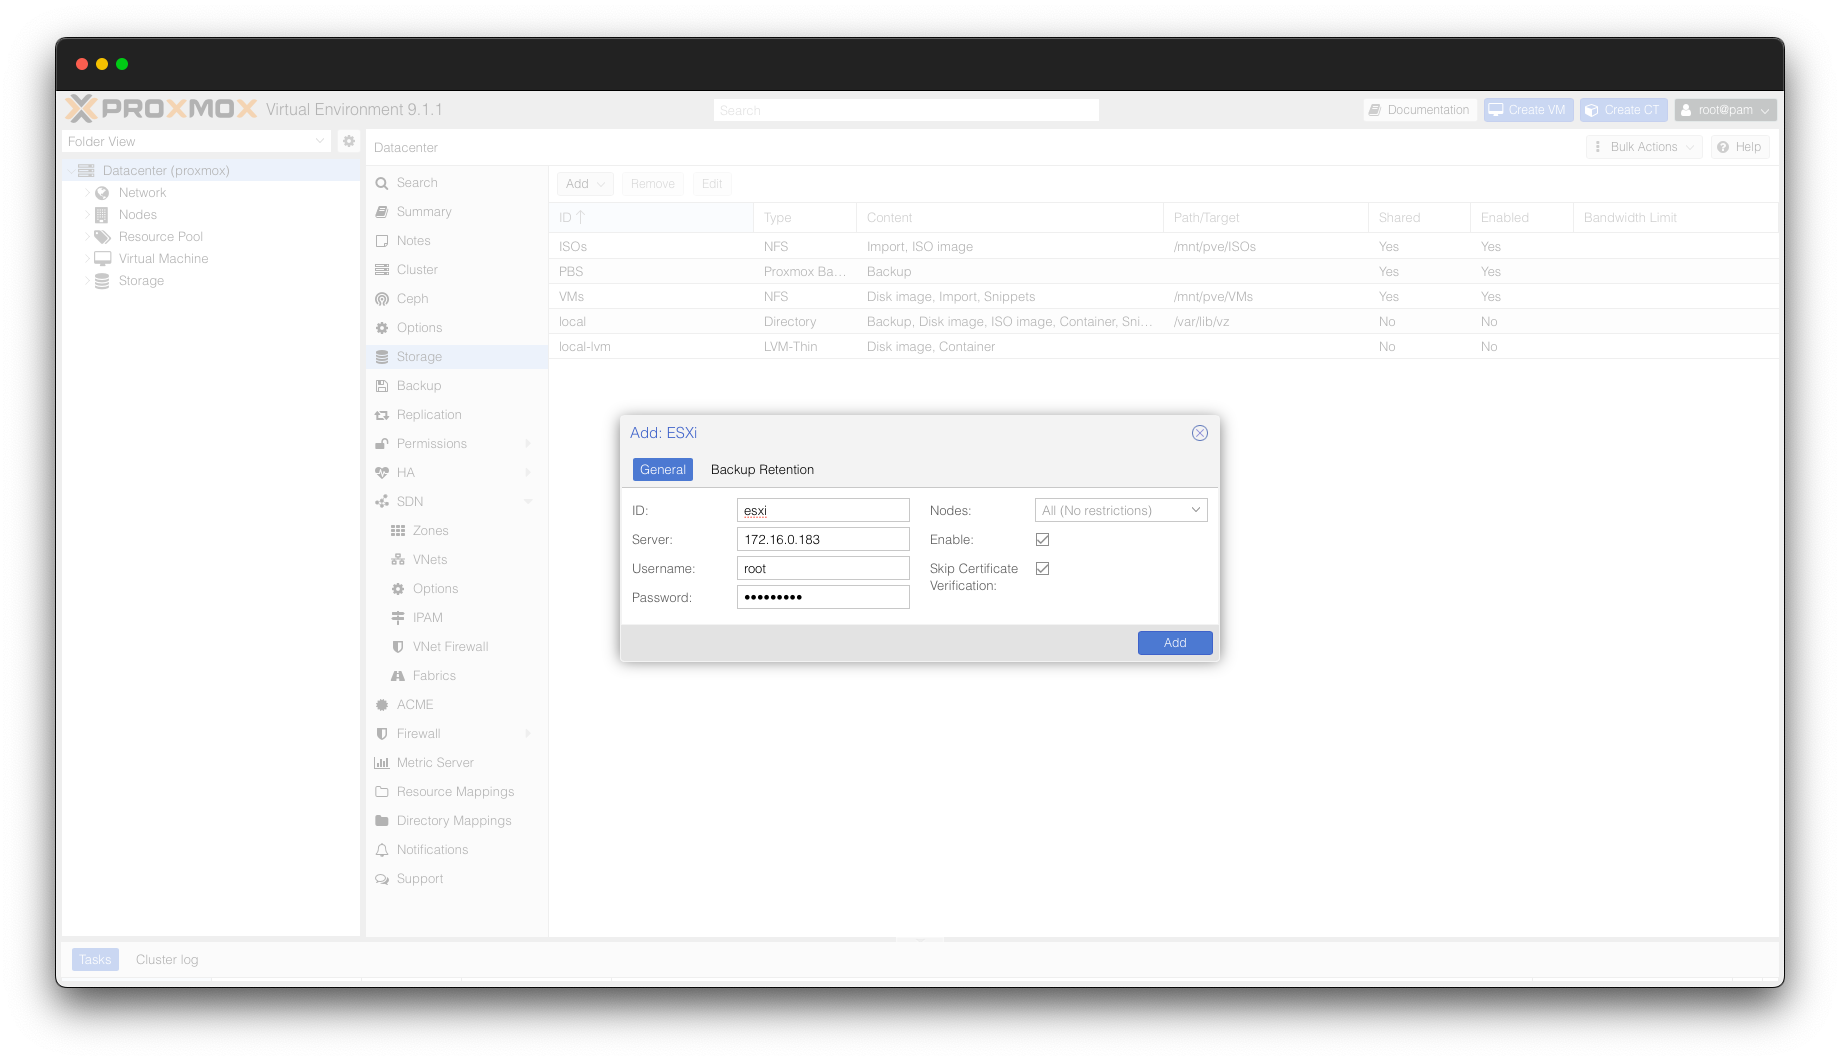
Step 2 - Configure ESXi Connection
Navigate to Datacenter > Storage in Proxmox. Click Add and select ESXi. Provide a custom ID for your import storage device and enter your ESXi connection credentials.
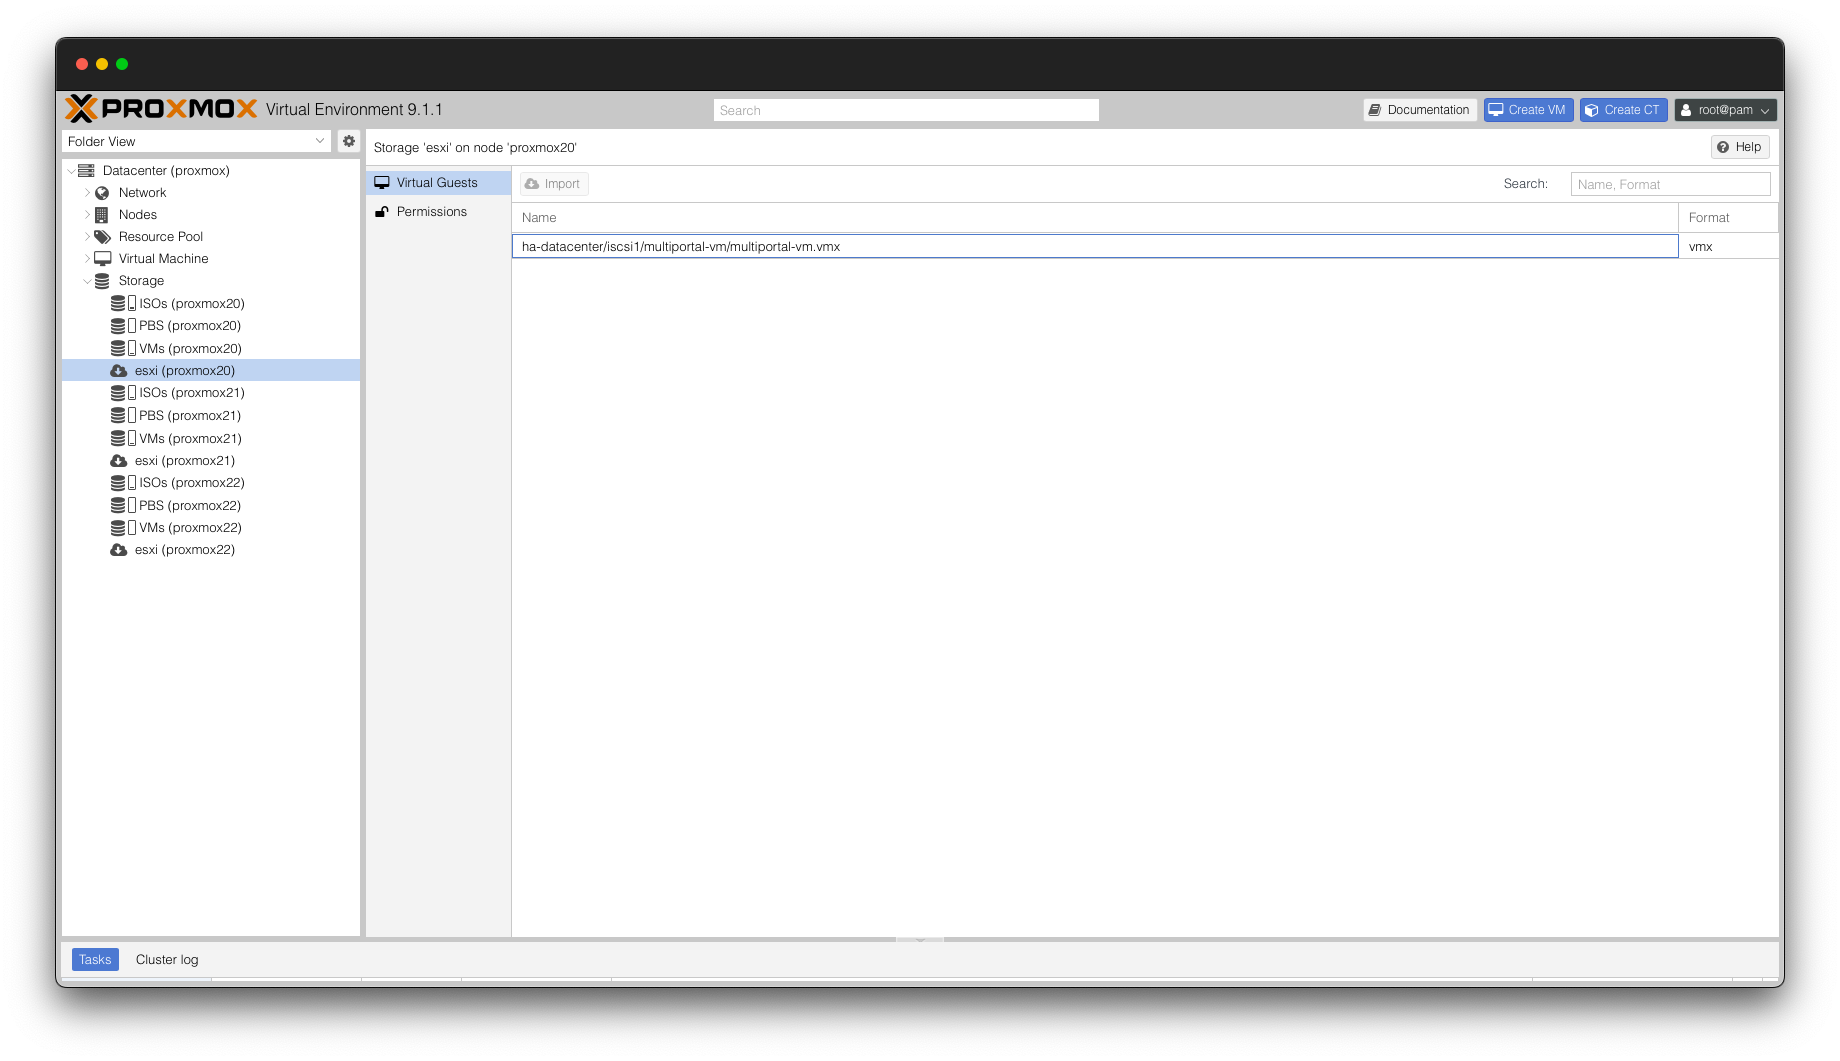
Step 3 - View Available VMs
Expand Storage in the Proxmox sidebar. Select Virtual Guests to display all available VMs from your ESXi server.
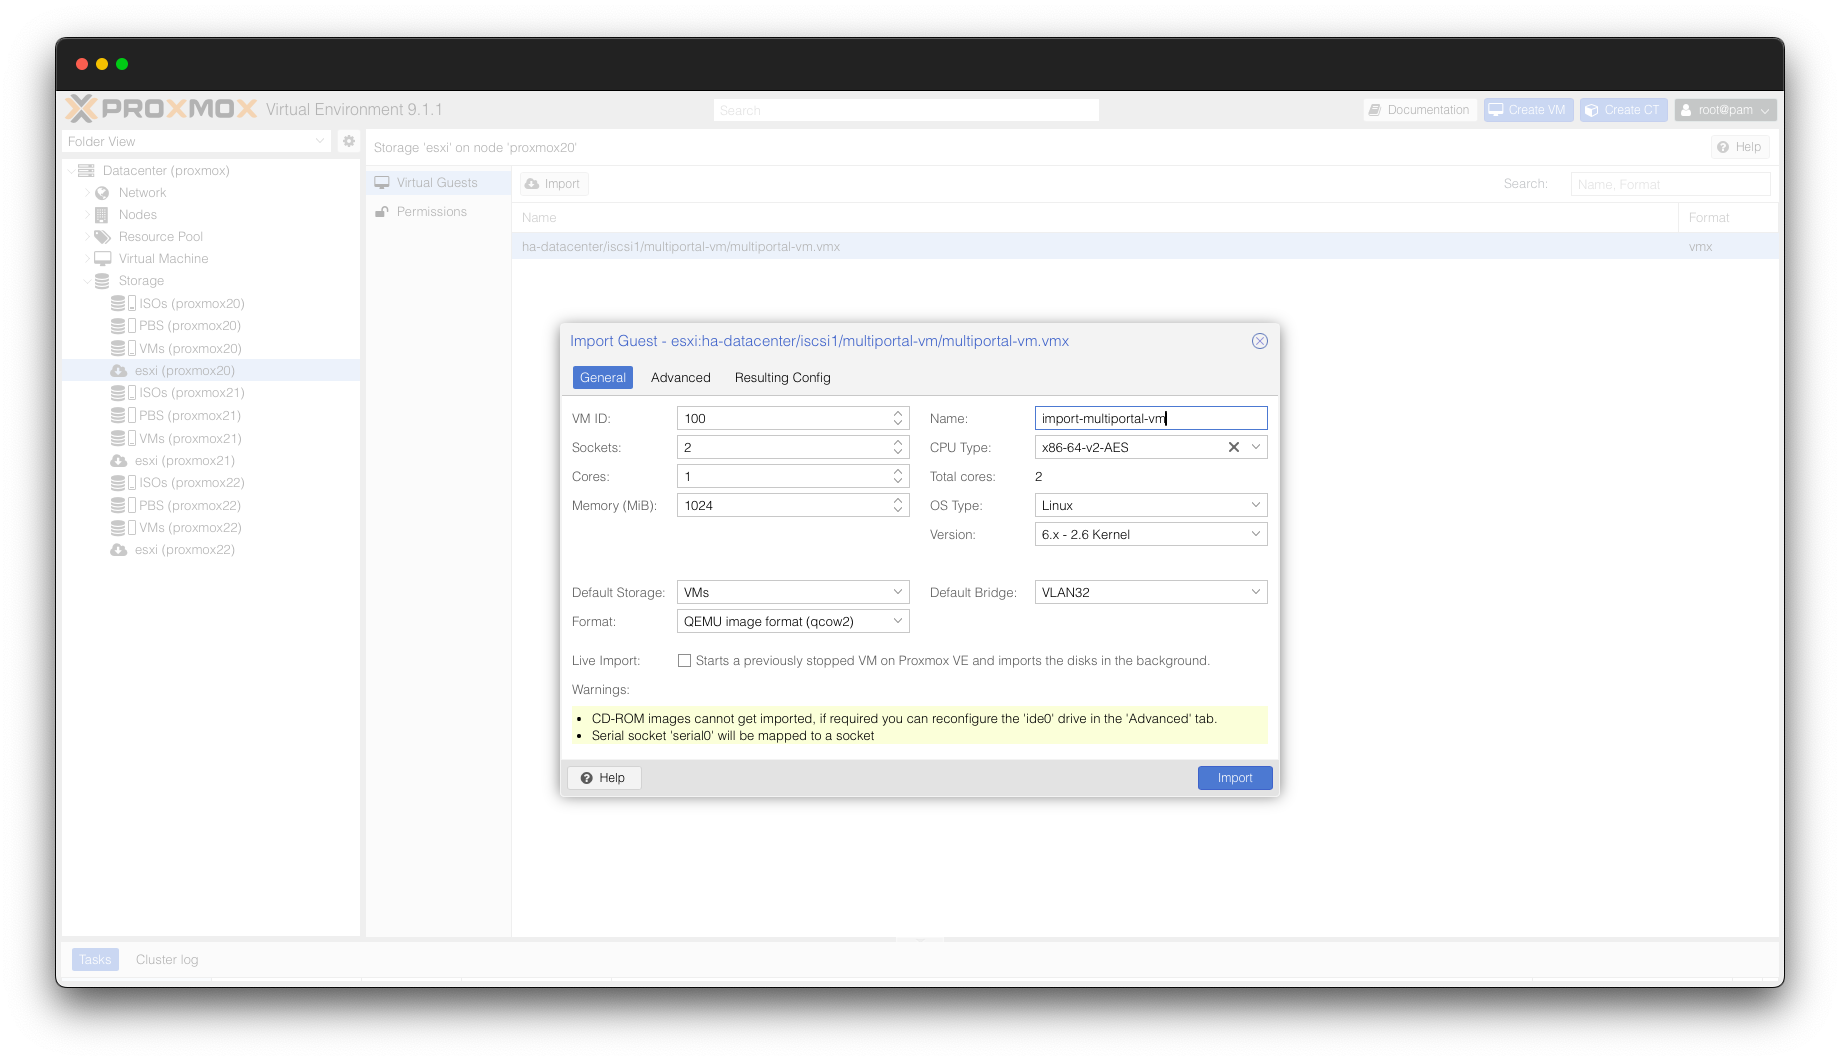
Step 4 - Import the VM
Choose your target VM and click Import. Proxmox presents a configuration screen allowing resource customization, though default settings are typically acceptable.
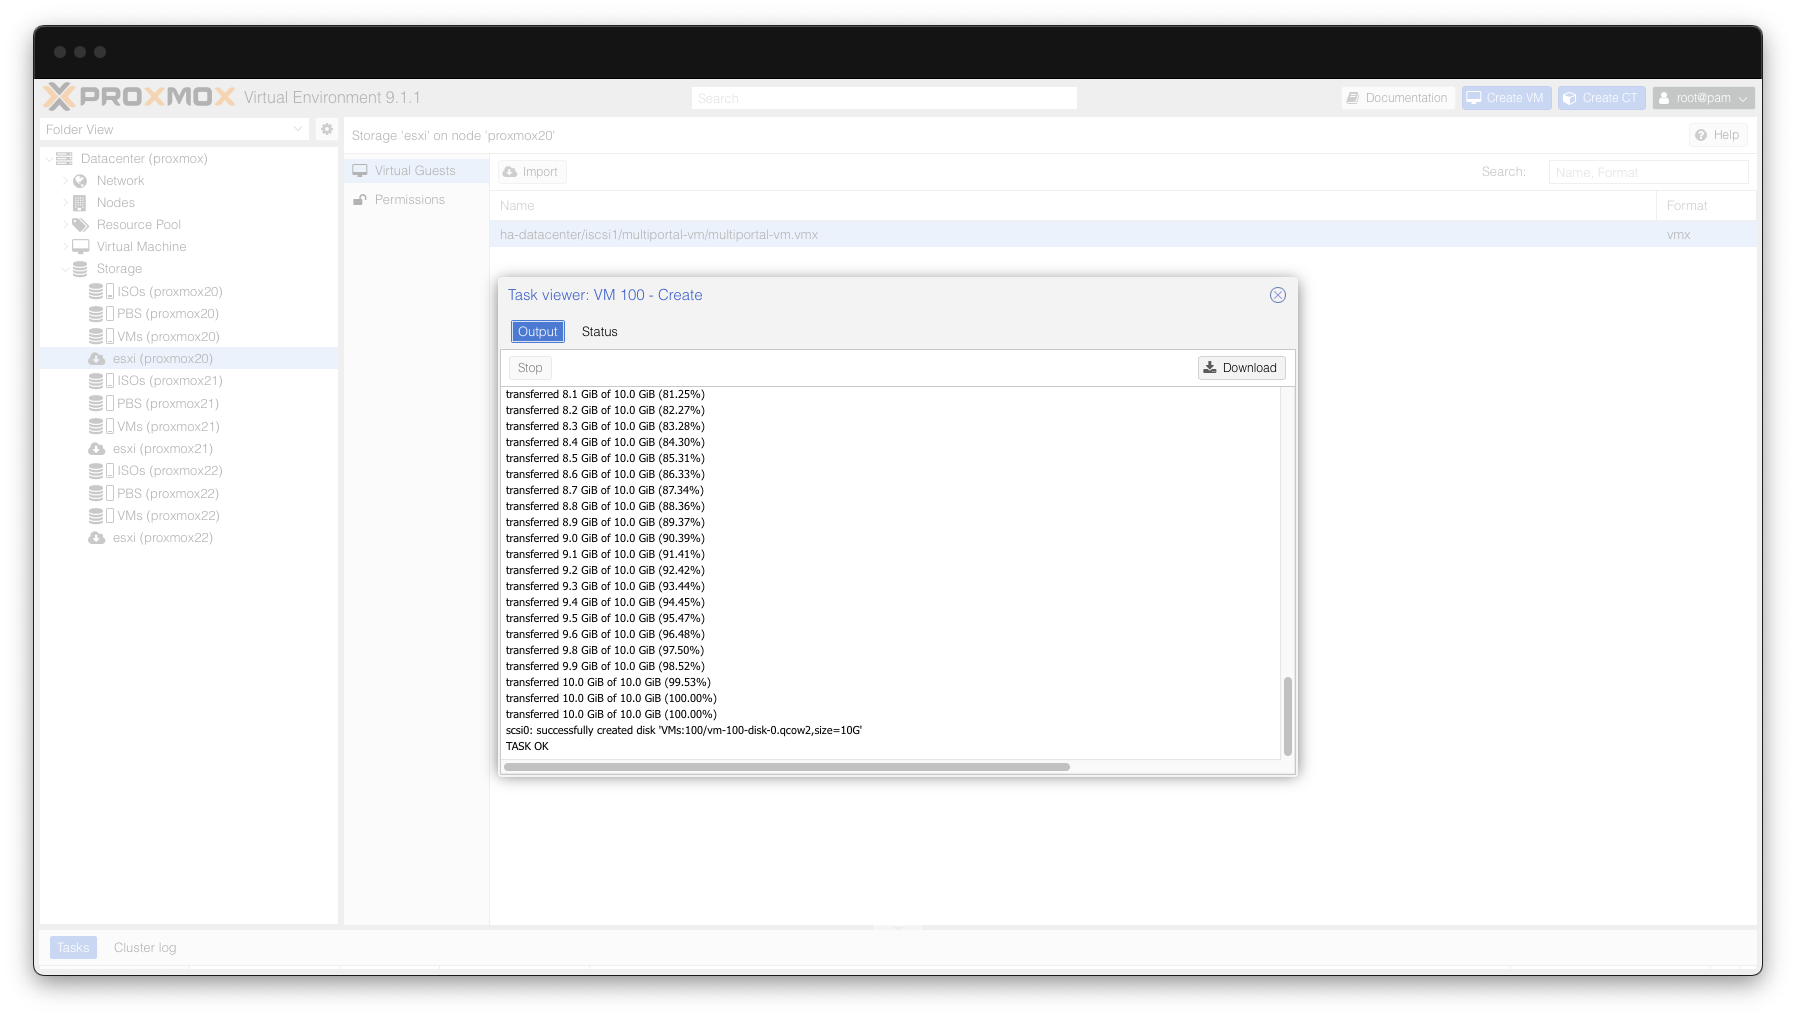
Step 5 - Wait for Completion
The import process requires time proportional to the virtual disk size. Wait for the task to complete.
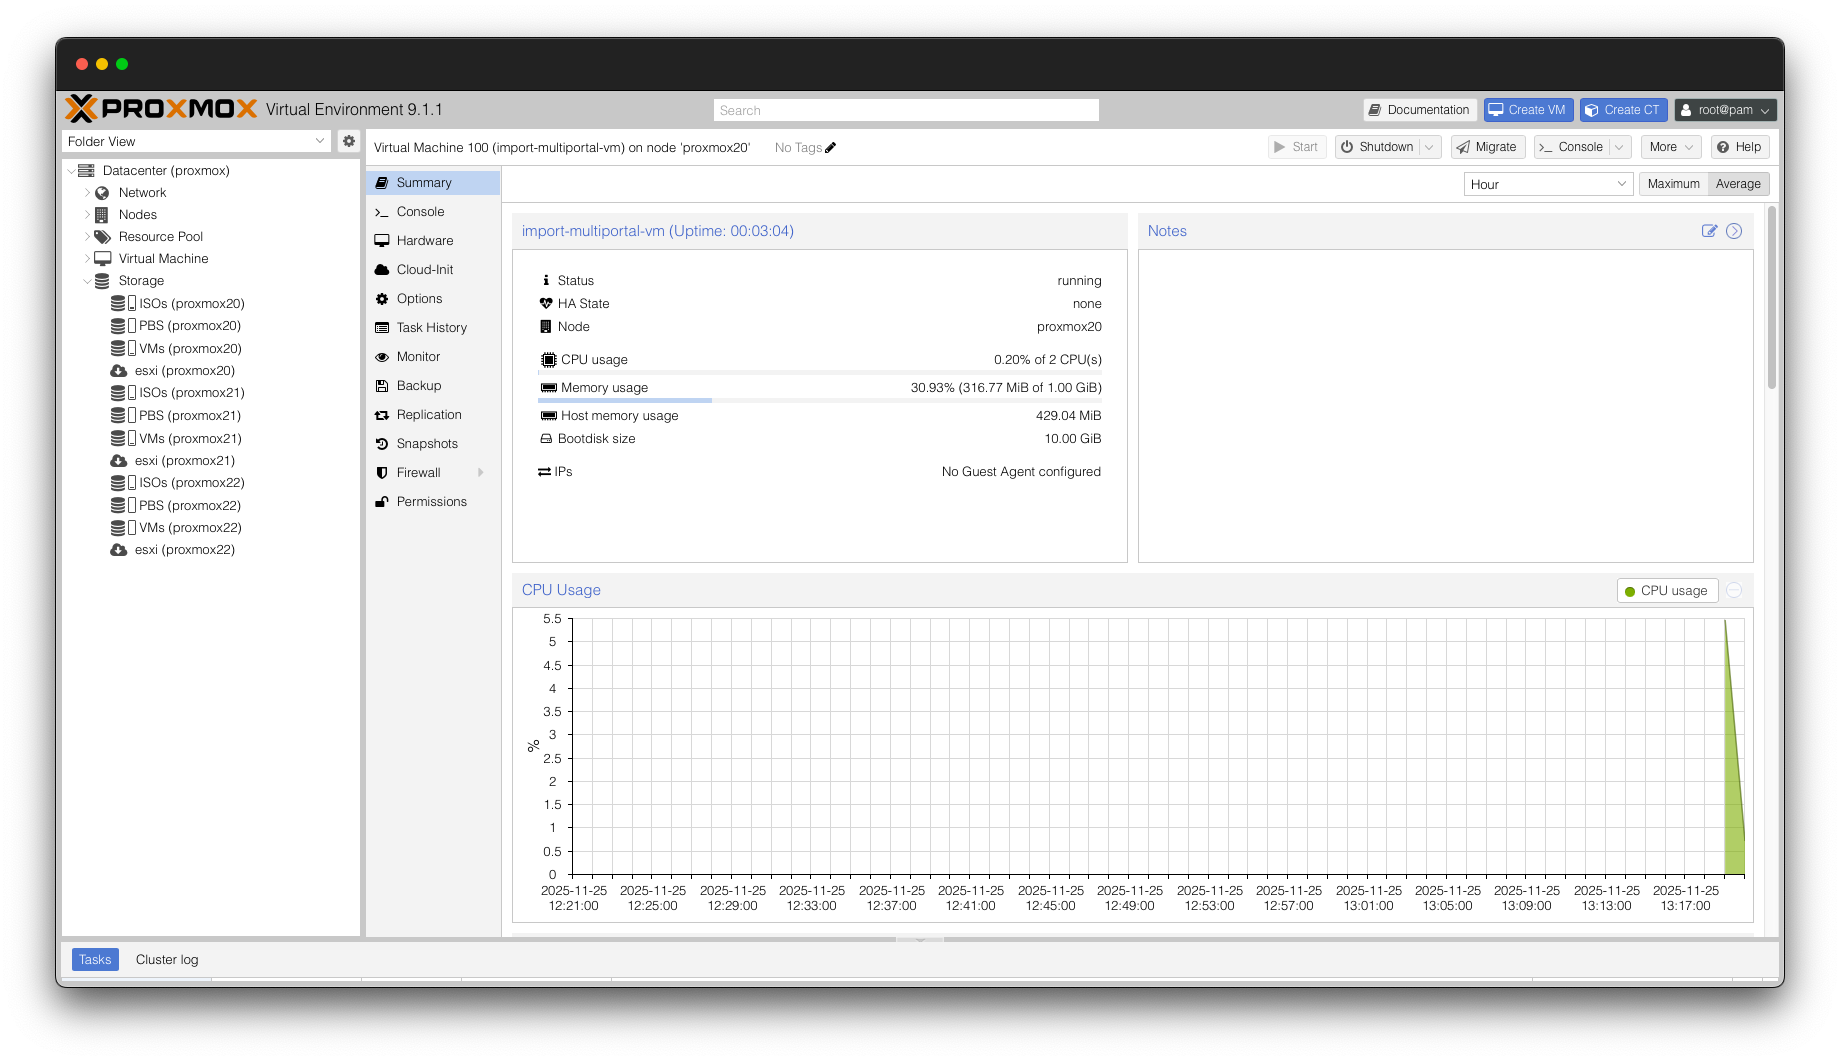
Step 6 - Power On and Verify
Navigate to the imported VM in Proxmox and power it on. The machine is now ready for MultiPortal integration.
For more details, check out the Proxmox migration documentation.
Part 2: Importing VM into MultiPortal
Prerequisites
Log in to MultiPortal as a Service Provider Administrator.
Step 1 - Access Import Tool
Navigate to Settings > Import > Virtual Machines.
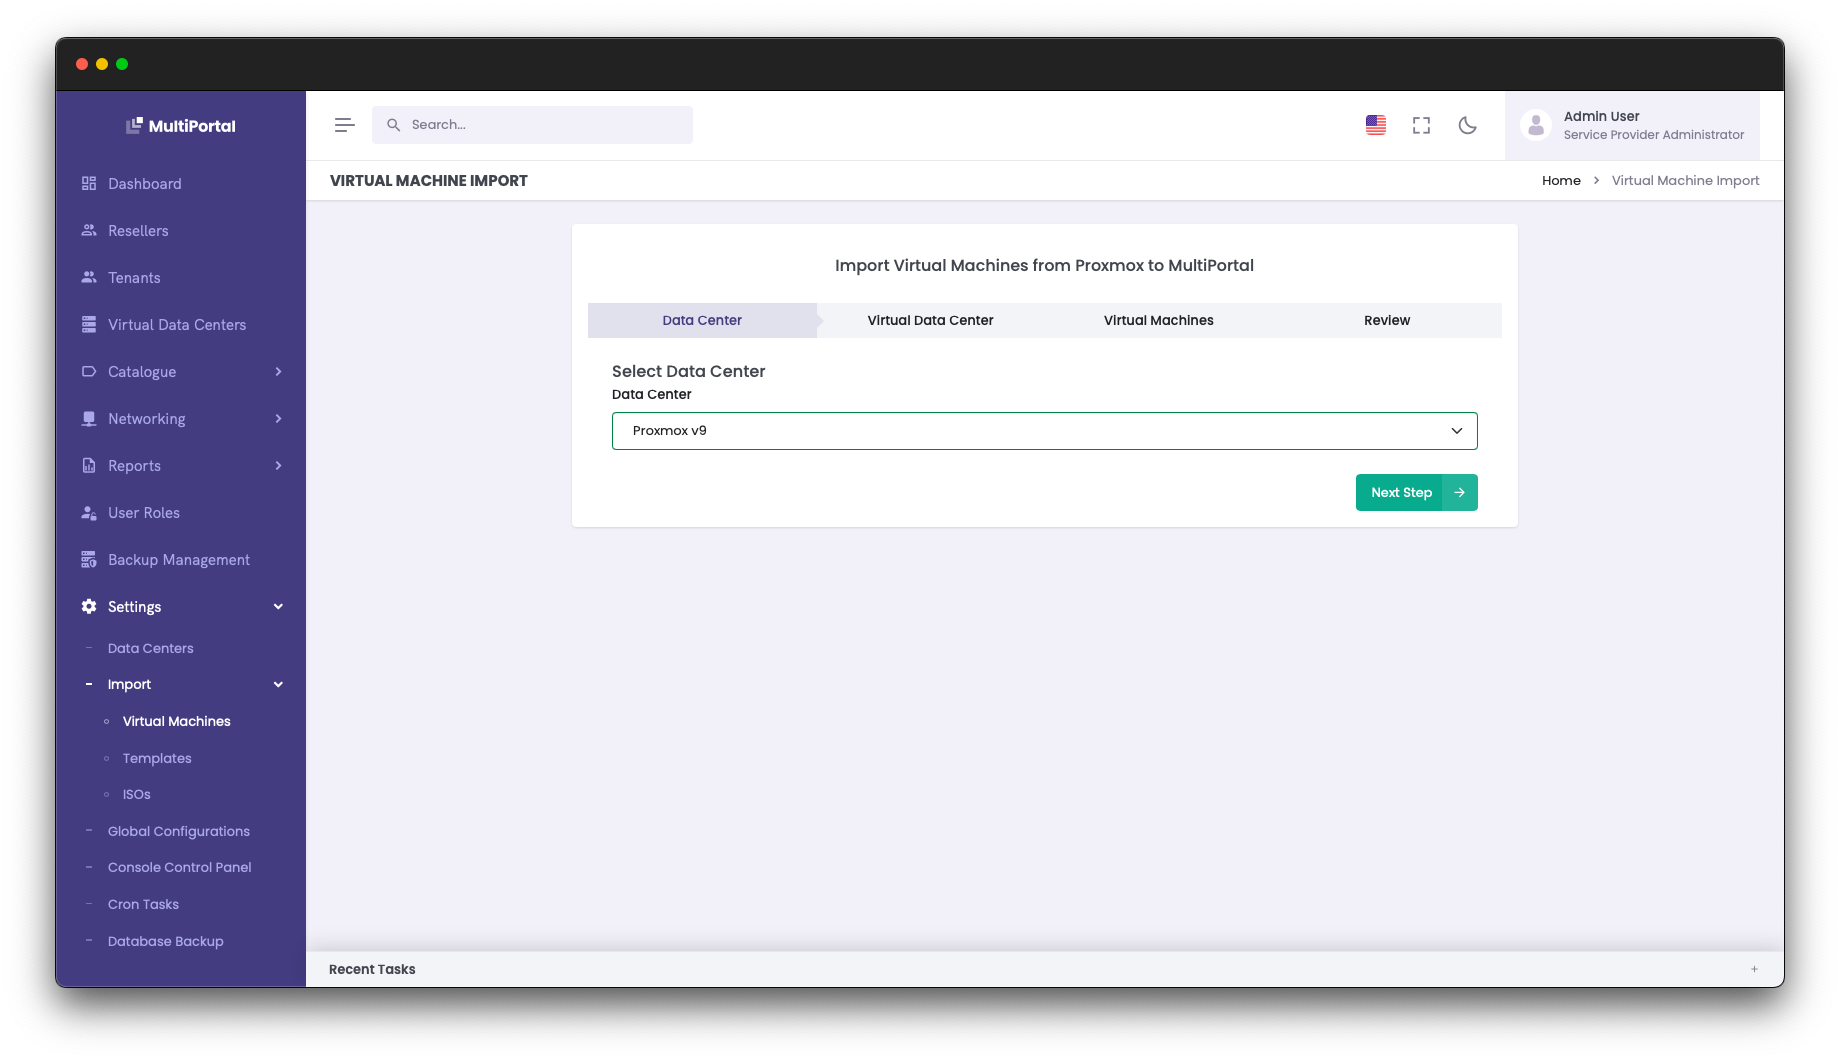
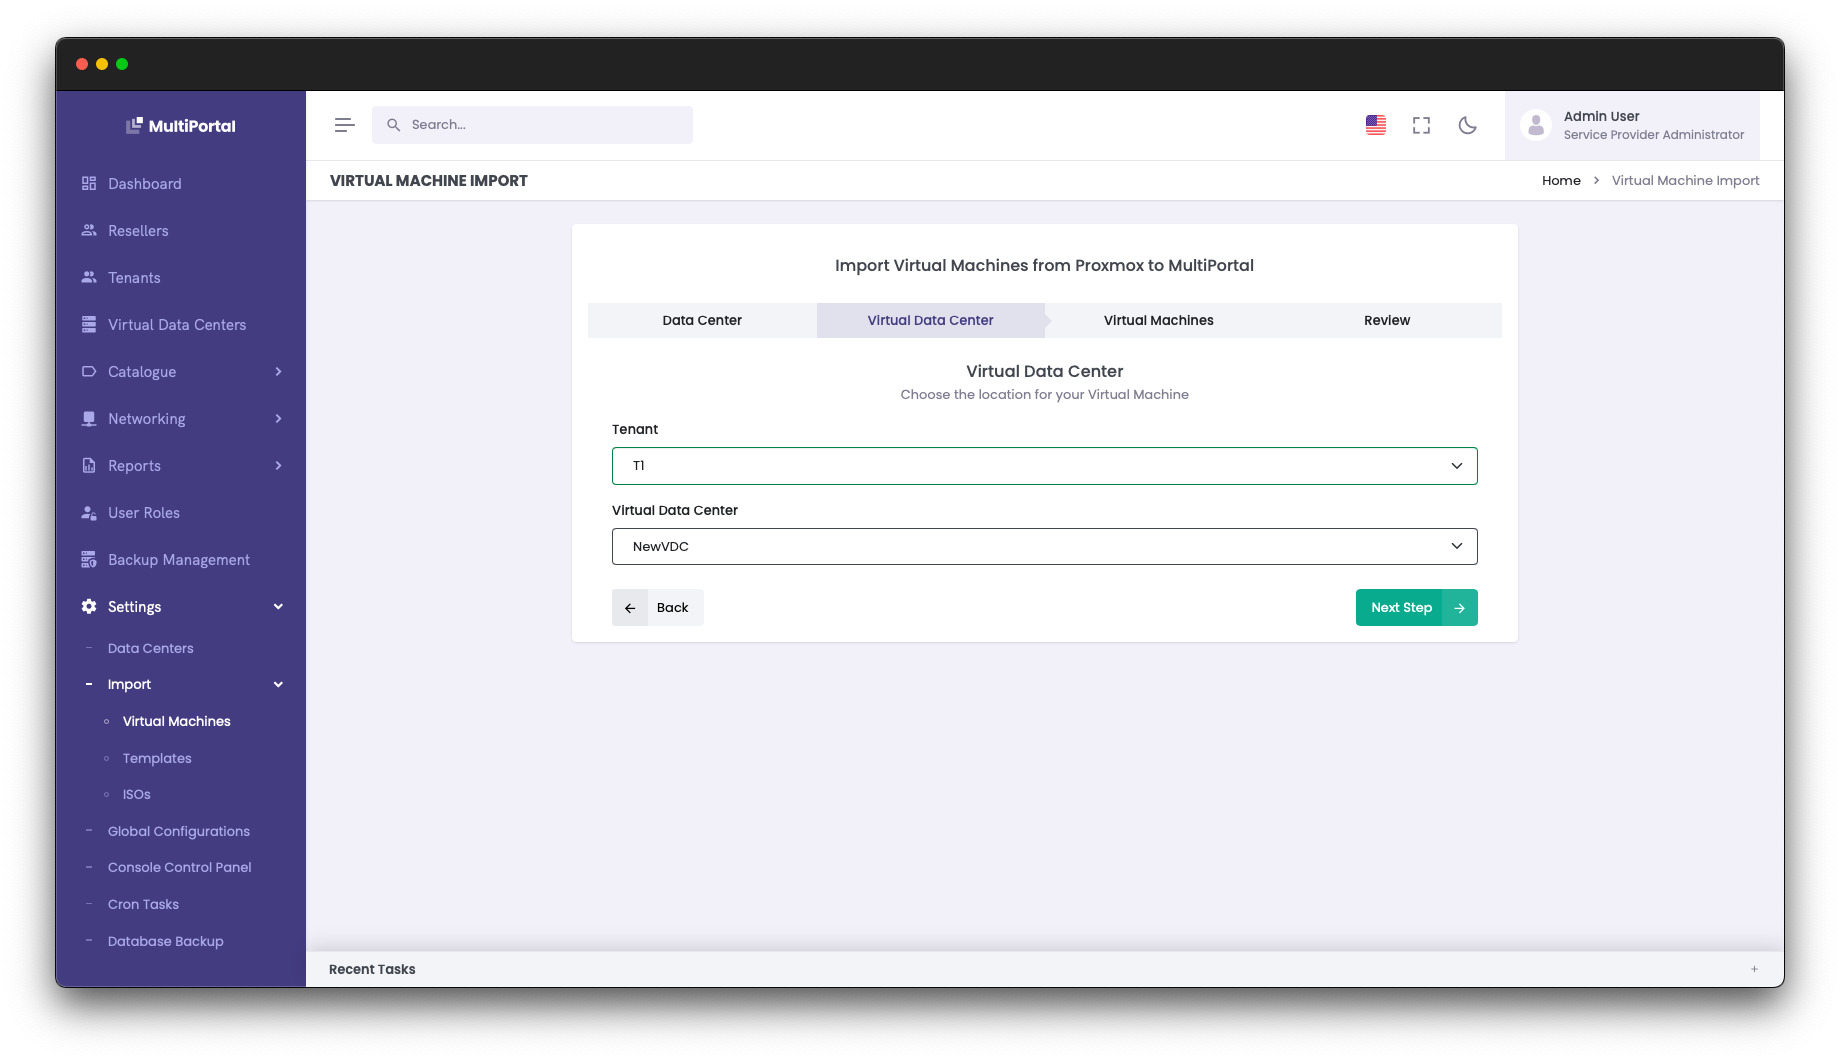
Step 2 - Select Infrastructure
Choose your Proxmox Datacenter and proceed. Select the target Tenant and Virtual Data Center for VM placement.
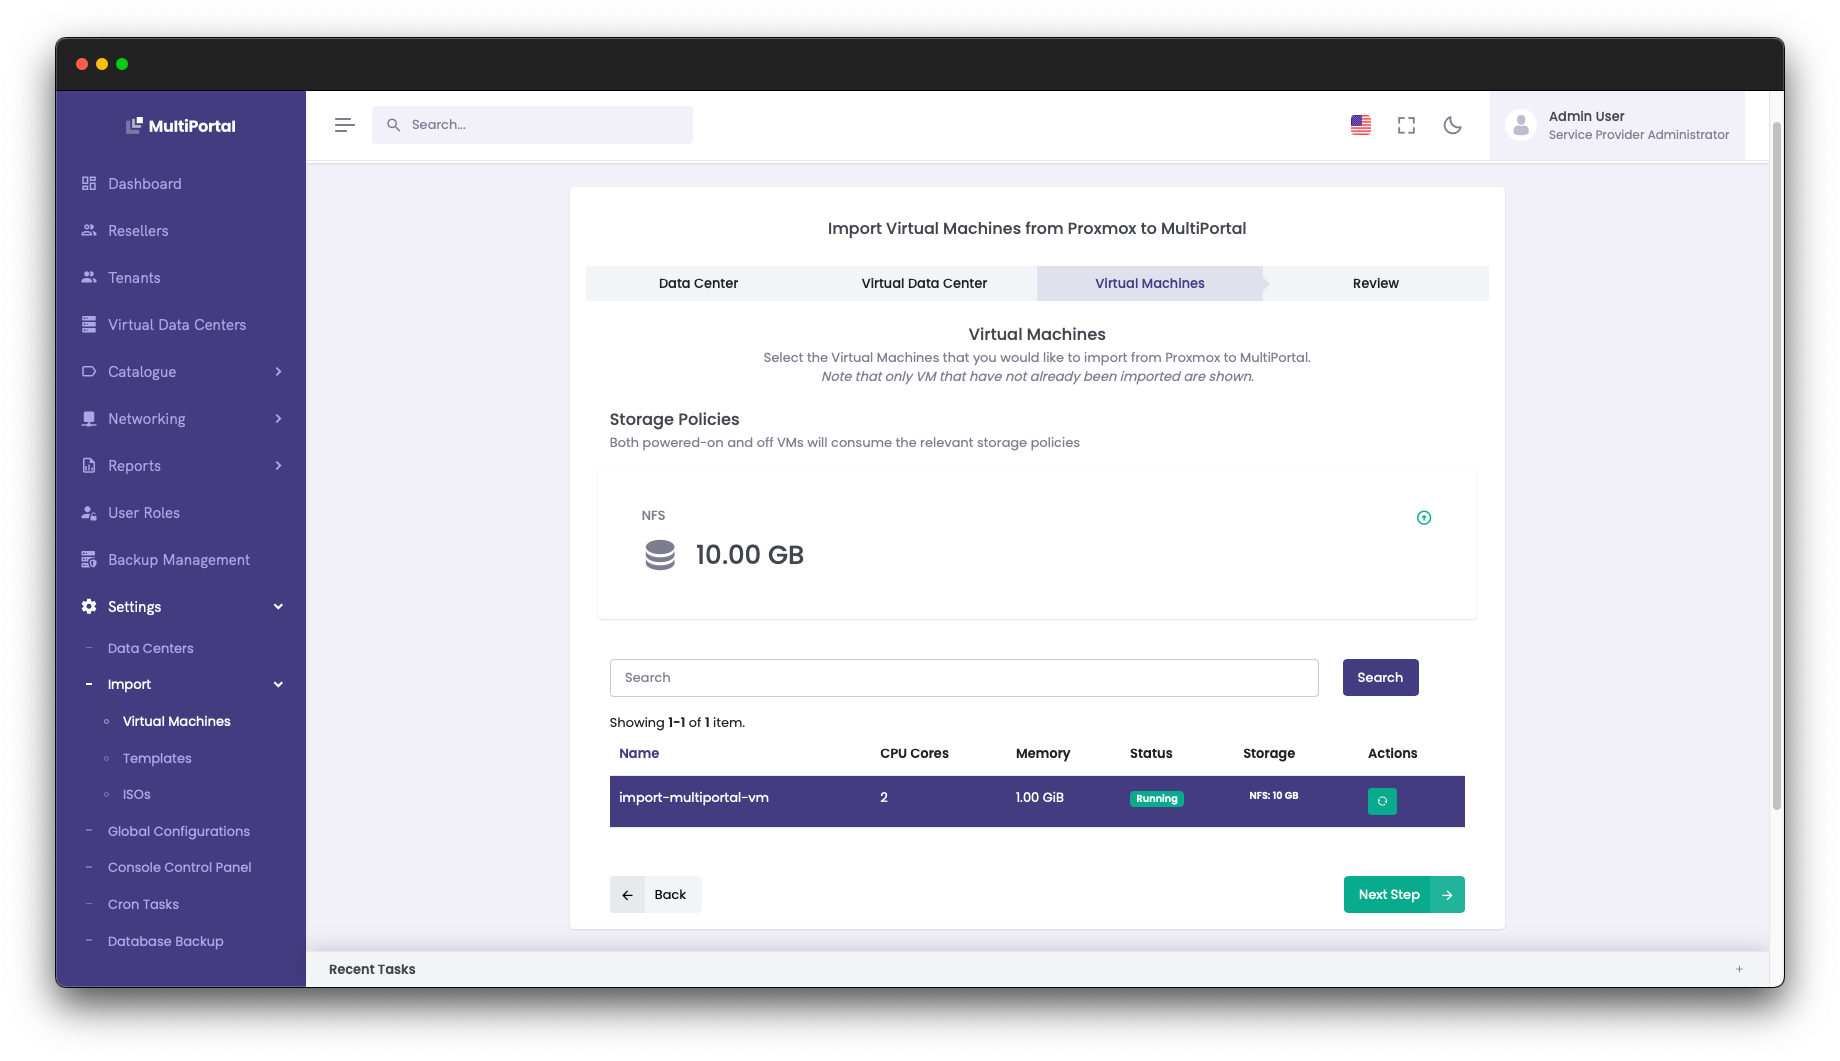
Step 3 - Choose VM
Select your previously imported VM from the available list.
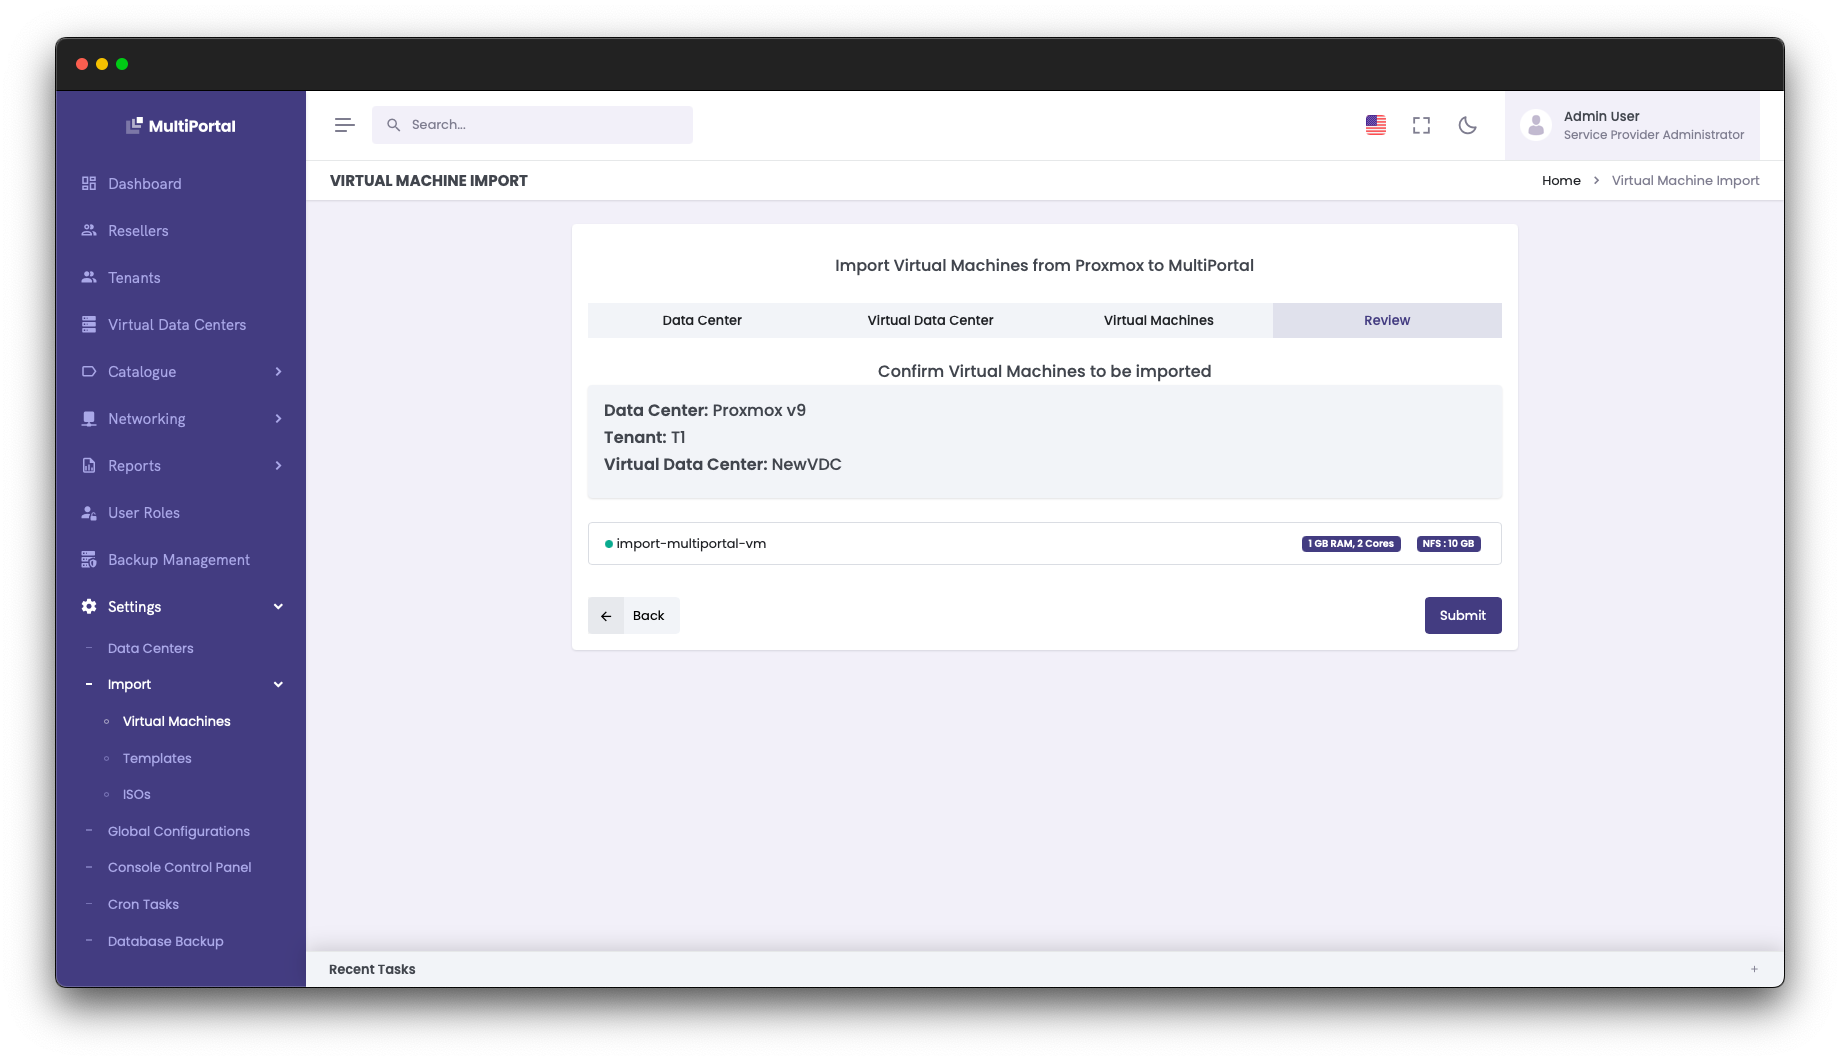
Step 4 - Confirm Import
Review the final confirmation details and click Submit to complete the process.
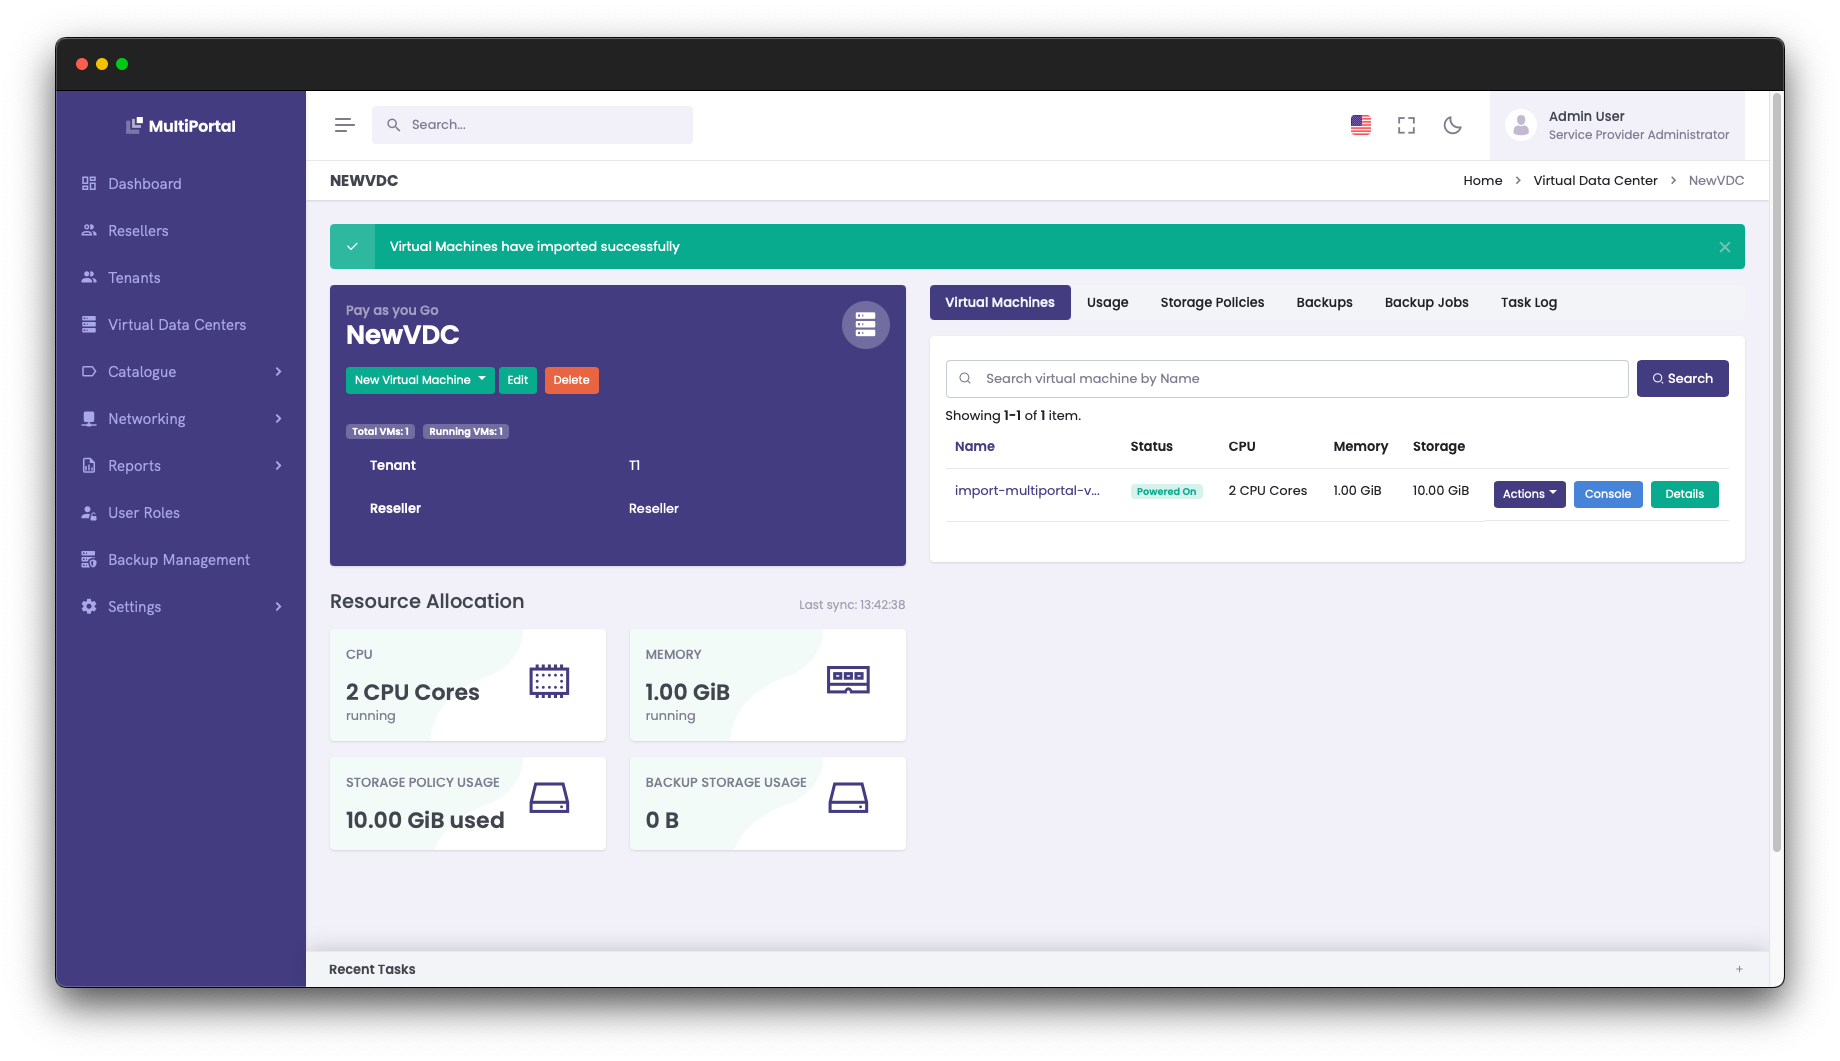
Step 5 - Access Your VM
The imported VM is now visible and manageable within MultiPortal.
For more information, see the MultiPortal Import Documentation.
Are you a Cloud Director user affected by the ripple effects from VMware’s acquisition? Contact us to discuss how MultiPortal can help with your transition.