
MultiPortal Migrator 2.0 Is Now Live: VMware to Proxmox VE, Without the Maintenance Weekend
MultiPortal Migrator 2.0.0 is our first public release: changed-block replication streamed straight into Proxmox VE, cutovers you approve, automated guest preparation, and estate assessments, all from an appliance on your own network.
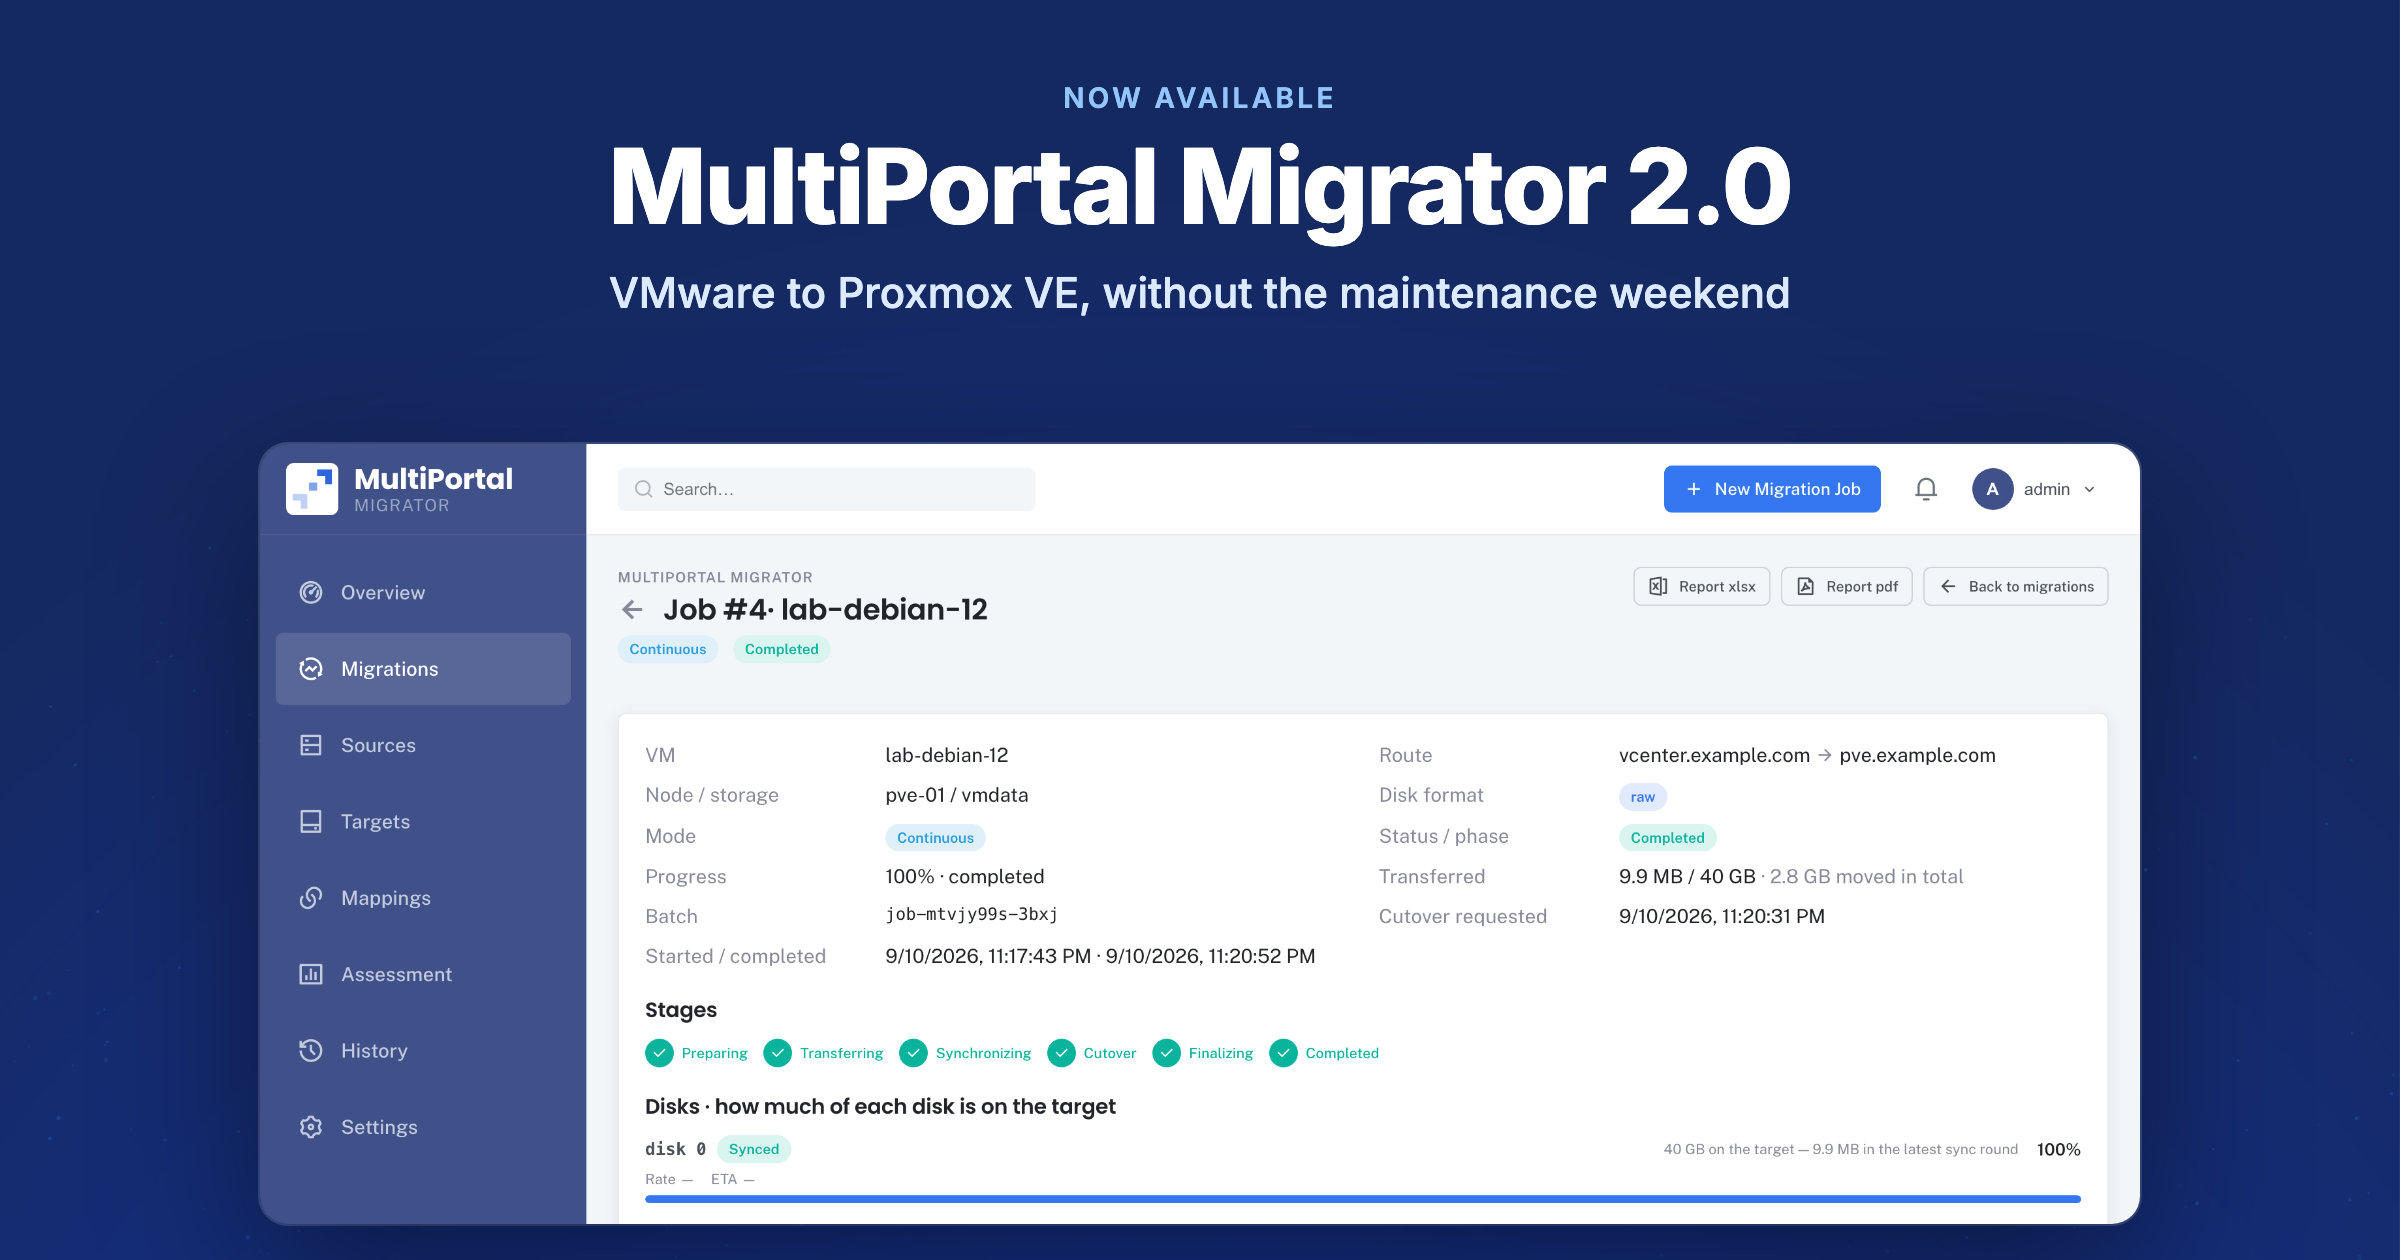
MultiPortal Migrator 2.0.0 is now live. It is the first public release of our appliance for moving virtual machines from VMware vSphere to Proxmox VE, and it is built around a simple idea: copying disks should be the easy part of a migration, and the outage should be a short cutover you schedule, not a weekend you give up.
Migrator replicates running VMs from vCenter Server and ESXi using VMware changed-block tracking (CBT) and streams them straight into your Proxmox VE storage. It keeps the new copy in step while the source keeps serving traffic, waits for you to approve the cutover, and handles the guest work each VM needs to boot cleanly on its new platform. It runs as an appliance inside your own infrastructure, so your credentials, inventory and disk data stay on your network.
Here is the short version:
- Faster copies. Only the blocks your disks actually use are copied, and every round after that carries only what changed.
- Downtime on your terms. On the continuous tier, the source keeps running for as long as you need, and the cutover takes seconds.
- No per-VM busywork. VMware Tools removal, VirtIO drivers, the QEMU guest agent, NIC and disk ordering, and Windows drive letters are all handled for you.
- A plan before you commit. Estate assessments tell you what has to move, what is ready and what is blocked, before you touch a single VM.
Where migration time really goes
If you have moved workloads off VMware by hand, you know the copy is rarely what eats the project. The time goes into everything around it. Scheduling long outages while full disks move. Logging into every guest to strip out VMware Tools and install VirtIO drivers. Rebuilding NICs, restoring static IPs, and checking that Windows still has its drive letters. Picking nodes, checking VMIDs, and starting over when an import fails halfway through.
None of that is hard on its own. Repeated across hundreds of VMs, it is months of engineering time. Migrator was built to take that work off your team.
Speed: move less data, and move it once
Only the blocks that matter
The initial copy transfers only the blocks the source reports as in use. A 60 GB disk holding 10 GB of data moves about 10 GB, not 60. After that, every sync round carries only the blocks that changed since the last one, so keeping a running VM in step with its Proxmox VE copy costs very little.
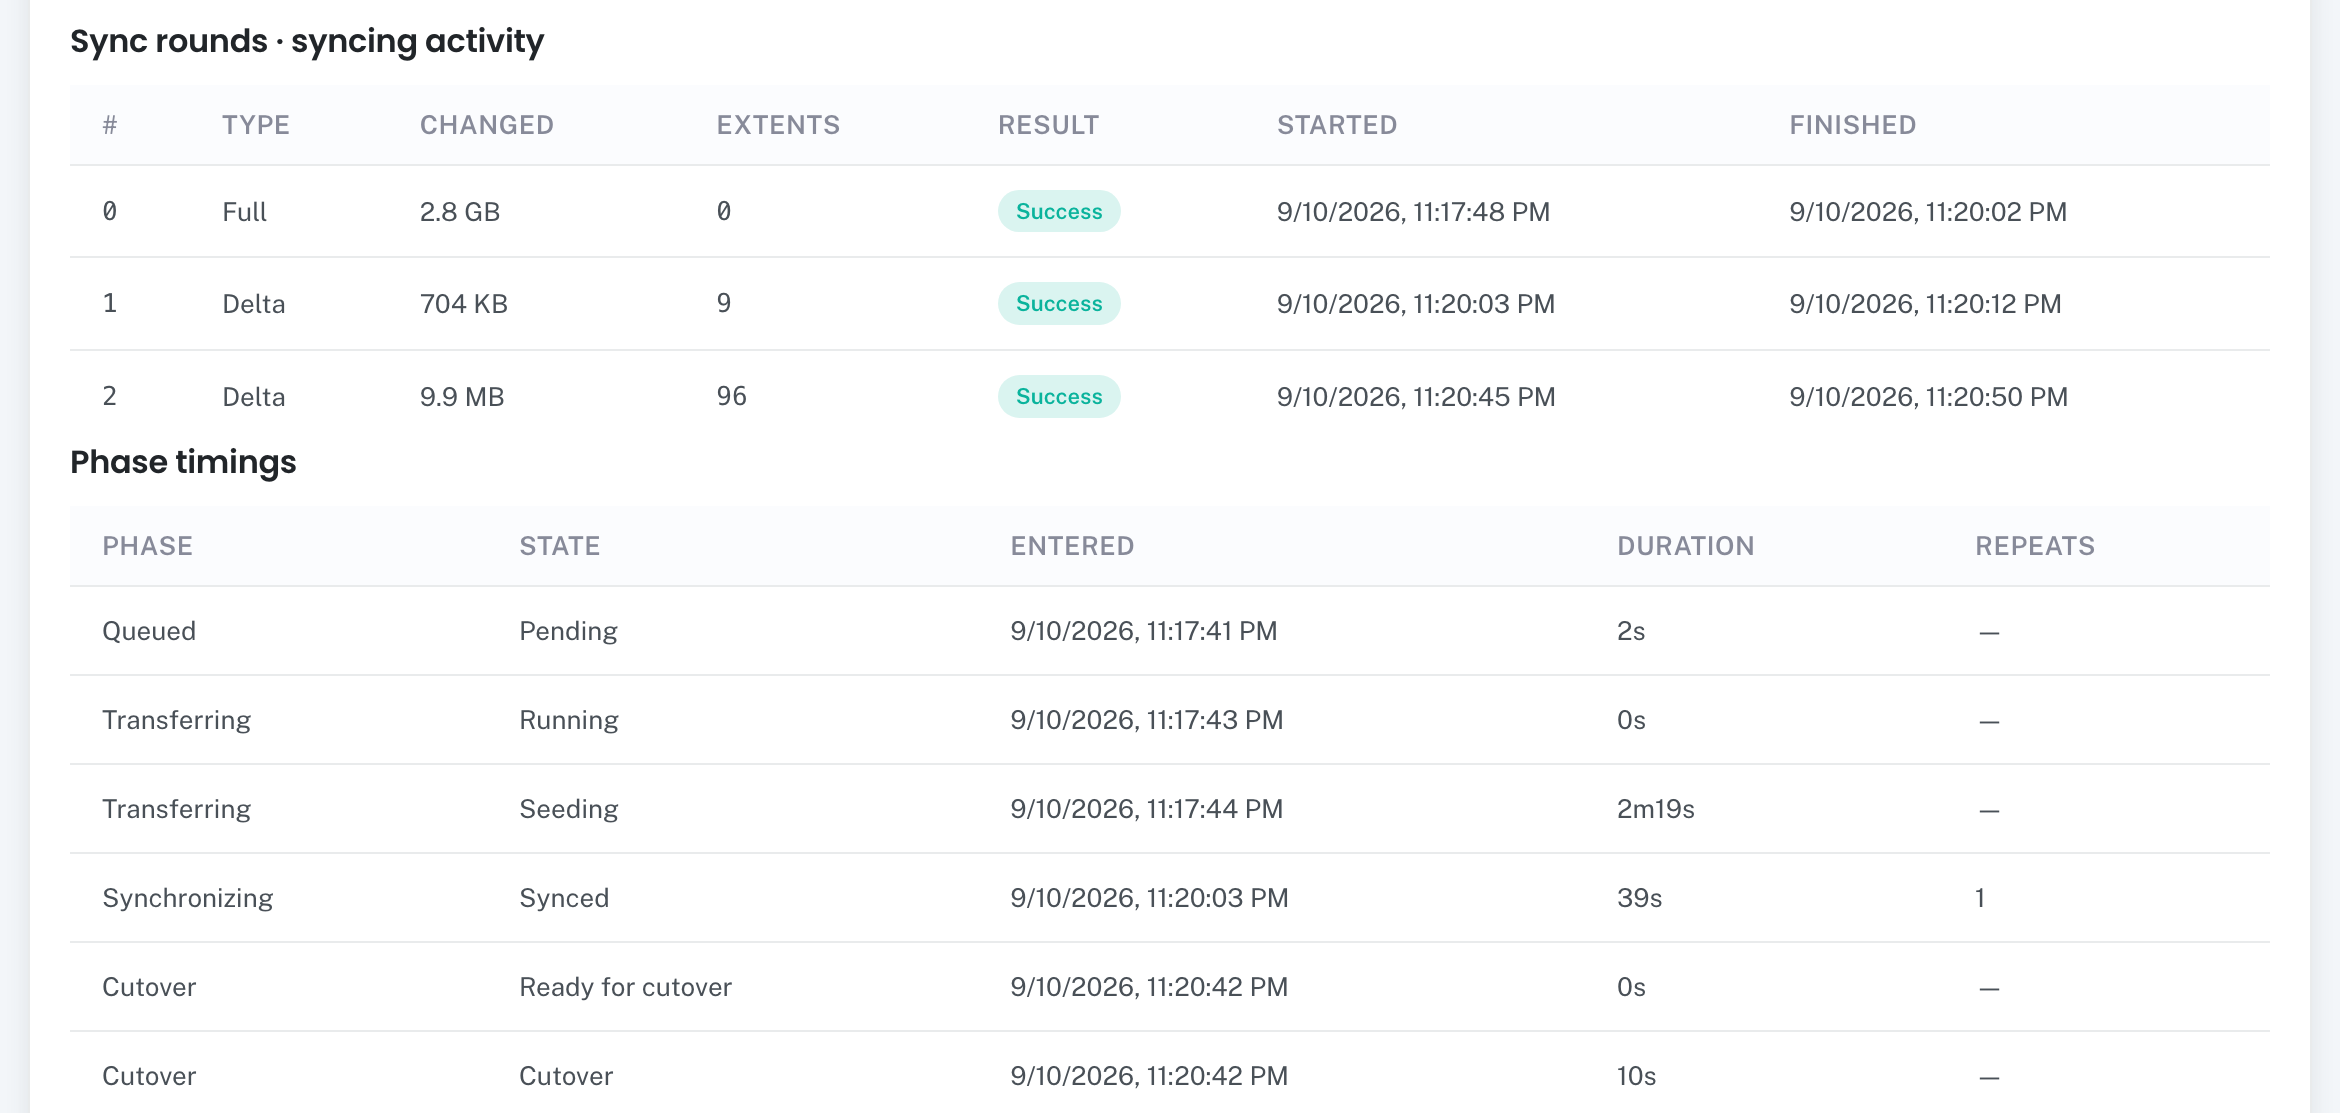
In our lab, a Debian 12 VM with a 40 GB disk moved 2.8 GB in its initial copy. Its two delta rounds carried 704 KB and 9.9 MB, and the cutover phase took 10 seconds.
Speed never comes at the expense of correctness. Migrator skips unallocated regions of a disk only where the target storage guarantees they read as zeros. Where it cannot guarantee that, it falls back to a full copy and records why in the job’s log, so data left behind by a previous VM can never surface inside a migrated guest.
Straight into Proxmox VE storage
Disk data travels from the ESXi host running the VM, through the appliance, to the Proxmox VE node the VM lands on, and is written directly into the target storage. There is no staging area and no intermediate copy. No agents are needed on your ESXi hosts, and one connection covers a whole Proxmox VE cluster, with the appliance choosing a node for each VM.
Run migrations side by side
Select several VMs in the migration wizard and each one becomes its own job, sharing a batch identifier while succeeding or failing independently. You can run anywhere from 1 to 32 migrations at once (4 by default), and changes to that limit apply immediately without interrupting anything already running. Migrations from the same standalone ESXi host queue one at a time, while separate sources run in parallel.
Each Proxmox VE node has its own transfer limit that you can raise, and placement policies let you choose how a batch uses your cluster: Balanced spreads it across the nodes, and Throughput favours the nodes that move data fastest.
Downtime on your terms
Not every workload needs the same approach, so Migrator gives you three tiers:
- Continuous (CBT) keeps the Proxmox VE copy in step with a running source, for days if you need it, and cuts over in seconds. Start replicating well ahead of time, then cut over in the window you agreed with the business.
- Warm (snapshot-delta) copies the base disk while the VM runs and applies only the final changes at cutover.
- Cold powers the VM off and copies the whole disk, for workloads that can take an outage.
You do not have to work out which tier each VM can use. For every VM, the migration wizard checks the source and its storage, marks the tier it recommends, and tells you why any other tier is not available.
Continuous and warm migrations wait for you. Nothing changes inside the guest until you approve the cutover, and the console raises a Ready for cutover alert when a job is waiting, so the outage lands in a maintenance window you pick rather than whenever the copy happens to finish.
If something does go wrong after the source has been powered off, the appliance reverts the target and powers the source back on. The source VM is never deleted.
Ease: the busywork is done for you
Guest preparation, automated
When you approve the cutover, Migrator prepares the guest for its new hardware. Preparation runs inside the running source VM, using a guest OS credential you store on the appliance. It removes VMware Tools, puts VirtIO drivers in place so Windows guests can boot and see their disks and network on Proxmox VE, and can install the QEMU guest agent from the guest’s own repositories or from a package you register.
The details that usually mean a console session per VM carry across too. NIC and disk ordering are preserved, and Windows guests keep their drive letters and volume layout. The appliance builds the Proxmox VE VM to match, with the right firmware, a VirtIO SCSI controller, a NIC for each source network and a tag that makes migrated VMs easy to find, then validates that it boots.
Problems surface early. A migration that asks for preparation on a guest Migrator cannot prepare is refused when you create it, instead of failing partway through.
Map your infrastructure once
A mapping records where a source’s VMs land: the Proxmox VE cluster, the bridge or VNet each VMware network becomes, and the storage pool each datastore becomes. Both sides of every rule are picked from objects that already exist in your source inventory and target cluster, so there is nothing to mistype.
In the wizard you map each source network, choose target storage and disk format, and set how VMs are placed across the cluster’s nodes. Per-VM overrides let individual VMs keep a specific VMID, take a new name, or put each disk on its own storage pool. The wizard checks VMIDs for availability before you submit, and suggests a valid name wherever Proxmox VE would reject the original.
Catch problems before your change window
Validating a vCenter Server, ESXi host or Proxmox VE target reports each check on its own, from network reachability and TLS through authentication and SSH, and names the stage where a problem occurs. For Proxmox VE, a per-node readiness table shows whether each node can receive a migration, including its SSH access and transfer capacity.
A new appliance opens on a Get started checklist that links to every prerequisite, from the licence key and VDDK to your first source, target and guest credentials. Setup becomes a list you tick off, not a document you piece together.
Always know where every VM stands
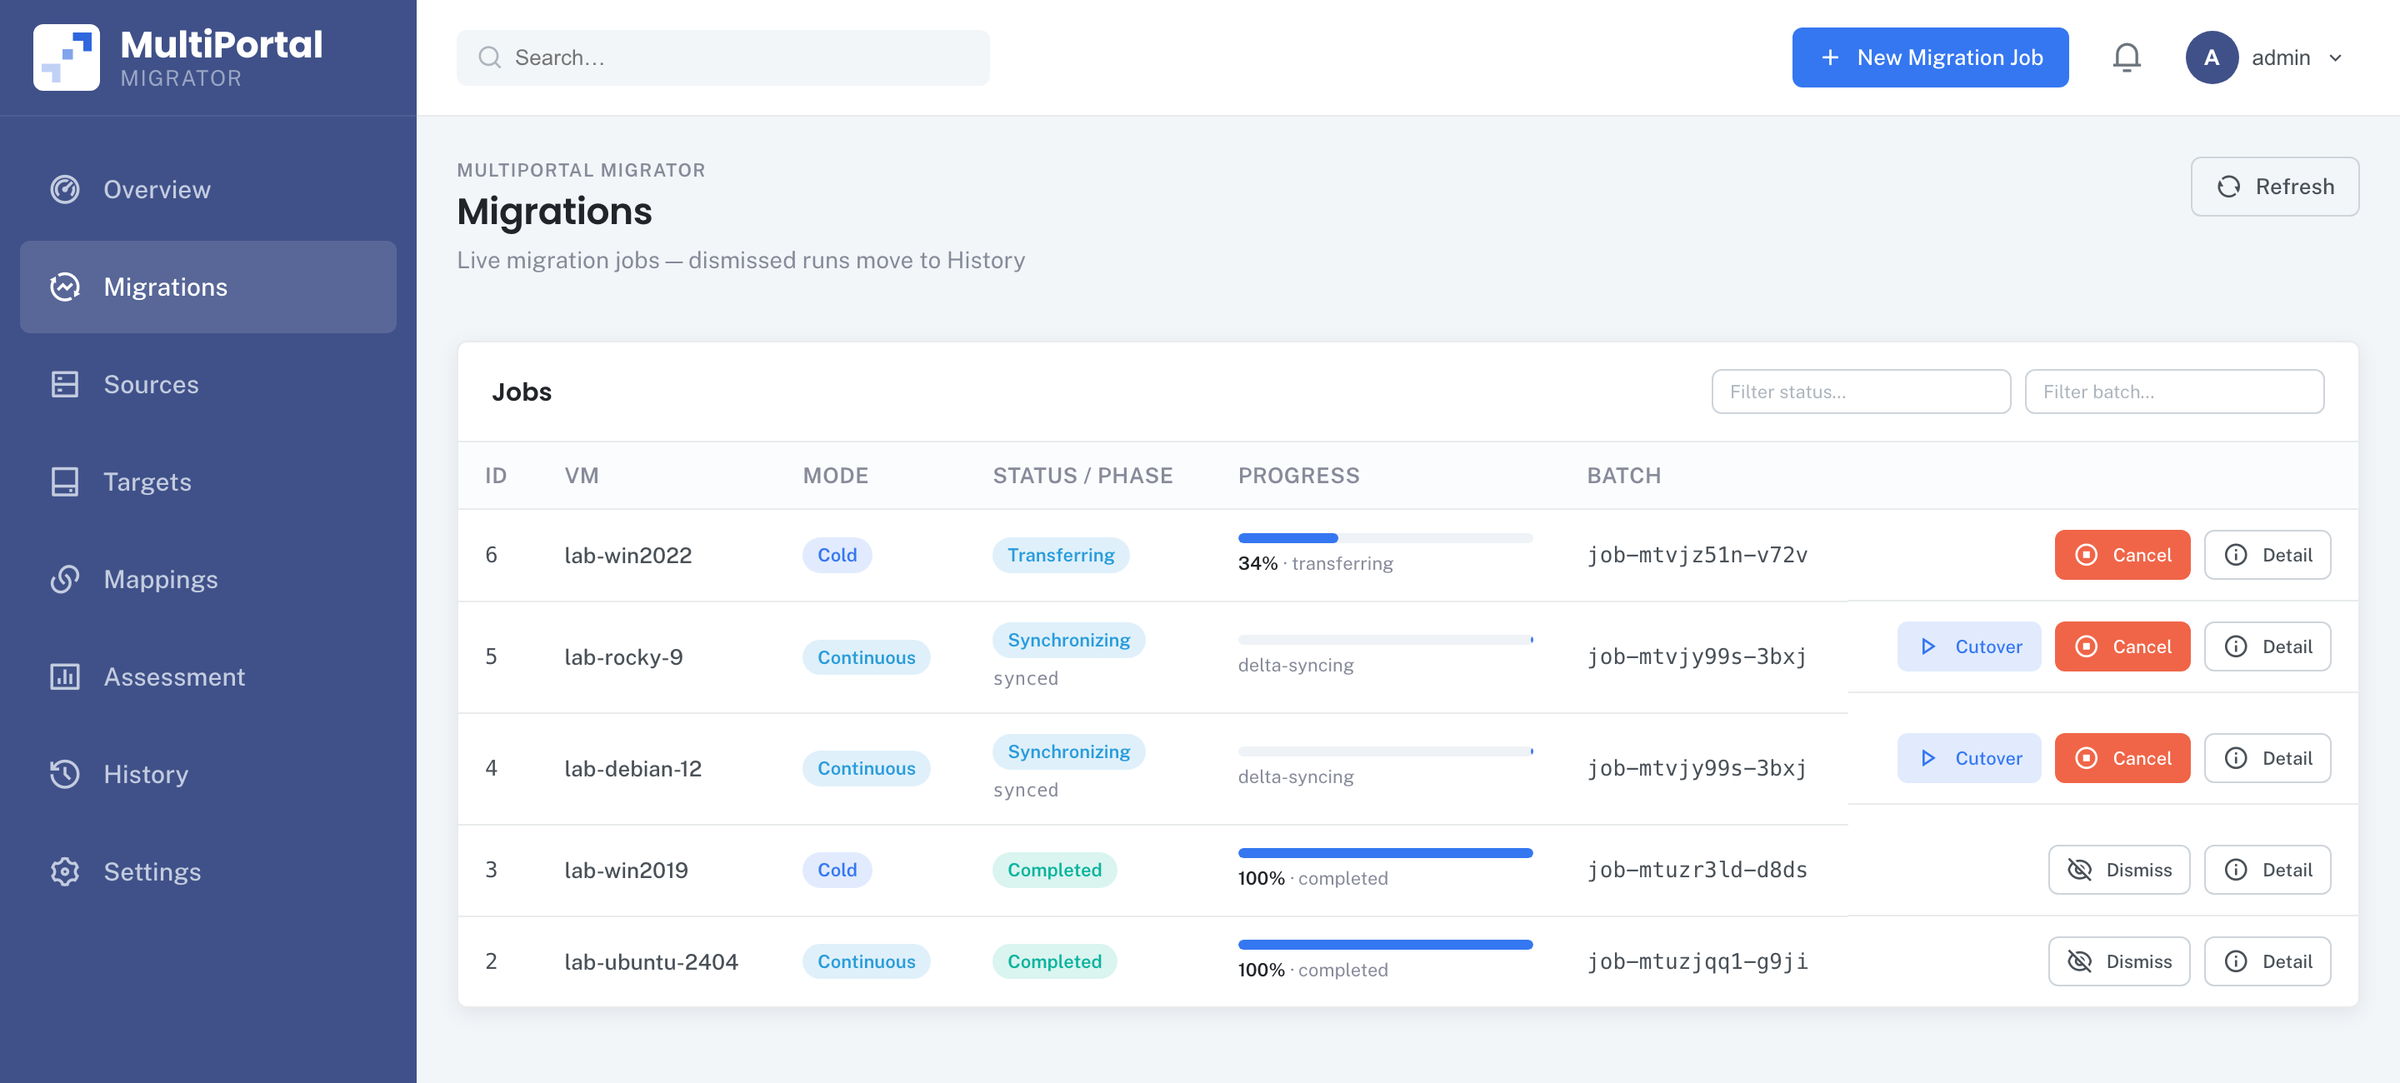
Follow each job from the Migrations board or its detail screen, with a stage strip, per-disk progress with rate and ETA, a sync rounds table for warm and continuous jobs, and the job’s own log, filterable by level and phase. The notification bell tells you when a job is ready for cutover, has failed or stalled, or needs attention.
Every completed migration produces a post-migration report as a PDF and a spreadsheet, ready for your change records or your customer. History keeps a record of every migration ever run, and if a job fails, Retry reopens the wizard with its settings already filled in.
Plan the whole estate before you move a VM
Before you commit to a plan, capture an assessment: a dated record of your VMware estate. It reports what has to move, which migration tiers each source allows (naming the affected VMs), a migration forecast, and a readiness ranking that sorts every VM into Ready, Unknown, Review or Blocked, with the reason.
You can also record your current VMware licensing, such as sockets, cores and annual cost, which makes the assessment a solid starting point for the business case. Anything you leave blank is recorded as unknown rather than zero, and a captured assessment never changes, so the figures you share on Monday are the same on Friday.
The time you get back
Here is where the hours go in a typical move from VMware to Proxmox VE, and what Migrator does with them.
| The job | By hand | With MultiPortal Migrator |
|---|---|---|
| Copying disks | Full disks exported, converted and copied, often through a staging location | Only in-use blocks, streamed straight into Proxmox VE storage |
| Downtime | The source is off while the copy runs | The source keeps running, and continuous cutovers take seconds |
| Scheduling | The outage lands whenever the copy finishes | Nothing cuts over until you approve it |
| Drivers and tools | Log in to each guest, remove VMware Tools, install VirtIO drivers and the guest agent | Handled inside the guest at cutover |
| Networking and disks | Recreate NICs, fix ordering, restore static IPs, check drive letters | Network configuration and NIC and disk ordering carry across, and Windows keeps its drive letters |
| Building the VM | Pick a node, check the VMID, fix names Proxmox VE rejects | The appliance picks the node, checks VMIDs and suggests valid names |
| When it fails | Work out what broke, clean up and start again | Target reverted, source powered back on, and Retry with settings filled in |
| Reporting | Build the spreadsheet yourself | A PDF and spreadsheet report for every completed migration |
None of those steps is difficult on its own, but done by hand every one of them repeats for every VM. With Migrator they become choices you make once in the wizard, and your team’s time goes into planning cutovers rather than performing them.
Your data stays on your network
Migrator runs inside your infrastructure and connects directly to your VMware and Proxmox VE environments. Disk data moves directly between your ESXi hosts, the appliance and your Proxmox VE nodes. The appliance’s only internet traffic is licence verification and dependency downloads, and both can go through your proxy.
Security is built in from first boot:
- Each appliance generates its own encryption key and TLS certificate, so two deployments from the same image never share them, and the console is served over HTTPS.
- Stored credentials are sealed with the appliance’s encryption key, and passwords are never displayed again after you save them.
- Support bundles never contain passwords or secrets, and can optionally scrub IP addresses, hostnames and paths before you send them.
- Configuration exports are encrypted with a passphrase you choose, and cannot be imported without it.
Licensing that stays out of your way
A licence key is needed for exactly one action: creating migrations. Adding sources and targets, provisioning, inventory, mappings and assessments all work without one, so you can finish setting up while your key is issued. The VM allowance counts distinct VMs across every appliance on your licence, and migrating the same VM again does not use a second slot. Approving a cutover is never blocked by the licence, and a job that is already underway can always finish.
Supported platforms
- Sources: VMware vSphere 8, as vCenter Server or standalone ESXi hosts, with VMFS, NFS and vSAN datastores.
- Target: Proxmox VE 9.x nodes and clusters. Ceph RBD, LVM-thin, ZFS, directory, NFS and SMB/CIFS storage support every migration tier.
- Tested guests: Windows Server 2012 R2, 2016, 2019, 2022 and 2025; Ubuntu 22.04 and 24.04; Debian 12; Rocky Linux 8 and 9; CentOS 7.
- Appliance: runs on Proxmox VE 9.x from a qcow2 or OVA image, with 2 vCPU and 4 GB of memory.
Before you start
A few things are worth having ready:
- The VMware VDDK. Broadcom no longer distributes it publicly, so obtain it from Broadcom and upload it to the appliance. It is required for the continuous tier and for migrating from vSAN.
- Credentials. vCenter sources need a root credential for each ESXi host, with port 902 open from the appliance to every host. Guest preparation needs a guest OS credential and a running source VM.
- Internet access for licence verification and dependency downloads, either direct or through a proxy.
- A note for your change process. Validating connections installs the appliance’s SSH key on your ESXi hosts and Proxmox VE nodes, installs the sesparse tool on each node, and creates a
pvemigratorAPI token.
The v2.0.0 release notes cover the full list of known issues and limitations.
Get started today
MultiPortal Migrator 2.0.0 is a new deployment, so there is nothing to upgrade. Download the appliance image, verify it against SHA256SUMS, import it into Proxmox VE and set its network, then open the console at https://<appliance-address>:8080, where the Get started checklist walks you through the rest.
- Read the requirements and how to install the appliance
- See what MultiPortal Migrator does
Planning a large move off VMware? We would be glad to walk you through Migrator and help you plan your first migrations. Get in touch with our team.